
Summary
The Registration, Amendments and Verification (RAV01) form enables Individuals, Tax Practitioners and Registered Representatives to view and maintain legal entity registration (demographic and specific tax type) details on eFiling.
The Registered Representative or Tax Practitioner or Trustee / Administrator must first activate his/her profile before updating the taxpayer’s registered particulars on RAV01.
Individual Taxpayer
- An individual is a natural person that is registered on eFiling with his or her own eFiling profile. This person can be classified as a foreign individual as well.
- On eFiling Individual profile, using the RAV01 form, you will be able to maintain the following:
- Selected identity information
- Bank Account details
- Address details
- Contact details
- Add trading names
- Add a new tax product subscription
- Non-representative relationships
Registered Representative
- A Registered Representative is a person who is appointed with full rights to act on behalf of the Legal Entity (e.g. Companies, Trusts, etc.). A Legal Entity can only have one Registered Representative.
Note: An Accountant or Tax Practitioner cannot be appointed as a Registered Representative unless they are an employee of the legal entity.
The following capacities are regarded as authorised representatives:
- Public Officer,
- Accounting Officers;
- Main Partner,
- Main Trustee,
- Treasurer,
- Administrator, and
- Executor / Curator
Tax Practitioner
- A natural person is regarded as a tax practitioner if they submit returns on behalf of other individuals or businesses and are currently registered with a recognised controlling body.
- On the eFiling Tax Practitioner profile using the RAV01 form, the tax practitioner will be able to maintain the following:
- Selected Identity Information
- Bank Account details (excluding 3rd party bank detail changes)
- Address details
- Contact details
- Indicate the non-representative relationships or updating representative detail
- Add a new tax product subscription if delegated by the representative.
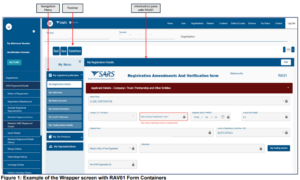
Introduction to the Wrapper Application
- The wrapper application is a navigation tool that allows the user to interact with RAV01.
- There are two types of screens that the application wrapper may display. i.e. form screen and wrapper screen.
- Wrapper screens display information related to the various sections of the legal entity profile. The user may freely move between wrapper screens by way of the navigation menu. Actions are initiated from Wrapper screens.
- Form screens are used to complete the actions initiated from the wrapper screen e.g. addition of a new tax registration. Form screens always display containers from the RAV01 form.
- The Wrapper screen consists of the following components:
- Navigation Menu which allows the user to navigate between the various sections of the legal entity profile
- Taskbar which contains action buttons that may be activated by the user.
- Back – This button allows the user to go to the previous page. All changes made will be discarded.
- Save – This button allows the user to save the changes made in a temporary state for later completion.
- Submit form – This button allows the user to submit the changes made for update on SARS.
- Edit – Once the “Edit” button has been selected, you will be allowed to proceed with the relevant changes and the form will be available.
- Information pane which displays a predetermined section of the legal entity profile. The information pane may display either:
- A table showing a summary view of an information set e.g. the set of Bank Accounts linked to the legal entity profile.
- A set of RAV01 form containers to display a particular portion of the legal entity profile e.g. the legal entity registered particulars.
- The Navigation Menu – allows the user to navigate between the various sections of the legal entity profile. The full set of menu options available in the menu are as follows:
- My Registered Particulars – consists of the demographic details of the entity and has the following sub-categories:
- My Registration details>My Addresses>My bank accounts>My Contact Numbers>My Email Addresses>My Trading Name Details
- My Tax Products – The WRAV01 allows users to manage all tax products that are linked to the entity. Click “+” sign to view the following tax products:
- Revenue>Income Tax >MPRR Taxes>Payroll Taxes >VAT>Customs>Excise>APT
- My Representatives – allows the user to create and maintain a list of non-representative entities, which are connected to the legal entity. Non-representative relationship refers to an entity that is associated with the company, trust or individual, e.g. a Parent or Guardian of a registered minor child. New representatives may not be added on eFiling but the existing one may be deleted.
- Who I Represent – allows the user to view list of parties that are represented by legal entity.
- My Tax Practitioner Details – allows the user to maintain tax practitioner and controlling body details that relate to their professional registration with SARS as a tax practitioner.
- My Registered Particulars – consists of the demographic details of the entity and has the following sub-categories:
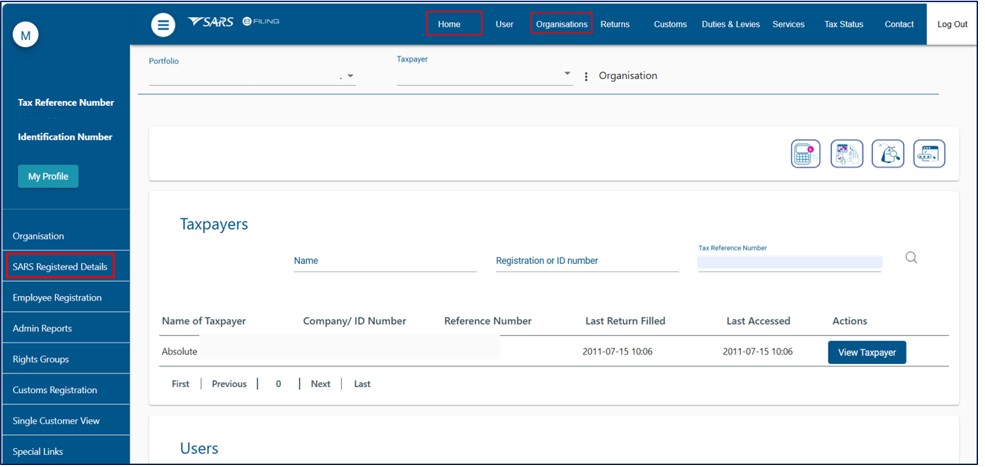
SARS Registered Details
- The SARS Registered Details functionality allows a registered eFiler to view, edit and maintain
demographic information on eFiling. This functionality will be accessed through different menu tabs
depending on the eFiling profile:- Individual eFiling profile:
- Navigate to the top menu and select “Home”.
- Tax Practitioner and Organisation eFiling profile:
- Navigate to the top menu and select “Organisations”.
- Individual eFiling profile:
- Ensure that one of the legal entity tax reference numbers is registered / activated on eFiling.Refer to the
external guide ‘How to Register for eFiling and Manage Your User Profile’
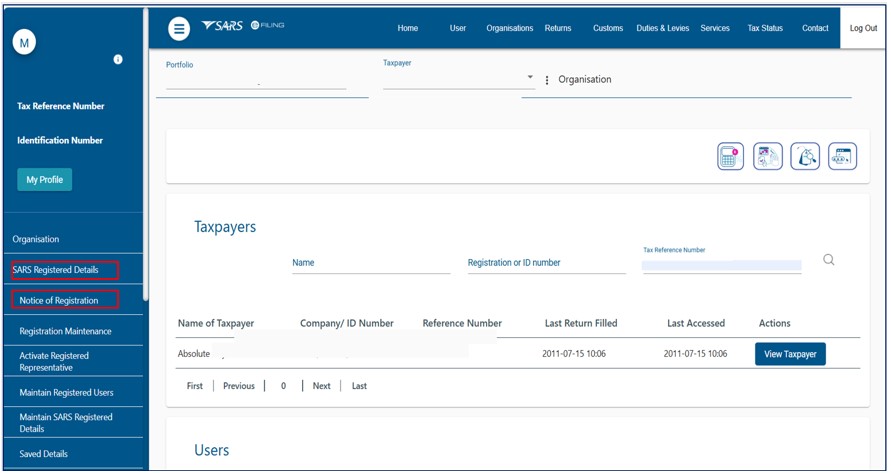
Notice of Registration
- The Notice of registration functionality is available on the Tax Practitioners; Organisations and Individual
eFiling Profiles for Personal Income Tax. Follow the steps below to access your notice of registration:- Select “SARS Registered Details” from the menu on the left.
- Select “Notice of Registration”
- On the Notice of registration screen, the system will display the notice of registration for each registered tax product.
- If there are previous requested notices, the user will have the option to ”Request New” or to “View”.
Note: The latest notice as well as the “Date of issue” will be displayed.
- The user should be able to view, print and / or save the notice on the desktop. Notices can also be viewed on eFiling under SARS Correspondence.
- SARS may require that you upload and submit supporting documents. For your convenience all letters,
notices and messages issued by SARS is available in one place under ‘SARS Correspondence’. - SARS allows the applicant 21 business days from the application date to submit the requested
supporting documents. Failure to do so will result in an application being cancelled and the
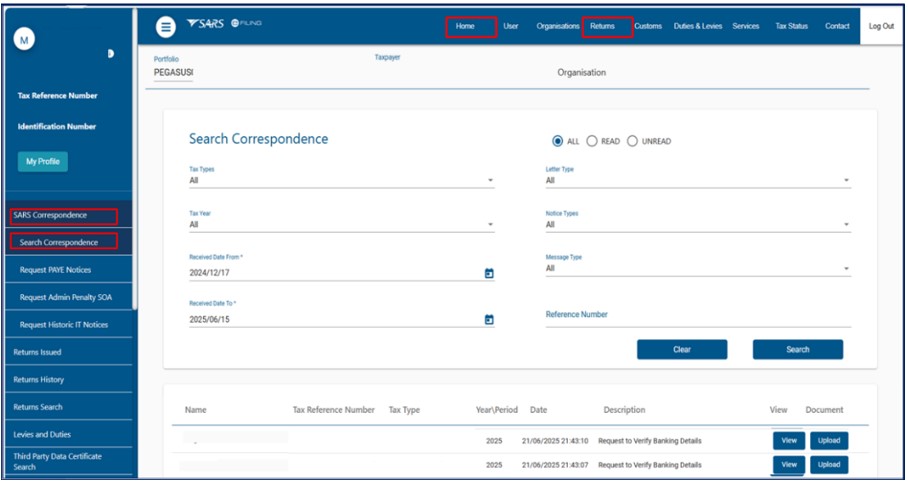
applicant would be required to re –apply. - To search for correspondence:
- Log on to eFiling and select “SARS Correspondence” from the menu on the left
- Click on “Search Correspondence”, the search correspondence grid will display.
- You can use one or more of the following filters to search for correspondence:
- Tax type
- Tax year
- Received Date From (i.e. start date)
- Received Date To (i.e. end date)
- Correspondence Type (such as Letters, Notices and Text Messages issued by
SARS)
Please Note:
If you navigate to other eFiling pages after logging on, you will no longer see <SARS Correspondence> on the menu on the left. To navigate back to “SARS Correspondence” select “Returns” from the menu on the top.
- To upload supporting document:
- Click ‘View’ to access the correspondence and determine the type of document that must be
submitted.” - Click ‘upload’, the following screen will display:
- Click ‘View’ to access the correspondence and determine the type of document that must be
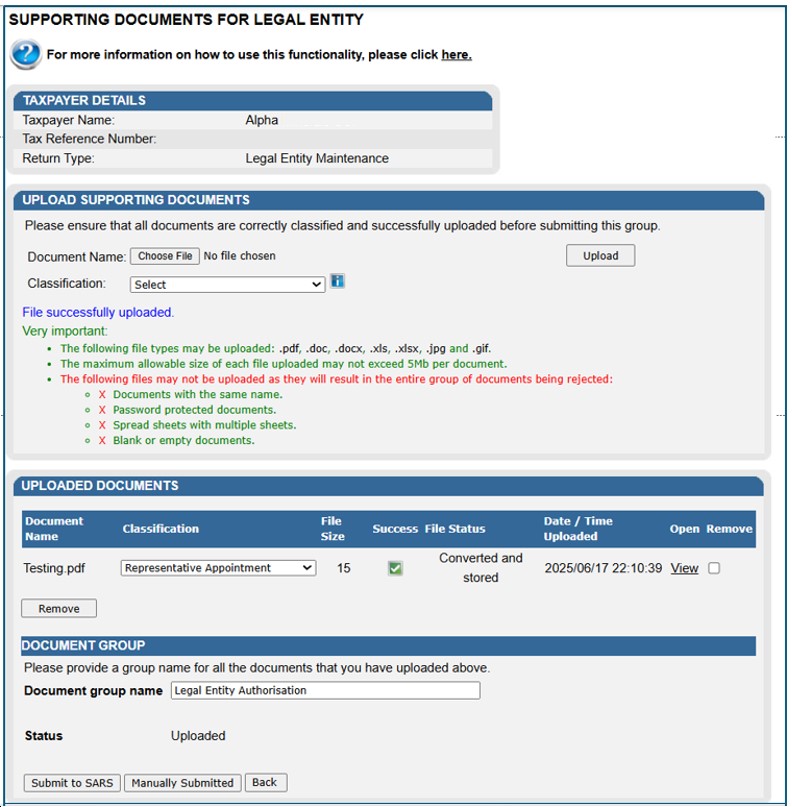
- Click on “Choose File” button and select the files to upload, then click “Open” button to continue.
- Ensure that you select the relevant classification per file to upload.
- Select the “Upload” button to add the document(s), listing under the heading “Uploaded
Documents”. - If you wish to remove the document that you have uploaded, click the document and select the
“Remove” button - When you have uploaded all the documents, select the “Submit to SARS” button to continue. If
you have submitted the relevant material at your nearest SARS branch, click on “Manually
Submitted” to indicate it. Click on the “Back” button to return to the Income Tax Work Page. - Confirm that you want to submit all the documents by clicking the “OK” button on the below
message. - The status on the supporting documents section will be updated to “Submitted
Activate Registered Representative
- If you are the appointed registered representative for an entity, you must activate the status on eFiling
to transact on behalf of your client. The Activate Registered Representative functionality allows the
representative to be set and / or activated as the assigned Representative for the Legal Entity. - If you are not a Registered Representative recorded on SARS records at the time you request
activation, SARS will create a case and request relevant supporting documents to verify that you
should be updated as the new Registered Representative of the taxpayer. - The Activate Registered Representative functionality is only available on the Tax Practitioner and
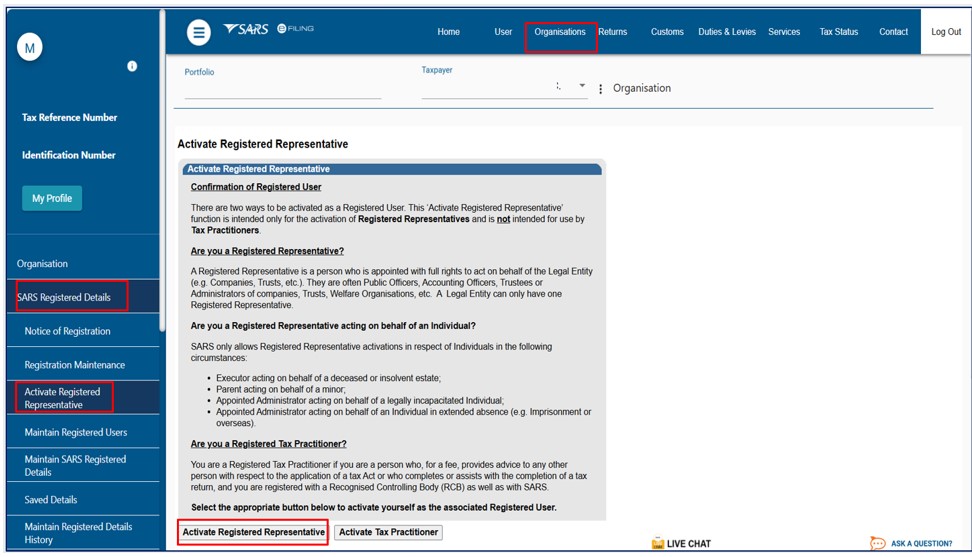
Organisation eFiling portfolios.- Select “Organisations” from the menu on the top.
- Select “SARS Registered Details” from the menu on the left.
- Select “Activate Registered Representative”
- Select the applicable option (i.e. Registered Representative or Tax Practitioner)
Activate Registered Representative
- Select “Active New Registered Representative”
- Select “Activate New Registered Representative”

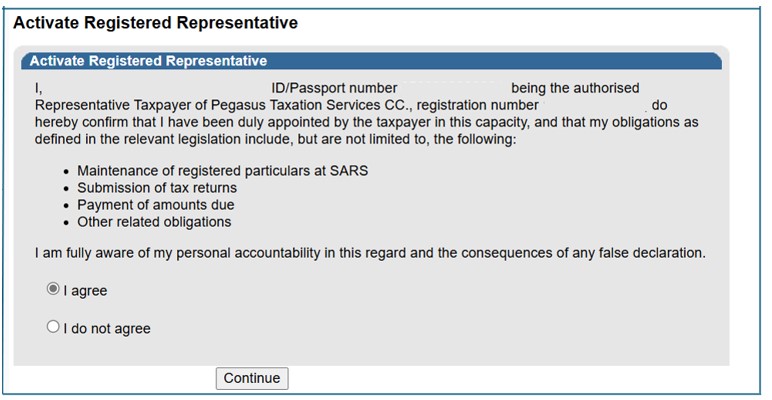
- Agree to the declaration confirming that you are the authorised representative for the taxpayer and click
on “Continue”.
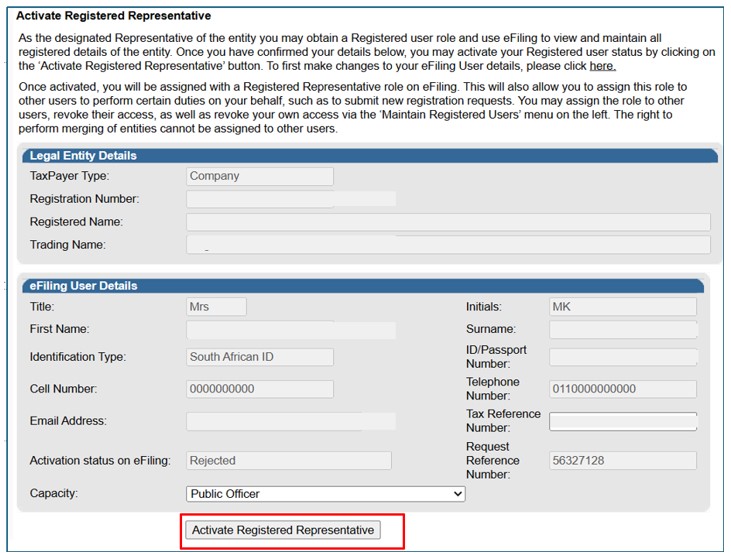
- Complete the applicable fields and select the representative capacity (e.g. accounting officer, curator,
public officer, parent guardian, etc.)
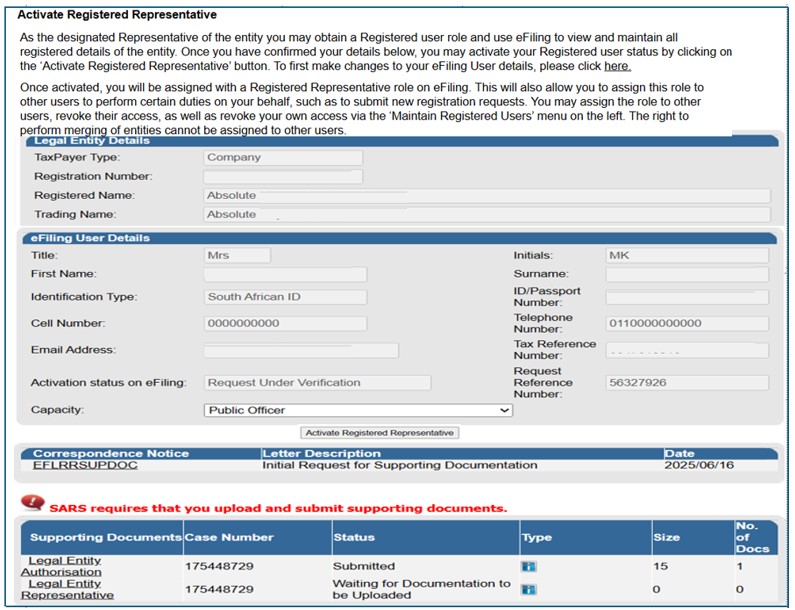
- Click on the “Activate New Registered Representative” button at the bottom of the screen.
- One of the following statuses will be indicated next to the “Activation Status on eFiling” field in the
Activate Registered User screen:- Unconfirmed – the representative has not been confirmed as the registered user or tax
practitioner with SARS and the representative might be required to submit relevant material to
confirm the representative relationship to the represented entity (Taxpayer). This status will also
be applicable for setting of a new Representative prior to SARS approval. Continue to request
activation and SARS will request you to submit the relevant supporting documents to verify your
details and appointment as a representative taxpayer. - Request under Verification – the representative must submit relevant material, and the case
will be reviewed by SARS. - Rejected – The tax reference number or the Tax Practitioner number captured is invalid or the
case is rejected. - Active – the activation request is successful; the requestor has been confirmed as the registered
representative.
- Unconfirmed – the representative has not been confirmed as the registered user or tax
Note: The executor of the deceased estate must activate the representative status to be able to request
second registration of the deceased estate.
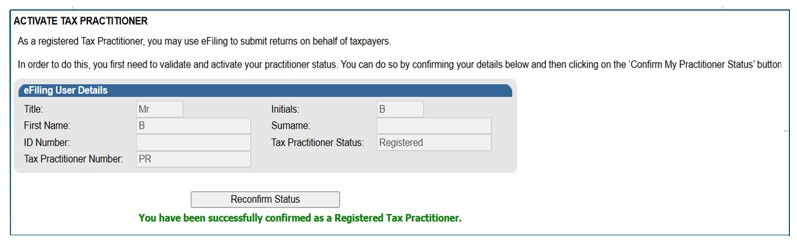
Activate Tax Practitioner
- Select “Activate Tax Practitioner”

- Agree to the declaration confirming that you are the authorised Tax Practitioner for the taxpayer and
click on “Continue”.
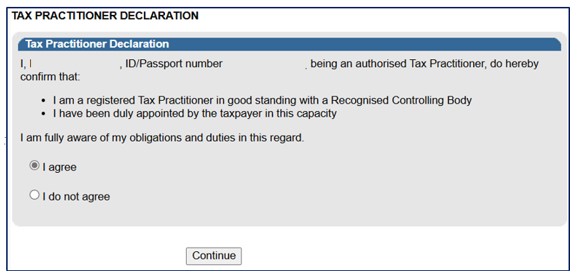
- Complete the applicable fields and select Reconfirm Status. A confirmation message will be
displayed.
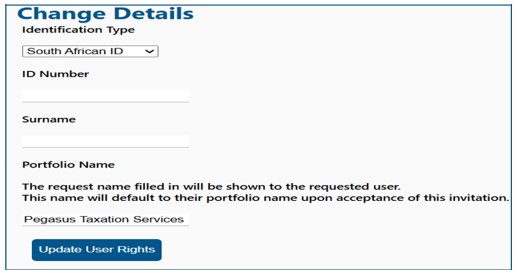
Change of eFiling User details
- If you want to make changes to your personal details, click on the hyperlink.
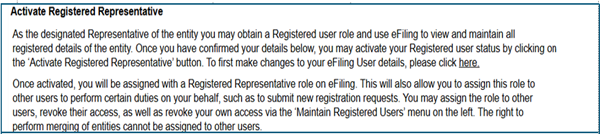
- The “Change Details” screen will display to update your personal details on eFiling. After you have made the changes, click the “Update Details” button to continue. After updating your details, you will be able to see the changes made on the “Activate Registered User” screen
Note that the eFiling registration details are used for verification purposes and it should be aligned with your identity document or passport.
- If the Legal Entity information and the eFiling User Details are all correct, select the “Activate
Registered Representative” button to continue.
- Complete your tax reference number or practitioner number in the case of a tax practitioner.
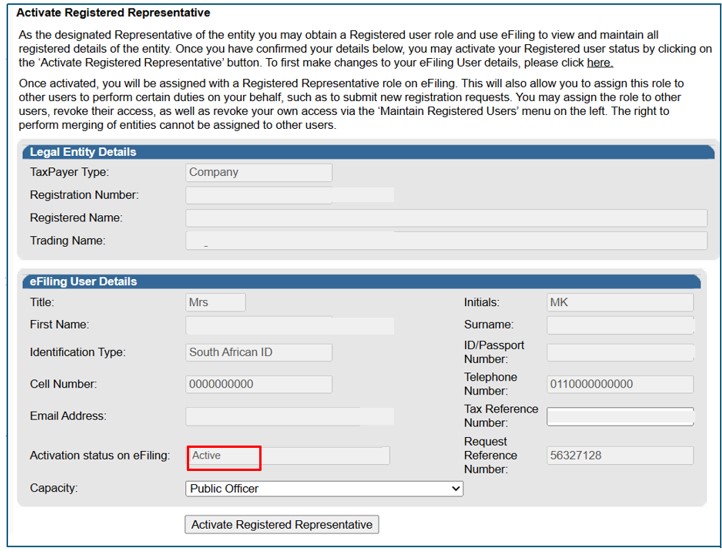
- If you are a Registered Representative of the entity according to the SARS records, upon the
selection of the “Activate Registered Representative” button, you will be activated immediately.
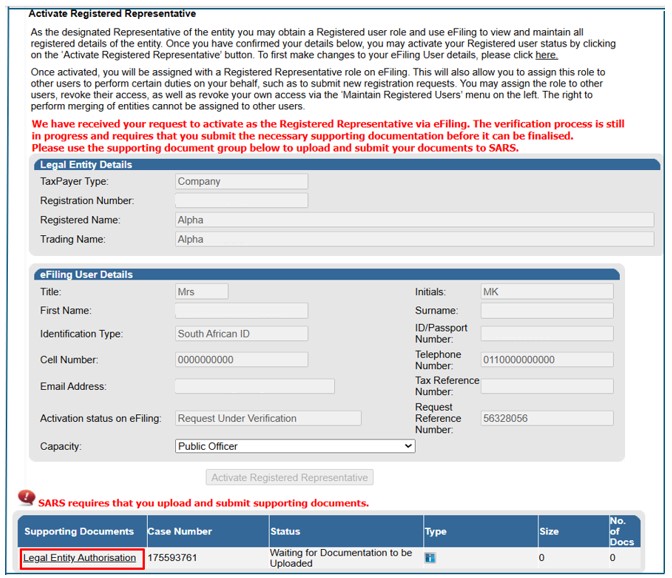
- If you are not a Registered Representative of the entity according to SARS records, upon the selection of the “Activate Registered Representative” button, you will be required to upload and submit relevant supporting documents for SARS to verify your personal details and confirm your appointment as a representative taxpayer.
- Click the “Legal Entity Authorisation” link and the “Upload Supporting Documents”. Refer to section SARS Correspondence on how upload and submit supporting documents.
- On successful activation of the registered representative on eFiling, the status field will indicate “Active”.
- The status of the registered representative will indicate “Rejected” where the tax reference
number captured is incorrect or the practitioner number is invalid, in the case of a tax practitioner.
Maintain Registered Users
- This is available on the Tax Practitioner and Organisation eFiling portfolios.
- In the “Maintain Registered Users” functionality, the registered representative user or tax practitioner assigns other eFiling users to have the same representative rights as the registered representative user. Once the users are assigned, they can perform the same functions as the representative on eFiling.
- This screen is accessed by the following Navigation Menu path:
- SARS Registered Details > Maintain Registered Users.
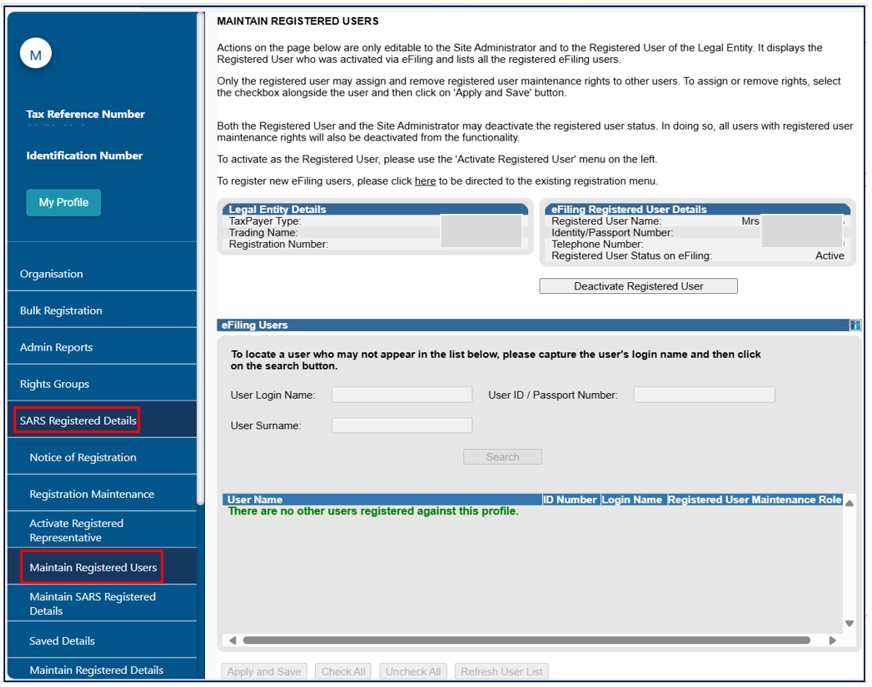
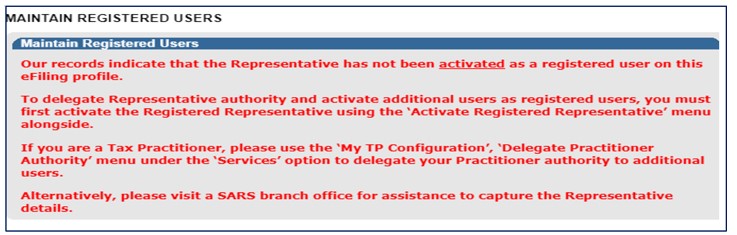
- The following message will display when you are not registered as the representative or the registered
tax practitioner of the legal entity that you have selected from the taxpayer list.
- The registered representative user or tax practitioner will accept all the responsibility for any maintenance performed by the users assigned against the Legal Entity. Click the “Deactivate Registered Representative” button if you wish to deactivate the registered representative.
- To confirm the deactivation request, click “OK” button to continue.

- To activate your status as registered representative again, follow Activate Registered User steps.
- To activate a Registered Representative User that is already listed, select the tick box in the “Representative Maintenance Role” column and click “Apply and Save”.

- Click “OK” button to continue with activation of the registered representative user.
- To add a new eFiling user for this legal entity, click on the “here” hyperlink and you will be directed to the “Register New User” page.

- Complete all required details and click “Register” to continue.
- If you select the Registered Representative User menu item again, the new user added will be listed.
Maintain SARS Registered Details
- The ‘Maintain SARS Registered Details’ functionality allows the user to access the RAV01 form to view or update specific details of the legal entity, as well as to register new product for the entity.
Note: To register for VAT and/or Payroll Taxes, you will need to complete biometric facial recognition authentication as a Registered Representative (RR) or as an Individual Taxpayer.
- To Access the ‘SARS Registered Details’ icon as a RR or as an Individual Taxpayer:
- Select taxpayer details from the list as a RR or select Home’ top menu as Individual Taxpayer.
- Select ‘Organisations’ top menu (applicable for RR).
- Select ‘SARS Registered Details’ sub-menu.
- Select ‘Maintain SARS Registered Details’ sub-menu.
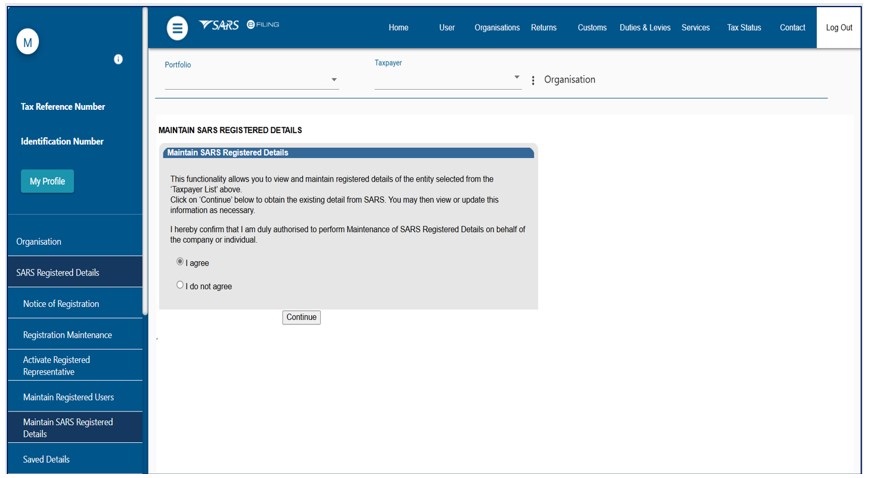
- Confirm that you are authorised to perform maintenance functions of the registered details of the company or individual:
- If you select the “I do not agree” button, the continue button will be greyed out and you will not be able to continue.
- If you select the “I agree” button, and click Continue, you will be able to access the RAV01 form, provided the logged in user is an Individual Taxpayer or confirmed Registered Representative (RR).
- When a tax practitioner selects the “I agree” button, and clicks “Continue”, the following screen will appear to confirm whether the tax practitioner is registering for VAT and/or Payroll Taxes:
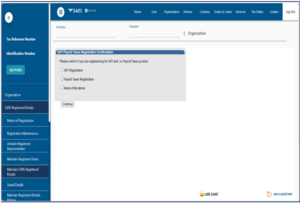
- If no tax product is selected, the RAV01 form will open; however, the options to add VAT and/or Payroll Taxes will not be available when you click “continue” button.
- If VAT and/or Payroll Taxes is selected, the following screen will appear, confirming that the tax type request has been sent for approval to the RR or Individual Taxpayer via email or SMS after you click Continue.

- The RR or Individual Taxpayer will receive the following message prompting them to approve the request via the ‘Manage Access Requests’ functionality by capturing the “Code” in the Unique Identifier:
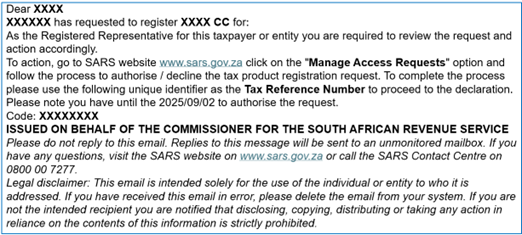
- The tax practitioner may only proceed with the registration application after the registered representative
or individual taxpayer authorises the request by granting permission to the tax practitioner through the
“Manage Access Requests” functionality
Viewing and Editing of the RAV01 Form
- The Registration, Amendments and Verification (RAV01) form enables Individuals, Registered Representatives or Registered Practitioners users to maintain the legal entity demographic information of the legal entity. Complete the RAV01 when there is a need to update the legal entity information
- This form enables the individual or representative maintenance of the registered details (viewing/editing)
the following information on eFiling or at a SARS branch:- My Registered Particulars
- My Tax Products
- My Representatives.
- Supporting documents may be required to change some of the above information on the RAV01.
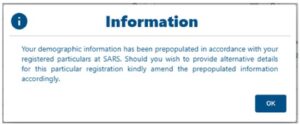
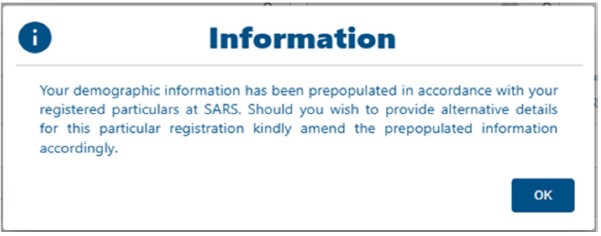
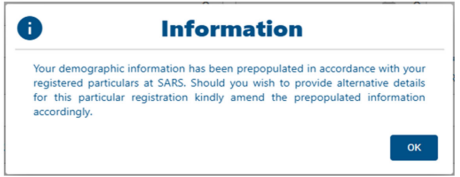
- All the information on the RAV01 will pre-populate with the legal entity data that is available at SARS.
- The “Reference No” field will pre-populate with the Income Tax Reference number if the entity has an
income tax registration number. In cases where there is no income tax registration, the entity (taxpayer)
active Tax type reference number will be pre-populated and locked.
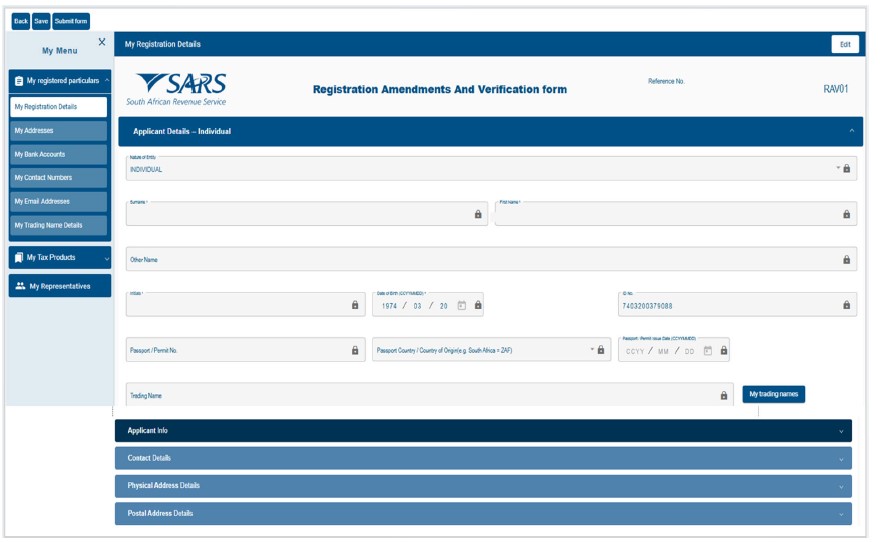
Application Details-Individual
- This container is used to capture the demographic details of the applicant, where the applicant is a
natural person i.e. not an enterprise. - The display of the ‘Applicant Details – Individual’ container is an indication that the Applicant is an
Individual - A view of the registered details is provided on the screen shown below. This screen is accessed by
the following Navigation Menu path:- My registered particulars > My registration details
Editing legal entity registered details
- Follow this process to edit the legal entity registered details:
- Click on the Edit button and the following containers will be displayed:
- Applicant Details for Individuals>Applicant Info<Contact Details<Physical Address<Postal
Address
- Applicant Details for Individuals>Applicant Info<Contact Details<Physical Address<Postal
- Click on the Edit button and the following containers will be displayed:
- In the “Applicant Details” section, the fields will be editable with the exception of the ID No.
- Make the necessary amendments and click Done to save changes. The changes will reflect on the form
containers. - The executor or a representative of a deceased estate must register the deceased estate for the second
tax reference number once the first tax reference number has been coded as “Deceased”. The executor
must confirm the tax status of the reference number by clicking on “Income tax” under “My tax products”. - To register the deceased estate for the second tax reference number:
- Open Income Tax container and select Normal as subcategory and “Post Death Income” as
Classification. - Confirm that the “Date of Liability” is set as 2017 or the tax year in which the Taxpayer received
the post date of death income. - Once the second registration is processed and the entity has an existing “To-Date of Death”
Estate record, the second registration will automatically be set with a status of “Deceased Estate”.
- Open Income Tax container and select Normal as subcategory and “Post Death Income” as
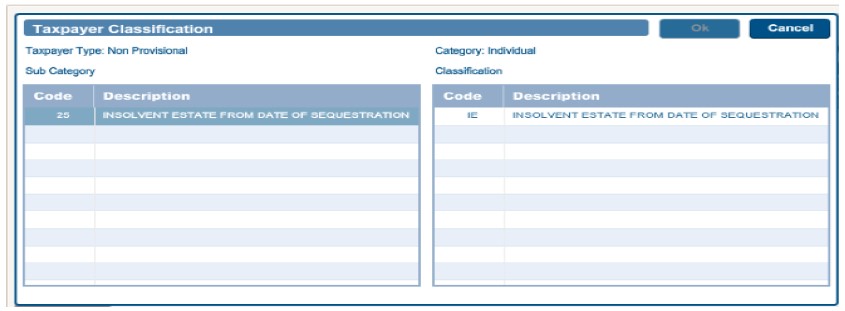
- To register an Insolvent estate for the second tax reference number:
- Open Income Tax container and select “Insolvent estate from date of sequestration” as Sub
Category and Classification.
- Open Income Tax container and select “Insolvent estate from date of sequestration” as Sub
- If the first tax reference number is not coded as an Insolvent Person yet and the status is “Active”, use
the SARS Online Query System (SOQS) or make an appointment visit the nearest SARS branch to
request the coding of the first tax reference number. - Ensure that all the supporting documents required for change of the representative and banking details
are submitted at the branch. - In the case of an insolvent taxpayer, the appointed administrator or trustee must register the insolvent
estate (second tax reference number) and if the entity has an existing “To-Date of Insolvency” Estate
record, the second registration will automatically be set with a status of “Insolvent Estate‘’. - For insolvent estate, a second tax reference becomes applicable on income received in the insolvent
estate or disposing the assets. This tax reference number should only be registered if the requestor /
registered representative can proof taxable income from the insolvent estate. - The third tax reference number is enforced to ensure that the taxpayer meet his / her filing obligation for
salary income after the date of sequestration. The third tax reference number is enforced in the RAV01
the moment the first registration is coded as an Insolvent Person.
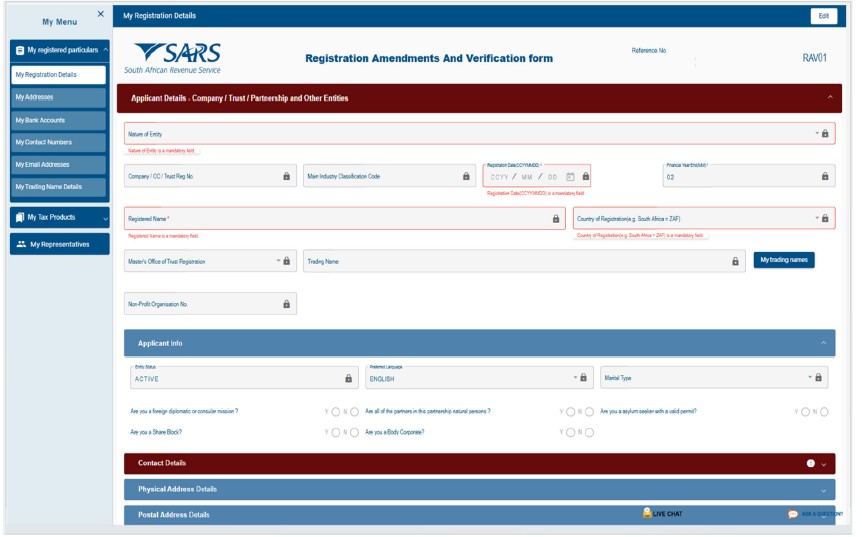
Applicant Details –Enterprise
- This container is used to capture the demographic details of the applicant, where the applicant is an
enterprise. - The display of the ‘Applicant Details – Company / Trust / Partnership and Other Entities’ container is an
indication that the Applicant is an Enterprise.
Editing legal entity registered details
- Click on the Edit button and the following screen will be displayed with these fields under “Applicant
Details”:- Nature of Entity
- Company/CC/Trust Reg. No:
- Main Industry Classification Code
- Registration Date
- Financial Year End
- Trading Name
- Country of Registration
- Nature of Entity – The Nature of Entity field in the “Applicant Details” container cannot beedited except if the value for the Nature of entity is Partnership / Body of Persons. Click on
dropdown list, a popup will be displayed which contains the following list of valid Nature of Entity:- Association Not For Gain
- Close Corporation
- Clubs
- Company Limited by Guarantee
- Company Registered Under Transvaal Law External Company
- Foreign Company
- Foreign eCommerce Company – email address mandatory for this option
- Foreign Governmental Institution
- Foreign Trust
- Inter-vivos Trust
- Government/Public/State Owned Institution
- Non-Profit Company (NPC)
- Non Profit External Company
- Other Trusts
- Partnerships
- Body of Persons
- Personal Liability Company (Inc.)
- Primary Cooperative
- Private Company (Pty)
- Public Company (Ltd)
- Secondary Cooperative
- State Owned Company (SOC Ltd)
- Statutory Body
- Tertiary Cooperative
- Testamentary Trust
- Unlimited Company
- Welfare Organisation
- Funds
- Collective Investment Schemes in Securities
- Collective Investment Schemes in Properties.
- Company/CC/Trust Reg. No – The field Company / CC/ Trust Reg No.is mandatory except if the
Nature of Entity in the Applicant Details – Company container is any of the following list,then the
field must be unlocked and optional:- Clubs
- Foreign Governmental Institution
- Government/Public/State Institution
- Association Not For Gain
- Welfare Organisation
- Foreign Company
- Foreign Trust
- Foreign eCommerce Company
- Fund
- Collective Investment Schemes in Securities
- Collective Investment Schemes in Properties/Outside SA
- Body of Persons
- Estate CGT Trusts
- Main Industry Classification Code – select from the dropdown list.
- Registration Date –This change can only be performed at the SARS Branch.
- Financial Year End – This field will not be updated directly as it requires manual intervention and
approval by SARS. The representative will be notified if the financial year end change was
approved. - Country of Registration –This field must be locked and populated with the value ZAF if the
Nature of Business is a CIPC type or a Local Governmental Institution. - Master’s Office of Trust Registration –This field will be editable and mandatory if the nature of
business is one of the following:- Inter-vivos Trust
- Testamentary Trust
- Other Trust.
- The Nature of Entity field describes the following for Trusts Types and cannot be changed
from eFiling:- Collective Investment Schemes in Securities;
- Estate Capital Gains Tax (CGT);
- Special Trust Type B;
- Testamentary Trust;
- Inter-vivos Trust.
Note that you cannot maintain the Nature of entity field via eFiling but can be changed at a SARS
branch. The attached annexure to this guide provides more information on the above trusts and possible
trust type changes, kindly consult the guide prior to a SARS branch visit.
Applicant info
- This container is used to capture the status information of the Applicant and fields will be editable.
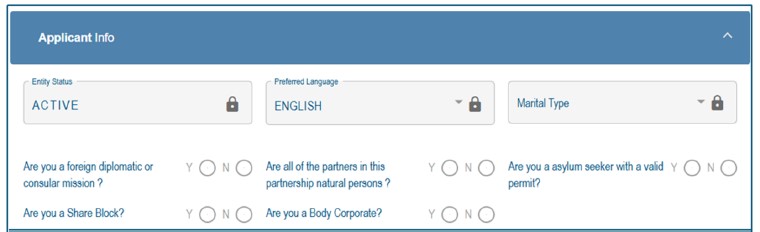
- Entity Status – This field will pre-populate with the status of the applicant at SARS.
- Preferred Language – This field will default to English and upon selection of the relevant option,
the field will have the preferred language. The preferred language selection does not change the
display language of the RAV01 form. - Marital Status – The fields must all be cleared and locked if the applicant is an Enterprise. For an
individual, the following fields will be editable and mandatory:- Not Married
- Married in Community of Property
- Married out of Community of Property.
- Are you a foreign diplomatic or consular mission? – This field is editable and mandatory if nature
of business is Foreign Governmental Institution. - Are all of the partners in this partnership of natural persons? – This field is editable and mandatory
if nature of business is Partnerships. - Are you an asylum seeker with a valid permit? – Field is editable and mandatory if nature of entity
is Foreign Individual. - Are you a Share Block Company? – Field is editable and mandatory if nature of entity is Public
Company. - Are you a Body Corporate? – Field is editable and mandatory if nature of entity is CIPC type or
Body of Persons.
For a Company/Trust/Partnership or Other Entities, the Applicant Info container will display with no
option opened to edit other than the preferred language option:
Contact Details
- This container is used to capture the contact details of both Individuals and Enterprise entities.
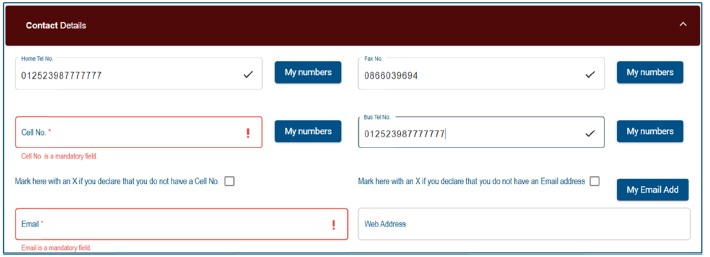
- Mandatory fields which are not completed will be indicated in red.
- The My numbers button contains the list of numbers stored in the contact number library (My Contact
Details). The user may then type a number into the text box or select a number from the list.
Important: SARS uses the eFiling Security Details that we have on record to issue you with a One-Time PIN
(OTP) and to authenticate you. To update this information, go to “eFiling Security Details Do not use the
Contact Details container to update Security Details. This will NOT update your “eFiling Security Details”.
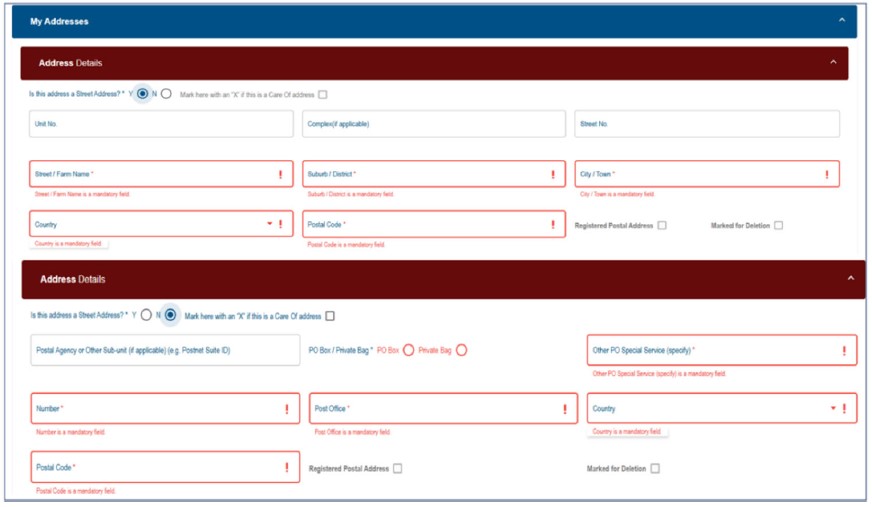
Physical Address Details
- This container is used to capture and display structured physical address information of individuals and
enterprises.
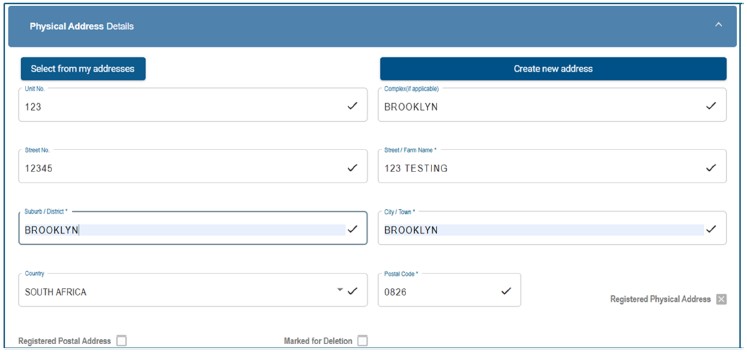
- “Select from my addresses” button – indicates a list of addresses stored.
- “Create new address” button – enter new unlisted physical address details.
- All mandatory fields will be highlighted in red to complete.
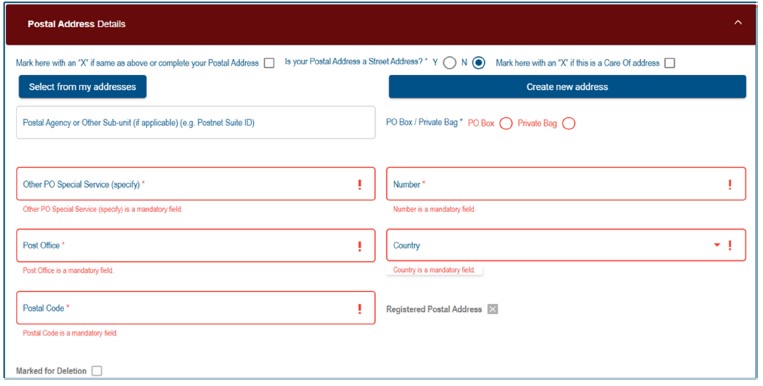
Postal Address Details
- This container is used to capture and display structured Postal address information of individuals and
enterprises. - Complete either of the following two fields: Mark here with an “X” if same as above or complete your
Postal Address. Is your Postal Address a Street Address? (Y/N)- If the field Mark here with an “X” if same as above or complete your Postal Address is
completed the field Is your Postal Address a Street Address? (Y/N) must be cleared and
locked.
- If the field Mark here with an “X” if same as above or complete your Postal Address is

- The following fields must display If the field Is your Postal Address a Street Address? (Y/N) is
completed the field Mark here with an “X” if same as above or complete your Postal Address
must be cleared and editable:- Select from my addresses button or create new address.

- The following fields must display if the question Is your Postal Address a Street Address? (Y/N)
is answered with a No and the field Care of Address must be unlocked
My Address
- This container is used to capture new additions to the list of My addresses. It is also used to maintain
existing items from the list of My addresses. The functionality consists of two sets of fields:- The first set is used for PO Box/Private Bag type addresses.
- The second set is used for Street Addresses.
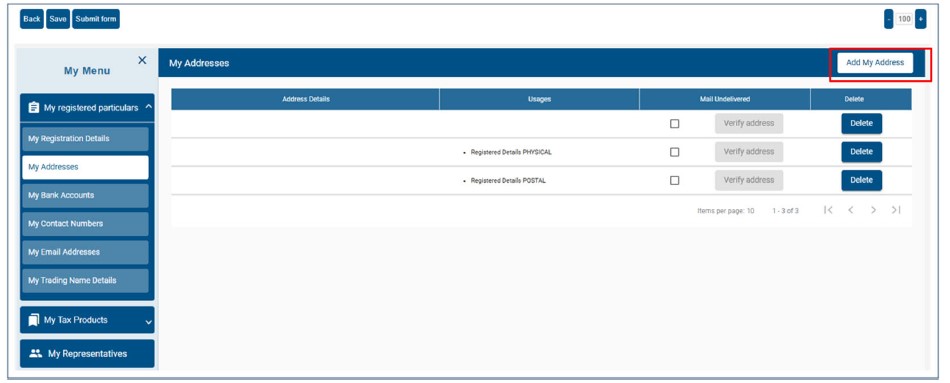
- When the user clicks ‘Add new address’ from the My addresses screen, the following screen will be
displayed. Select Yes or No to this question “Is your address a street address” and capture all mandatory
fields.
My Bank Accounts
- My Bank Accounts functionality on the WRAV01 form provides functionality that allows users to create
and manage bank accounts associated to the legal entity profile within the account library. These bank
accounts can be reused across various tax products without the need to recapture the same details
multiple times. The following functions are available for managing the bank account within the account
library on the WRAV01 form:- View bank account
- Edit a bank account
- Delete a bank account
- Add a new bank account
- Bank account settings
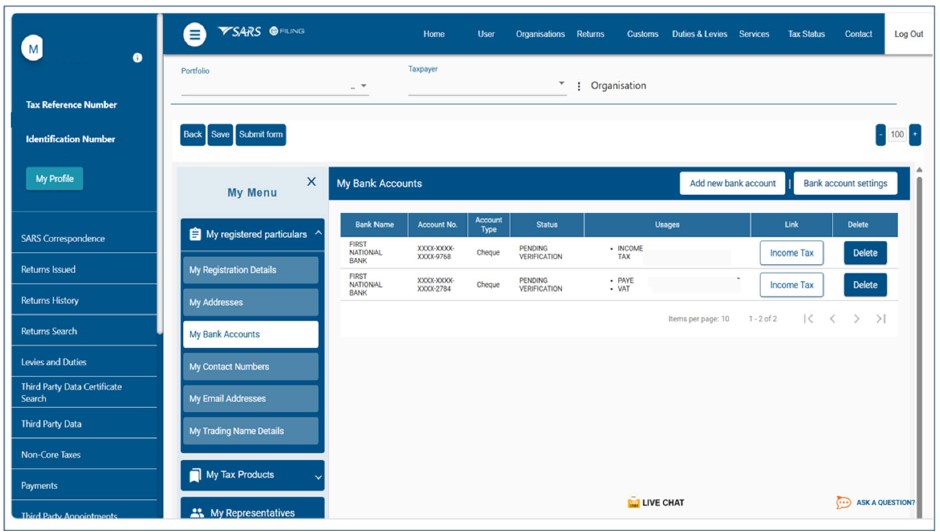
Viewing Bank Account
- Users can access and view all bank accounts currently saved to their profile.
- Select “My registered particulars”.
- Select “My Bank Accounts” then the “My Bank Accounts” container inside the WRAV01 form will
display. As a security enhancement, the bank account number displayed on the WRAV01 form
is masked. Only the last four digits of the bank account number will be visible.
Edit Bank Account
- Users can update editable fields (e.g., account number, account type, branch name / bank name and
account holder name)- Click on the specific bank account from the Bank Account Table, the RAV01 Bank Account Details
container will display, pre-populated with the selected account’s information. - Update the bank account field.
- Click on the OK button.
- Click the “Done” button to save your changes and return to the bank account table.
- Click on the specific bank account from the Bank Account Table, the RAV01 Bank Account Details
- If no errors after clicking the Done button, the popup message ‘Please note that this message will
only display if amendments were made in the ‘Bank account Details’ will display
Delete Bank Account
- Users will not be able to delete a bank account that is in use (i.e., linked to one or more tax products),
the following error message will be displayed when attempting to delete a bank account:
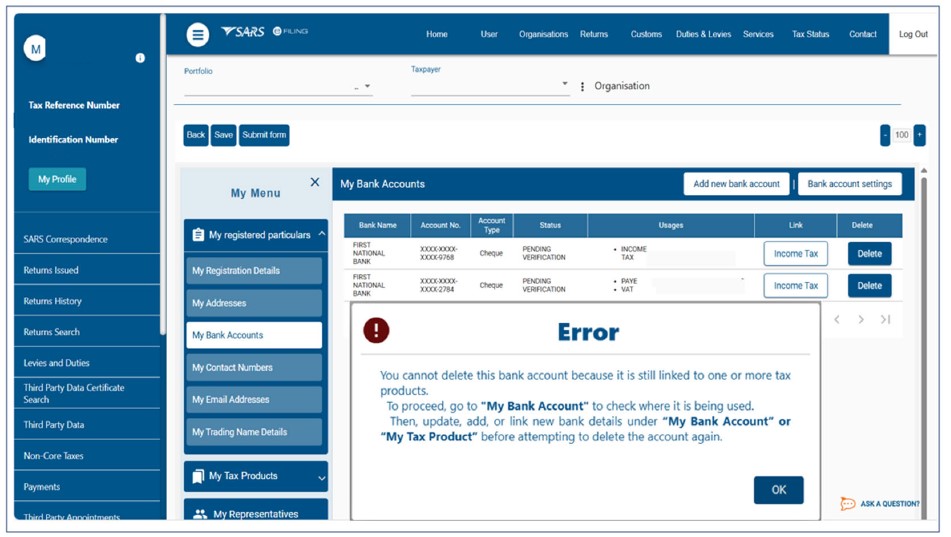
- To delete a bank account linked to one or more tax products:
- Navigate to the relevant tax product(s) under field “My Tax Products”.
- Update or reassign the associated bank account.
- Select “My Bank Accounts” to return to the bank account library.
- Select the bank account to be deleted.
- Click the delete button on the applicable line item from the bank account table.
Adding New Bank Account
- Users can capture new bank account details to be added to the library, once added, the account
becomes available for selection across all relevant tax products.- Click the Add new bank account button from the taskbar.
- Expand the “Bank Account” container.
- Expand the “Bank Account Details” sub- container details.
- Capture banking details.
- Click Done.
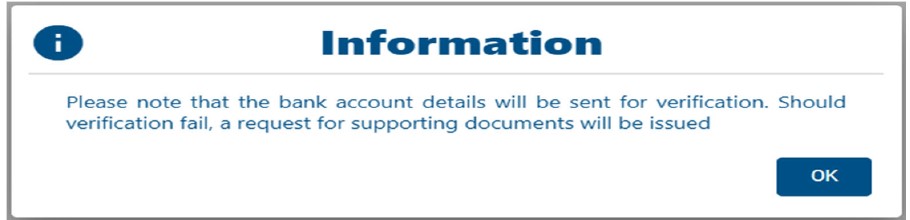
- When adding a new bank account or updating the existing bank account, the following pop-up
message will be displayed after clicking the Done button:
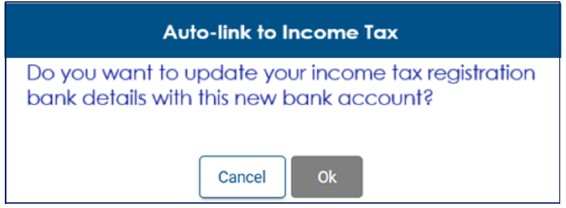
- Click on the OK button, this popup message will display:
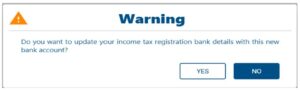
- Click ‘YES’ to link the new bank account to the existing income tax registration or click ‘NO’ if no
linking is required.
Auto-Linking Bank Account
- The WRAV01 will automatically link a bank account to an Income Tax product. This auto-linking
removes the need to manually link a bank account to an Income Tax product. The auto-linking will
happen under the following specific conditions:- Bank account exists in the library, Income Tax product added later:
- When there is an existing bank account in the library and later adds a new Income Tax
product, the system will automatically link the existing bank account to the new tax product
on condition that there is only one bank account that that exists in the library and one
Income Tax product exists.
- When there is an existing bank account in the library and later adds a new Income Tax
- Income Tax product exists, Bank account captured later:
- Where an income tax product has already been registered but initially did not have a local
bank account (e.g., declared “no local bank account” at the time of registration) and later
a new local bank account is captured via the My Bank Accounts menu, the system will
automatically link that bank account to the existing income tax product on condition that
there is a single active bank account and a single income tax registration.
- Where an income tax product has already been registered but initially did not have a local
- A new bank account is captured while one is already linked:
- Where a bank account is already linked to an Income Tax product, but another new bank
account is added, after capturing the new bank account and selecting “Done”, the system
will not auto-link. Instead, it will display the following information message:
- Where a bank account is already linked to an Income Tax product, but another new bank
- Bank account exists in the library, Income Tax product added later:
- Clicking the “Cancel” button closes the pop-up without making any changes.
- Clicking the “Ok” button links the new bank account to the existing Income Tax registration
and closes the pop-up message.
- Linking a bank account when multiple Income Tax registrations exist:
- When a taxpayer has multiple active or new income tax registrations, and a new or existing
bank account needs to be linked, the system requires the user to manually select the
appropriate income tax reference number.
- When a taxpayer has multiple active or new income tax registrations, and a new or existing
- Linking a bank account when multiple Income Tax registrations exist:
Bank Account Settings
- The bank account settings functionality enables the user to define and modify bank account settings. If
the user does not have defined bank account settings, the bank account settings pop up will display.- Click the bank account settings button from the taskbar.
- The bank account settings pop up will display as follows:
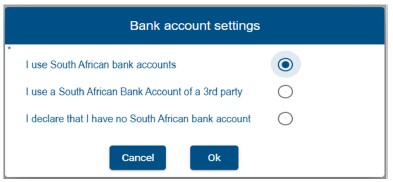
- Select one of the above options.
- If the 3rd party or No bank accounts options are selected, select a reason from the dropdown
list provided. - Reasons for No Local / 3rd Party Bank account for Individual:
- Non-resident without a local bank account
- Insolvency / Curatorship
- Deceased Estate
- Shared Account
- Income below tax threshold / Impractical
- Statutory restrictions
- Minor child.
- Reasons for No Local / 3rd Party Bank account for Company / Trust / CC/ Partnership/
Government / Foreign Entity / Other Exempt Institutions etc.:- Non-resident without a local bank account
- Liquidation
- Company Deregistration
- Group Company Account
- Dormant
- Trust Administrator Account
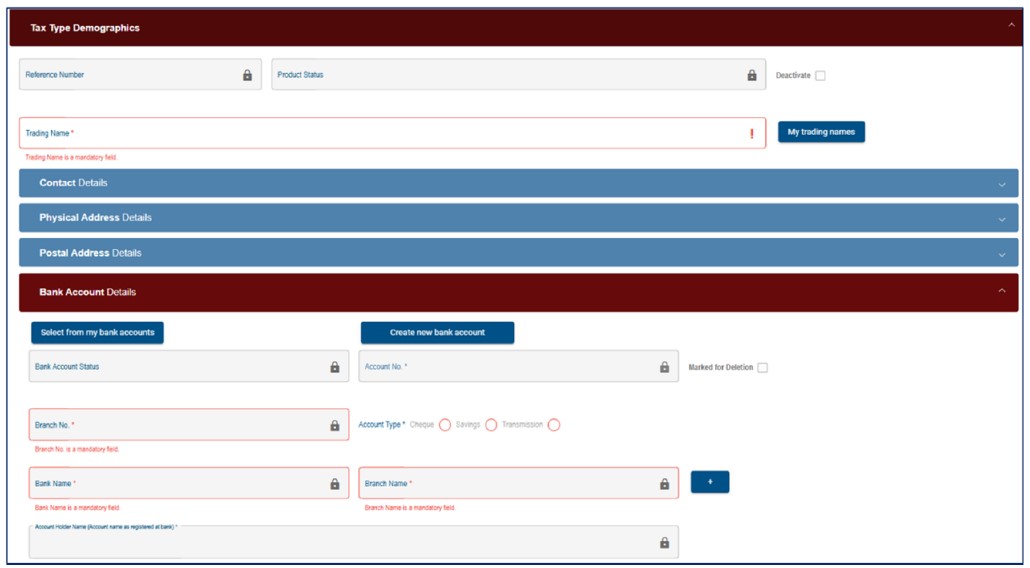
Bank Account Details
- The ‘Bank Account Details’ container provides the user with the option to select a different bank
account for usage / linkage to a tax product and create new bank account.
Selecting Bank Account From the List
- Selection of bank accounts from the list may be done if there is existing bank detail(s) set-up, the bank
account details container will be prepopulated with the current registered income tax registration bank
details and the bank account number will be masked except the last four digits. In the case where
there are no income tax registration bank details, the fields in the container will remain blank and the
user must capture the necessary fields or select a bank account from the bank account library using
the “Select from my bank accounts” button.- Navigate to the Bank Account Details container under the “My Tax Products” menu.
- Select tax product.
- Expand the “Tax Type Demographic” container.
- Expand the “Bank Account Details” container, the bank account details will be displayed with the
account number masked, only the last four digits of an account number will be displayed.
- Click on “Select from my bank accounts” button.
- Select a bank from the list of presented bank accounts and click OK.
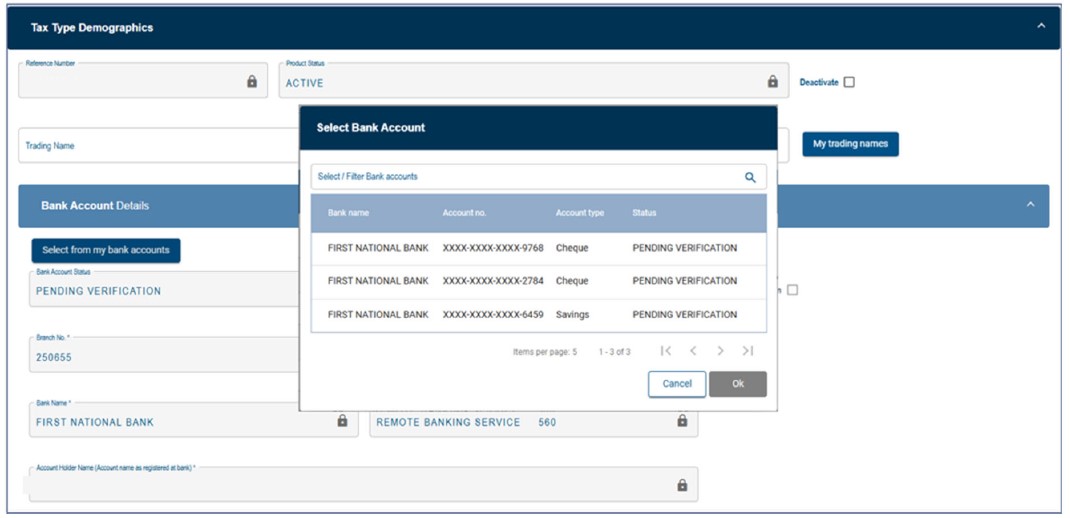
- Select the “Done” button after selection of the bank account and then “Submit Form”.
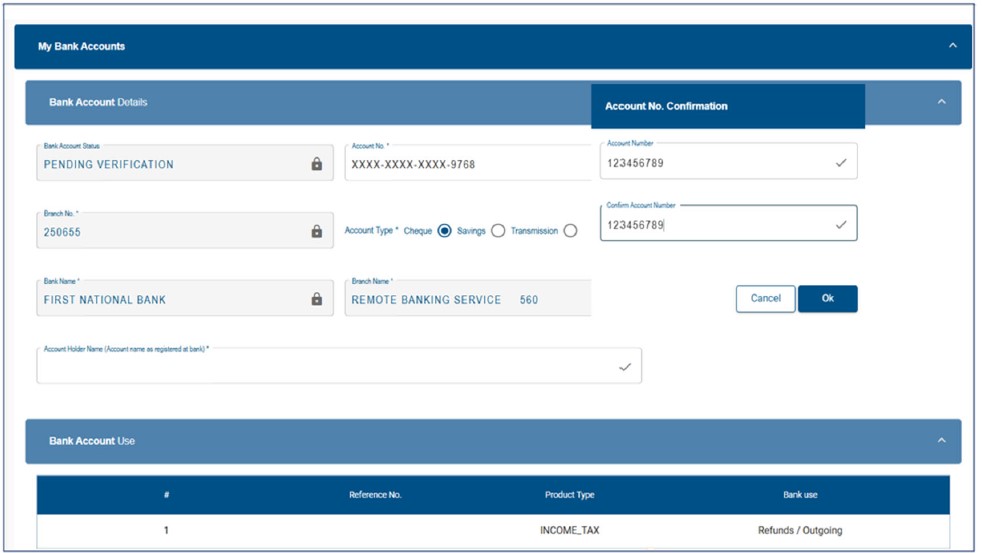
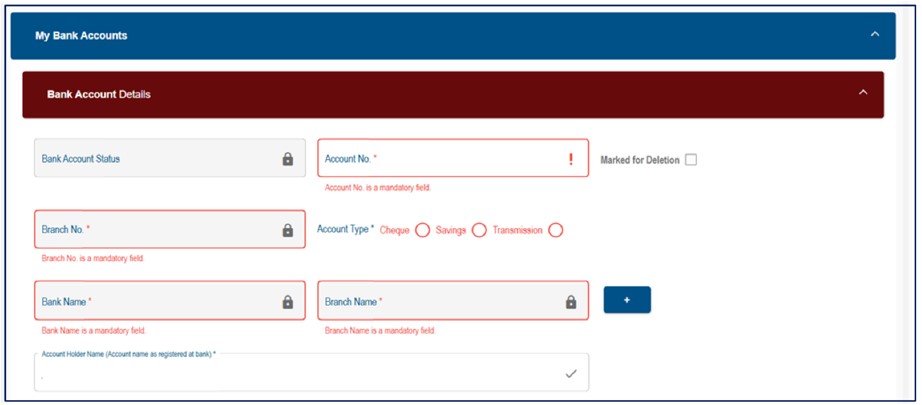
Create New Bank Account
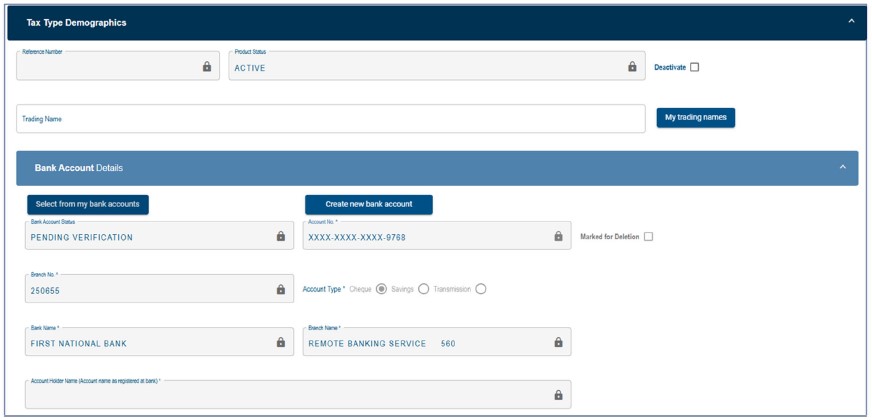
- If “Create new bank account” is selected, all the fields will be unlocked, and you may enter new bank
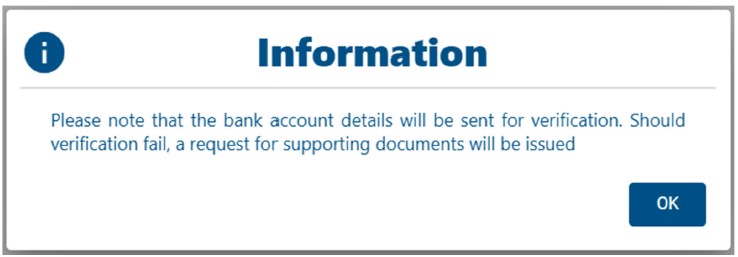
details. - The new added bank details are subject to verification and will validate against a bank verification
system. Added details will only be marked as confirmed once successfully verified.- Bank Account Status
- Pending – implies the bank details are awaiting verification
- Unverified – implies the bank details are not yet sent for verification
- Valid – implies the bank details have been verified and are valid
- Invalid – implies the bank details are invalid and the entity needs to either correct the
incorrect details on the form or at the bank.
- Account Number
- Account Type – Select Cheque, Savings or Transmission
- Account Holder Name (Account name as registered at bank) – This field will be pre-populated.
- Bank Account Status
- Complete the following fields after the selection of the Bank Name.
- Branch No: If the “Bank Name” has a universal bank code, this field will be locked and default to
the universal branch code, or else this field will be editable and must be completed. - Branch Name: If the “Bank Name” has a universal bank code, this field will be locked and default
to “Universal branch”, or else this field will be editable and must be completed.
- Branch No: If the “Bank Name” has a universal bank code, this field will be locked and default to
- Select the “Done” button after you have completed the relevant bank details and then “Submit Form” to
proceed. The new bank details added will be displayed under “My bank accounts”.
My Contact Numbers
- This container is used to maintain existing items from the list of My contact numbers and also allows
users to perform the following functions:- View / Editing a contact number from the library
- Delete a contact number from the library
- Add a contact number to the library
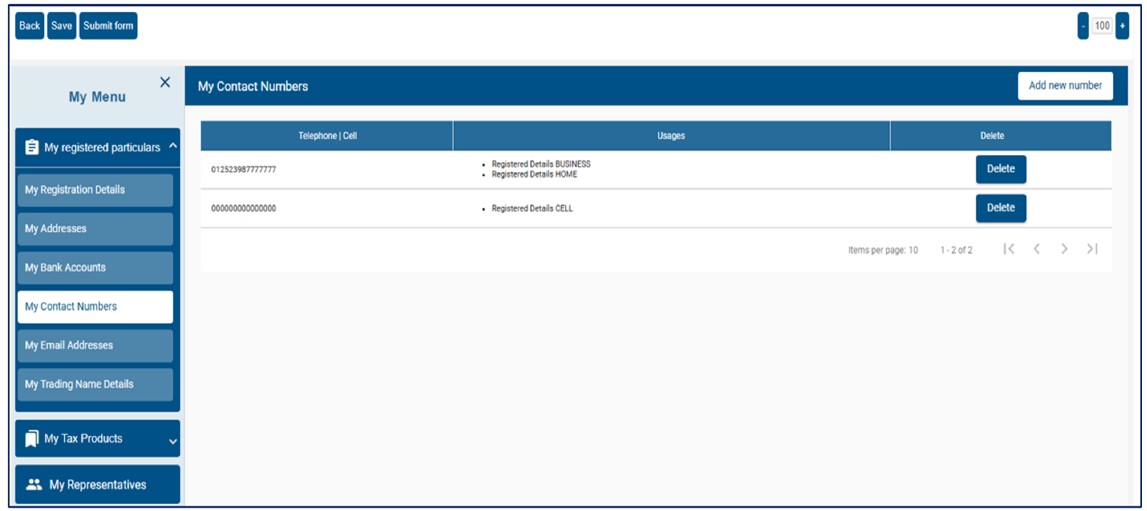
View / Edit Contact Number
- Click the contact number to be viewed / edited from the contact number table.
- Make the necessary amendments.
- Click Done to save changes
Delete Contact Number
- Select the contact number to be deleted by clicking the delete button on the applicable line item from
the contact number table. If the contact number is being used, an error message will be displayed:- This contact number is currently in use elsewhere in your profile and cannot be deleted.
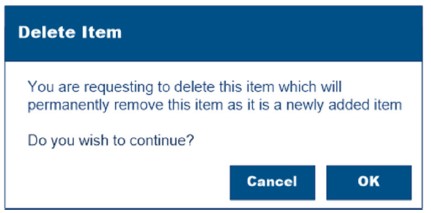
- The following pop-up will be displayed if a contact number to be deleted is a newly added item:
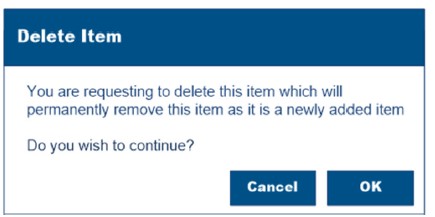
- Clicks ‘Ok’ to complete or click ‘Cancel’ the pop up will close and no further action will take place.
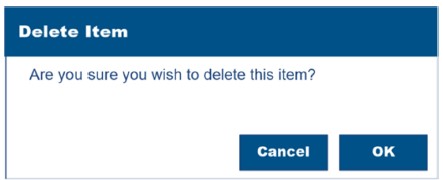
- The following pop-up will be displayed if a contact is an existing item:
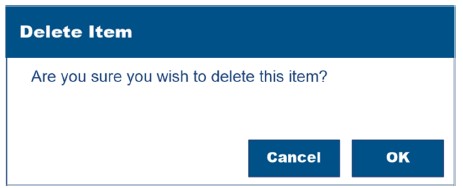
- Click ‘Ok’ to complete or click ‘Cancel’ the pop up will close and no further action will take place
Add Contact Number
- Add new contact number button from the taskbar
- Capture the new contact number.
- Click Done to complete.
My Email Address
- This container allows users to create and maintain a list of email addresses and also allows users to
perform the following functions:- View / Edit an email address from the library
- Deleting an email address from the library
- Add an email address to the library
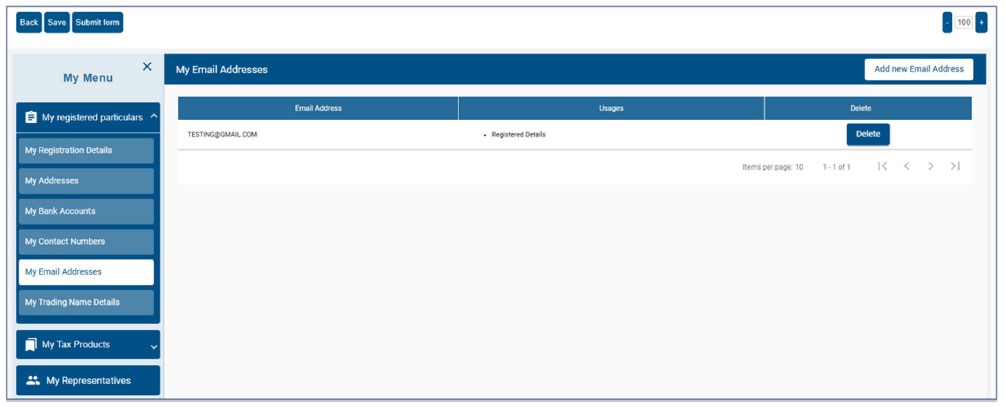
View / Edit Email Address
- Hover your cursor over to a specific line item in the table.
- Click on a line item will open the item for viewing / editing.
- Make the necessary amendments.
- Click Done to save changes
Delete Email Address
- Select the email address to be deleted by clicking the delete button on the applicable line item from the
email details table. If the email address is being used, an error message will be displayed:- This email address is currently in use elsewhere in your profile and cannot be deleted.
- The following pop-up will be displayed if the email address to be deleted is a newly added item:
- Click ‘Ok’ to complete or click ‘Cancel’ the pop up will close and no further action will take place.
- The following pop-up will be displayed if the email address is an existing item:
- Click ‘Ok’ to complete or click ‘Cancel’ the pop up will close and no further action will take place.
Add Email Address
- Click the Add new email address button from the taskbar.
- Capture the email address.
- Click Done to complete the process.
My Trading Name Details
- This container is used for viewing or editing existing trading names, deleting trading names, and
adding new trading names to the library.
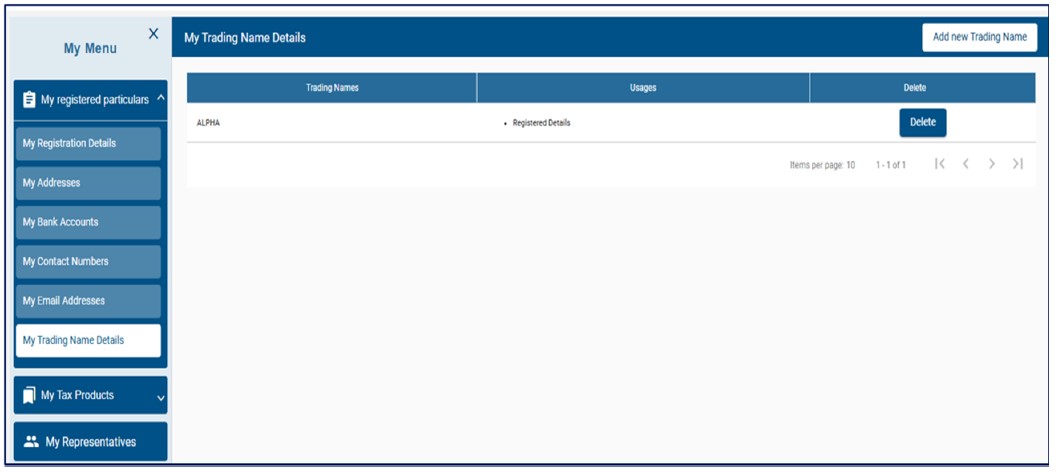
- Viewing or editing existing trading names:
- Click the contact number to be viewed / edited from the trading name table. The Trading Name
details container will display with the trading name populated. - Make the necessary amendments.
- Click Done to save changes.
- Click the contact number to be viewed / edited from the trading name table. The Trading Name
- Deleting a trading name from the library:
- Select the trading name to be deleted by clicking delete button on the applicable line item. If the
trading name is being used, an error message will be displayed:- This trading name is currently in use elsewhere in your profile and cannot be deleted.
- Select the trading name to be deleted by clicking delete button on the applicable line item. If the
- Adding a trading name to the library:
- Click Add new trading name button and the Trading Names container will display.
- Capture the trading name.
- Click Done to save changes.
My Tax Products
- This container enables users to manage all tax subscriptions linked to their profile, including the ability
to deactivate existing tax registrations and add new tax registrations.
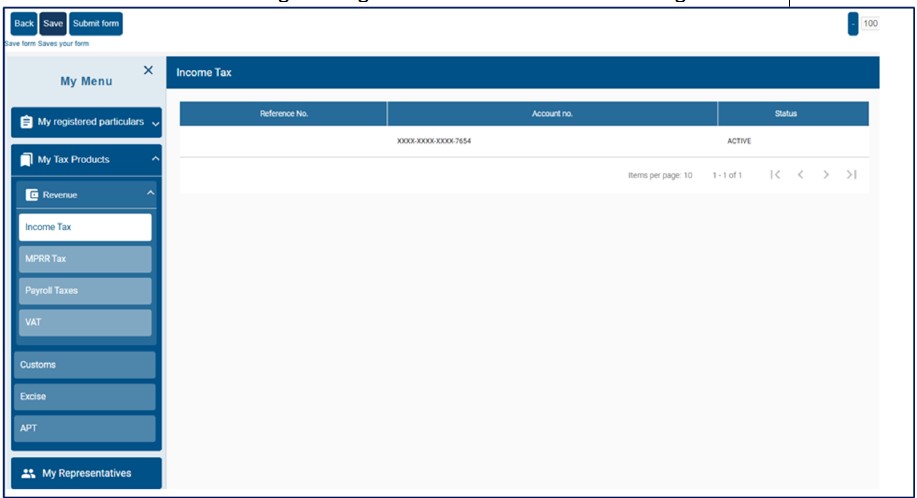
Income Tax
- This container enables the user to maintain Income Tax registration This screen is accessed by the
following Navigation Menu path:- My Tax Products > Revenue > Income tax

Add new Income tax registration
- Follow the steps below to add a new Income tax registration:
- Click the Add new Income tax registration button from the taskbar
- Capture all necessary fields.
- Click Done to complete the registration process. The new Income tax registration will then display
on the Table of Income tax registrations with a status of ‘New registration’. - Click Submit form button, then you be requested to approve your registration request online.
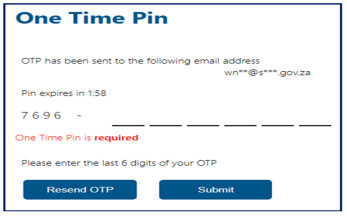
- Select the preferred method of contact and enter the OTP number to authorise your request.
- Registration of new Income Tax is allowed even if there is an existing Active Income tax registration
already on the taxpayer profile, on condition that the existing registrations contain.- Estate reason code is 03 – “Deceased Estate” and the Date of death is 01 March 2016 and
onward. - Estate Reason code is 09 – Insolvency/Sequestration unless there is no existing registration
classifieds as “Insolvent Person to date of sequestration” - Taxpayer Classification is an “Insolvent Person to date of sequestration” unless there is more
than one existing Active Income tax registration.
- Estate reason code is 03 – “Deceased Estate” and the Date of death is 01 March 2016 and
- Registration of a third new Income Tax registration is allowed if:
- The existing registration is coded as “Insolvent Person to date of sequestration” and the other is
coded as Insolvent Estate to date of sequestration; a taxpayer is then allowed to register as
normal taxpayer. - The existing registration is coded as “Insolvent Person to date of sequestration” and the other is
registered as normal taxpayer; a taxpayer is then allowed to register as Insolvent Estate to date
of sequestration.
- The existing registration is coded as “Insolvent Person to date of sequestration” and the other is
- Registration of new Income Tax is allowed even if there is an existing Inactive Income tax registration
already on the taxpayer profile, on condition that the existing registrations contain:- Estate reason code is 03 – “Deceased Estate” and the Date of death is 01 March 2016 and
onward. - The Deactivation reason code is 05 (Insolvent / Liquidation – Insufficient assets) (confirmed)
- The Deactivation reason code is 04 (Insolvent / Liquidation Final Dividend paid)
- Deactivation reason 13 (Estate) and the Estate Reason Code is 09 (Insolvency/Sequestration)
- Taxpayer Classification is an “Insolvent Person to date of sequestration” unless there is more
than one existing Active Income tax registration.
- Estate reason code is 03 – “Deceased Estate” and the Date of death is 01 March 2016 and
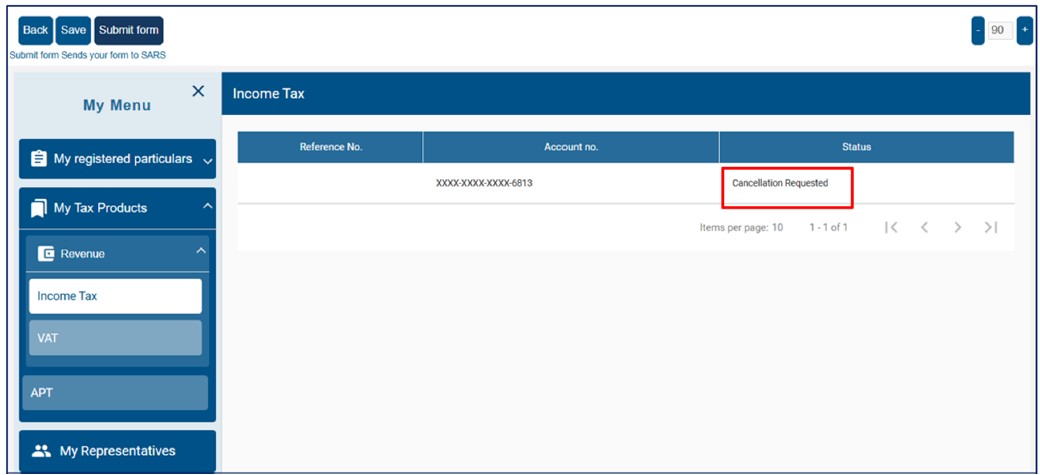
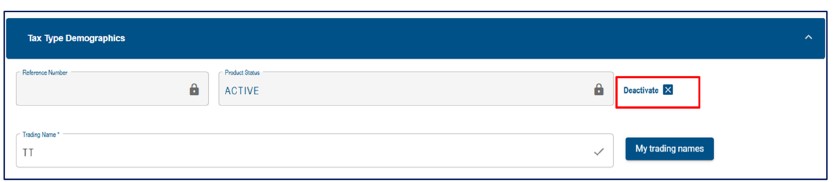
Deactivating Income tax registration:
- Select the Income tax registration to be to be deactivated from the table of Income tax registrations. The
following containers will display with the registration data populated.- Tax Type Demographics>Bank Account details>Income tax liability details
- Click the deactivate button on the applicable line item from the table of Income tax registrations.
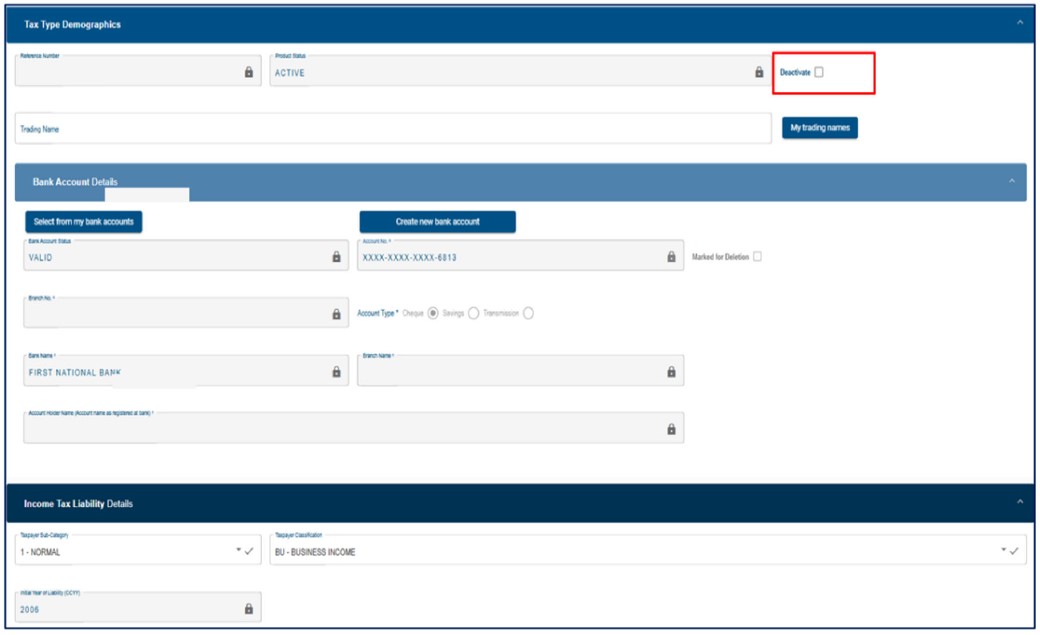
- Click Done, the status will change from Active to Cancellation Requested.
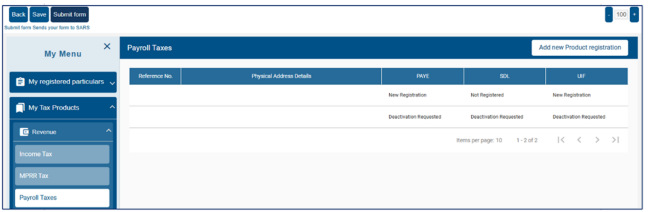
Payroll Tax Registration
- This container enables users to manage PAYE registrations linked to their profile. Registration of
Payroll Tax will go through biometric authentication. - This screen is accessed by the following Navigation Menu path:
- My Tax Products > Revenue > Payroll Taxes
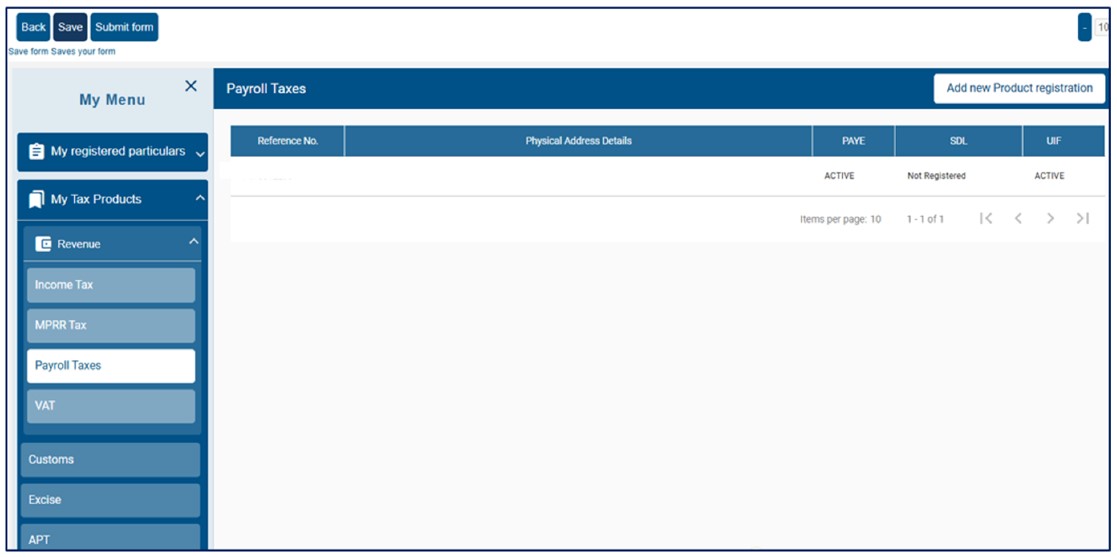
Add new Payroll Tax registration
- A use cannot register for a new Payroll Tax if one of the following exist:
- When there is an existing registration with “New Registration” status
- When Payroll has a status of “New Registration and SDL and VAT have a status other than “New
Registration”
- Click the Add new Product registration button on the taskbar. A pop-up message will appear.
- Click ‘OK’ to proceed, the following containers will be displayed:

- Complete all required fields displayed in this container.
- Click ‘Done’ to complete the registration process.
- Click Submit form button, then you be requested to approve your registration request online.
- Select the preferred method of contact and enter the OTP number to authorise your request
- The following message will be displayed:
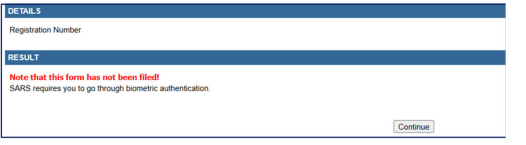
- Click continue and refer to section Biometric Facial Recognition Authentication to proceed with
biometric authentication.
Deactivating a Payroll Tax registration
- Select the Payroll Tax registration to be deactivated on the applicable line item from the table of Payroll
Tax registrations. The following containers will display with the registration data populated:- Applicant Details>Payroll Taxes registration options >Tax Type Demographics>Contact Details
>Physical Address Details> Postal Address Details
- Applicant Details>Payroll Taxes registration options >Tax Type Demographics>Contact Details
- Click the deactivate button on the applicable line item from the Tax Type Demographics table.
- Click Done to complete the process, the status will change from Active to Deactivated Requested.
- Click the Submit Form button and approve online request.
- Select the preferred method of contact and enter the OTP number to authorise the request.
Rules for PAYE and SDL Registration on e-Filing
- PAYE and SDL liability date:
- The liability date captured must not be backdated for more than six months from today’s date.
- Due to the nature of employment taxes, the transaction year must be determined, and registration
must be allowed from 1 March of the 6-month period. For an example: Today’s date is 15
December 2021. Current month minus 6 months is June 2021 which falls within the 2022
transaction year and therefore, allow backdating to the start of the 2022 transaction year which is
1 March 2021. - Should the liability date exceed the six months, you will be required to book an appointment to
visit the SARS branch with supporting documents (Financial statements or signed employment
contracts) to request a further backdating. - A warning message will appear on the screen as follows: “The <field name> provided exceeds
the period allowed on eFiling. Please visit a SARS branch with your supporting documents to
request the required backdating”.- Click “OK” button on the error message and the date will default to today’s date.
- Then edit the date.
- For existing registrations, no backdating of the PAYE and SDL liability date will be allowed via
eFiling channel. You are required to book an appointment to visit the SARS branch with the
necessary supporting documents to request an amendment to the PAYE liability date.
- Deactivate – this tick box will be disabled and the representative of the entity or the entity themselves,
in the case of an individual, will be required to visit a SARS branch to initiate a request for deactivation. - Estimated Payroll for the following 12 Month period –You may only register for SDL if your Estimated
Payroll is at least R 500 000.- If an Estimated Payroll value is less than R500 000, a warning message will appear on the screen
as follows: “The <fieldname> is less than R 500 000. You may only register for SDL if your
<fieldname> is at least R 500 000”.
- If an Estimated Payroll value is less than R500 000, a warning message will appear on the screen
- Particulars of Exemptions (Only for SDL)
- Employers who fall within the categories mentioned below are not liable for the payment of the
levy in terms of section 1 of the Skills Development Levies Act, but must however still register in
terms of section 5(6) of the aforementioned Act:- Public Benefit Organisations
- Municipalities to whom a certificate of exemption has been granted
- Any National / Provincial Public Service Employer
- National / Provincial Public Entity, if more than 80% of your expenditure is defrayed from
funds voted by Parliament
- Employers who fall within the categories mentioned below are not liable for the payment of the
- Exemption Valid from Date – May not be prior to the SDL Liability Date and cannot be a date in the
future. - UIF Status
- The UIF Status is a prepopulated field that the users will be unable to edit if it is a first time UIF
Registration, then the status will be New Registration once a number is allocated, the status will
change to Active
- The UIF Status is a prepopulated field that the users will be unable to edit if it is a first time UIF
De-registration for Payroll Taxes
- Select “SARS registered details” side menu and “Registration Maintenance” sub-menu items.
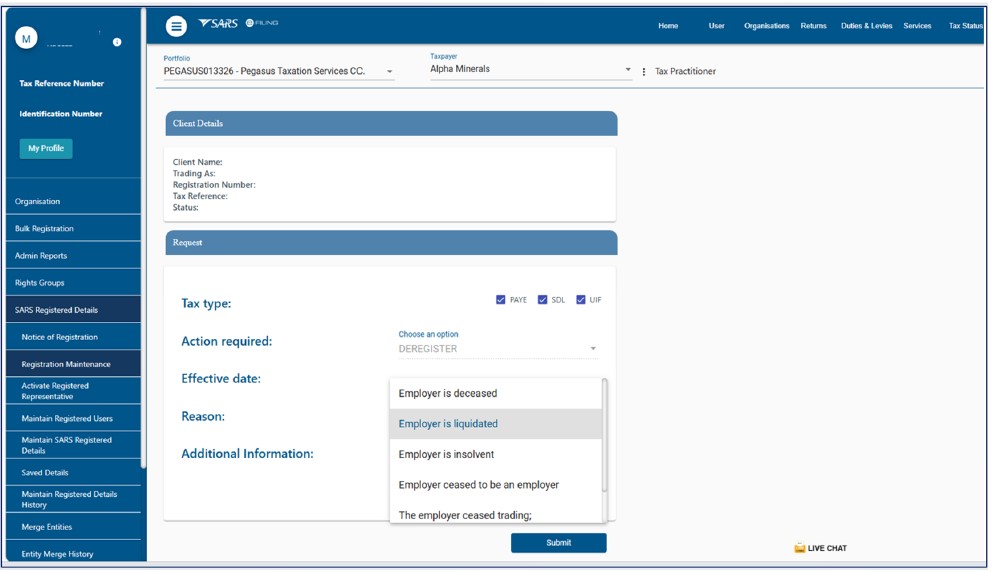
- Select the tax type to be de-registered i.e. PAYE, SDL or UIF.
- Complete the effective date. The effective date cannot be greater than the date of request (current date).
- Capture the reason for de-registration by selecting one of the reasons from the dropdown list e.g. The
employer ceased trading, the employer is insolvent, other, etc.- Option “Other” has been added as one of the reasons from the dropdown list.
- “Additional Information” field has been added and this field is mandatory if the reason “other” is
selected. However, this field can be completed where any other reason is selected.
- Click “Submit” button to submit the request.
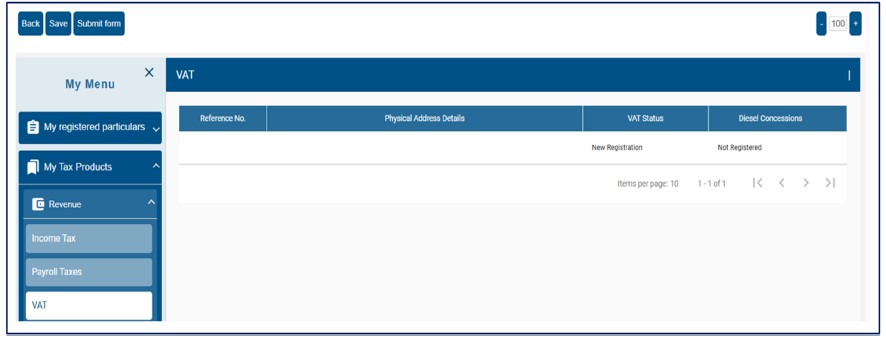
VAT Registration
- This container enables users to manage VAT registrations linked to their profile, including the ability to
deactivate VAT registration and add new VAT registration. Registration of VAT will go through biometric
authentication. - This screen is accessed by the following Navigation Menu path:
- My Tax Products > Revenue > VAT

Adding new VAT registration
- A user cannot register for a new VAT product if one of the following exist:
- When there is an existing registration with “New Registration” status
- When Diesel has a status of “New Registration and VAT has a status other than “New
Registration”
- Click the Add new product registration button on the taskbar. A pop-up message will appear.
- Click ‘OK’ to proceed, the following containers will be displayed:
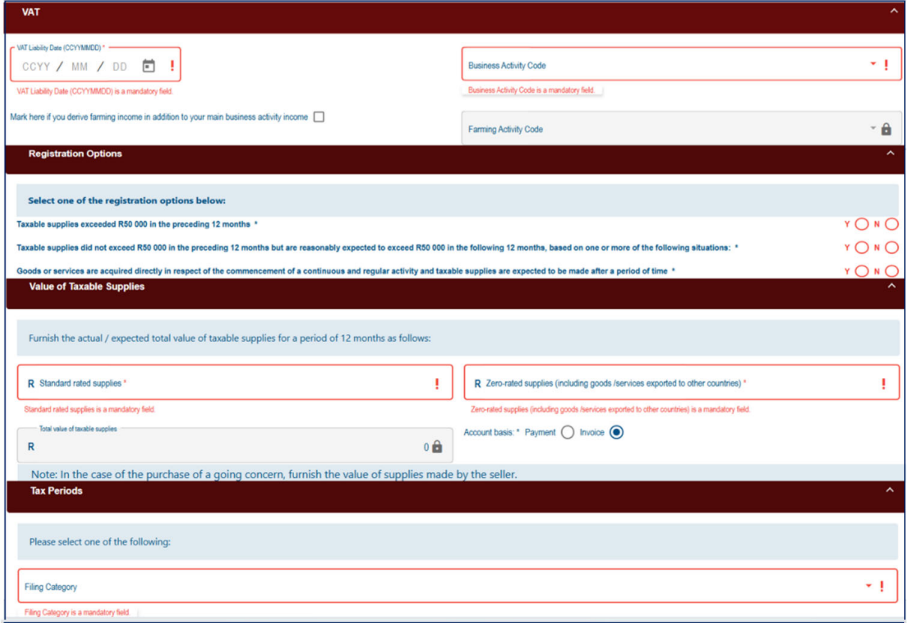
- Capture all necessary fields:
- VAT Liability Date – Refer to rules as shown in section Rules for New VAT Registration on e-Filing
- Business Activity Code – select a code from the list of Business Activity Codes displayed.
- The field Mark here if you derive farming income in addition to your main business activity income
will only be available for section if the Business Activity Code selected is not a farming activity
code - Farming Activity Code – this field is mandatory if the field Mark here if you derive farming income
in addition to your main business activity income is checked. - Select one of the registration options below – select Yes for one of the questions.
- Standard Rated Supplies –Enter the values
- Zero Rated Supplies – Enter the values
- Total Value of Taxable Supplies – this field is auto calculated as follows: Standard Rated
Supplies+ Plus Zero-Rated Supplies. - Tax Periods – Select the Filing Category from the dropdown list. Only one option can be
selected at any time- Monthly tax periods
- Tax periods of two months
- Tax periods of 6 months (Farming – only if taxable supplies for 12 months do not exceed
R1.5 million) - Tax periods of 12 months ending on financial year end
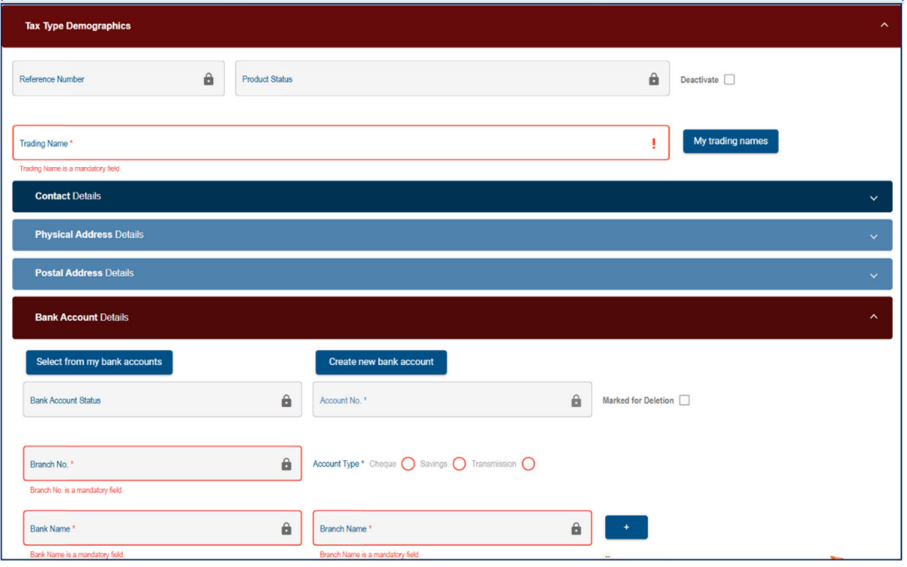
- Trading Name – Capture or Select the trading name from the list.
- The following containers will be prepopulated:
- Contact Details
- Physical Address Details
- Postal Address Details
- Bank Account details:
- The bank account details container will be prepopulated with the current registered income
tax registration bank details. - In the event that there are no income tax registration bank details, the fields in the container
will remain blank and the user must capture the necessary fields or select a bank account
from the bank account library using the “Select from my bank accounts” button
- The bank account details container will be prepopulated with the current registered income
- Click Done to complete the registration process, the following screen will display:
- Click the Submit Form button and approve online request.
- Select the preferred method of contact and enter the OTP number to authorise the request. The
following message will display:
- Click continue and refer to section Biometric Facial Recognition Authentication to proceed with
biometric authentication.
Rules for New VAT Registration on e-Filing
- VAT Liability Date – Compulsory Registration:
- If the value for “Total Value of Taxable Supplies” is equal to or greater than 1 million (Compulsory
Registration), the VAT Liability Date:- Cannot be more than 3 months in future
- Must be prior to any Liability Date’s in the VAT – Diesel Refund section.
- May not be backdated to more than 6 months prior to the current date
- If the user enters a VAT Liability date that is more than 6 months prior to the current date, then
this error message will display:” The VAT Liability Date provided exceeds the period allowed on
eFiling. Please visit a SARS branch with your supporting documents to request the required
backdating”.- The VAT Liability date must default to the current system date and must be locked.
- If the value for “Total Value of Taxable Supplies” is equal to or greater than 1 million (Compulsory
- VAT Liability Date – Voluntary Registration:
- If the value for “Total Value of Taxable Supplies” is less than 1 million (Voluntary Registration),
the VAT Liability Date:- Cannot be more than 3 months in future
- Must be prior to any Liability Date’s in the VAT – Diesel Refund section.
- May not be backdated
- If the user enters a VAT Liability date prior to the current date, then then this error message will
display: “No backdating in terms of voluntary registrations is allowed unless you have charged
VAT prior to this application. Please visit a SARS branch with your sales invoices or signed
contracts to request the required backdating”- The VAT Liability date must default to the system current date and must be locked.
- If the value for “Total Value of Taxable Supplies” is less than 1 million (Voluntary Registration),
- VAT Liability Date – Existing Registrations (Voluntary Registration)
- If the value for “Total Value of Taxable Supplies” is less than 1 million (Voluntary Registration),
the VAT Liability Date:- May not be backdated and may not be editable.
- If the value for “Total Value of Taxable Supplies” is less than 1 million (Voluntary Registration),
Deactivate VAT registration
- Select the VAT registration to be deactivated on the applicable line item from the VAT registrations table.
- Click the deactivate button on the applicable line item from the Tax Type Demographics table.

- Click Done to complete the process, the status will change from Active to Deactivated Requested.
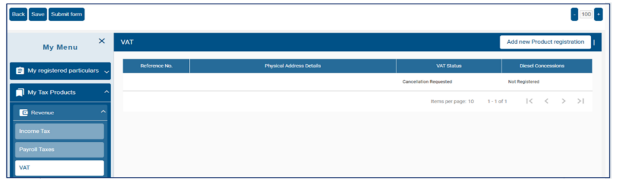
- Click the Submit Form button and approve online request
- Select the preferred method of contact and enter the OTP number to authorise the request.
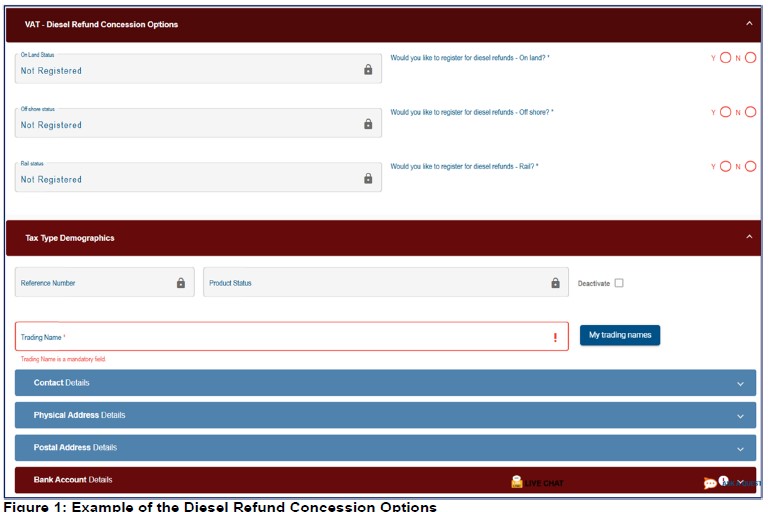
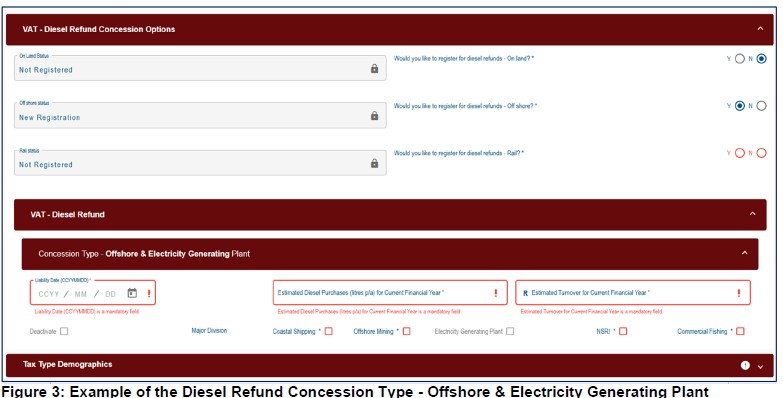
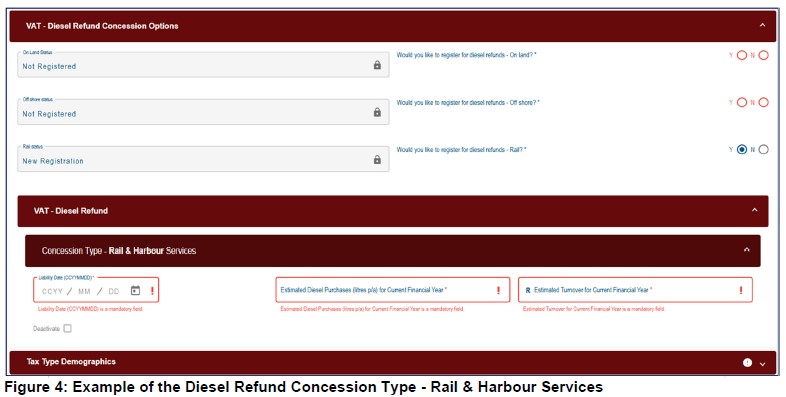
VAT – Diesel Refund Concession Options
- This container will be used to maintain VAT subscription of diesel details for individuals and enterprises.
This container will only be displayed if the business activity you have selected is applicable to diesel
concession. - This container will display three Diesel Refund Concession Options:
- Concession Type – On Land > Concession Type – Offshore & Electricity Generating Plant >
Concession Type -Rail & Harbour Services
- Concession Type – On Land > Concession Type – Offshore & Electricity Generating Plant >
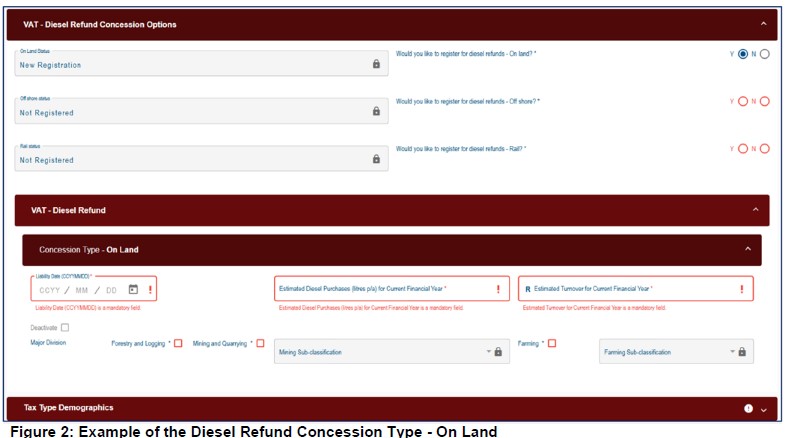
- If Yes is selected to the questions displayed on Diesel Refund Concession Options (Figure 1), then the
Concession Type sub – containers (Figure 2, Figure 2 and Figure 4) will be displayed with following
applicable fields to be completed:- Liability Date:
- May not be less than 2001/07/04
- May not be earlier than VAT liability date
- Cannot be more than 3 months into the future
- May not be backdated prior to 2007/1/01 if activity code = 1905 (e.g., On Land)
- May not be backdated prior to 2016/04/01 if the diesel activity code = 1920((e.g., Rail &
Harbour)
- Estimated Turnover for Current Financial Year – Enter the expected total revenue for the
current financial year (in ZAR) - Estimated Diesel Purchases (litres p/a) – Provide the estimated number of diesel litres to be
purchased annually. - Major Division –Select the primary business activity sector.
- Trading Name – Capture or Select the trading name from the list.
- The following containers will be prepopulated:
- Contact Details
- Physical Address Details
- Postal Address Details
- Bank Account details:
- The bank account details container will be prepopulated with the current registered income
tax registration bank details. - In the event that there are no income tax registration bank details, the fields in the container
will remain blank and the user must capture the necessary fields or select a bank account
from the bank account library using the “Select from my bank accounts” button.
- The bank account details container will be prepopulated with the current registered income
- Liability Date:
MPRR TAX
- The RAV01 allows enables users to manage all of the MPRR registrations stored against their profile,
including the ability to, Adding a new MPRR registration, Deactivating an MPRR registration and
Reactivating an MPRR registration. - An entity is allowed to have only one MPRR tax reference number. A taxpayer is allowed to register for
MPRR tax type on efiling channel if there is an existing tax product registration.
Note: Where an entity has multiple entity profiles and have not yet been merged, the MPRR registration
will not be allowed
- This screen is accessed by the following Navigation Menu path:
- My Tax Products > Revenue > MPRR
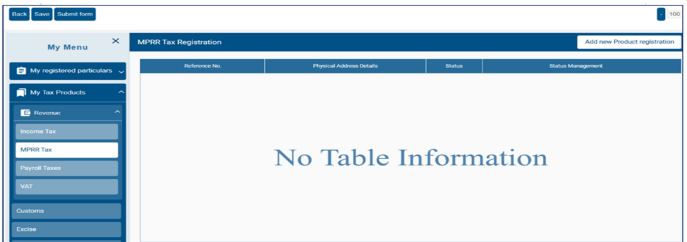
Adding new MPRR registration
- Click the Add new product registration button on the taskbar. A pop-up message will appear.
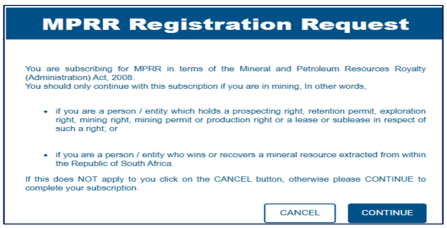
- Click ‘CONTINUE’ to proceed, A pop-up message will appear:
- Click ‘OK’ to proceed, the following containers will be display with the registration data populated
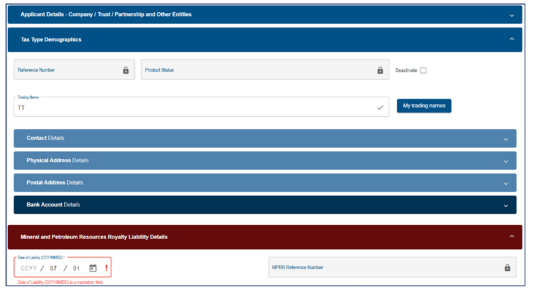
- Complete all required fields displayed in this container.
- Click Done to complete the registration process.
- Click the Submit Form button and approve online request.
- Select the preferred method of contact and enter the OTP number to authorise the request.
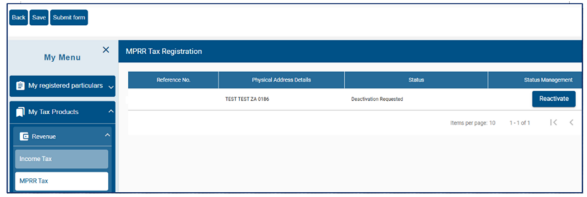
Deactivate and Reactivate MPRR registration
- Select the MPRR registration to be deactivated by clicking the deactivate button on the applicable line
item from the Table of MPRR registrations.
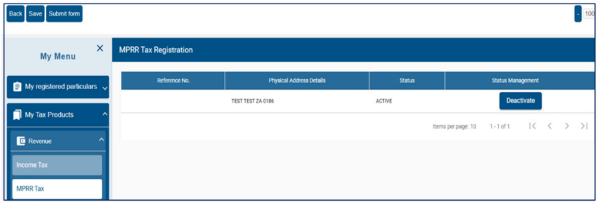
- The following pop-up will be displayed:

Click ‘Ok’ the following MPRR Deactivation Request popup will be displayed:
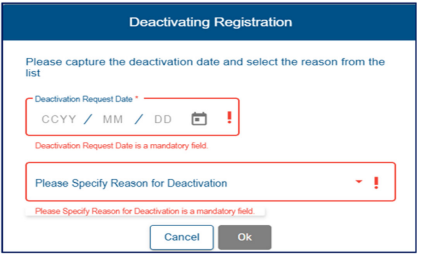
- Completes all the required fields and click ‘Ok’ the deactivation process will be complete and change
the status management to Reactivation.
- Click the Submit Form button and approve online request.
- Select the preferred method of contact and enter the OTP number to authorise the request.
- To reactivate the MPRR registration:
- Select the MPRR registration to be reactivated by clicking the reactivate button on the applicable
line item from the Table of MPRR registrations.
- Select the MPRR registration to be reactivated by clicking the reactivate button on the applicable
- The following pop-up will be displayed when clicking the Reactivate button:

- Complete the Reactivation Date and click ‘OK’
- Click Done to complete the registration process.
- Click the Submit Form button and approve online request
- Select the preferred method of contact and enter the OTP number to authorise the request.
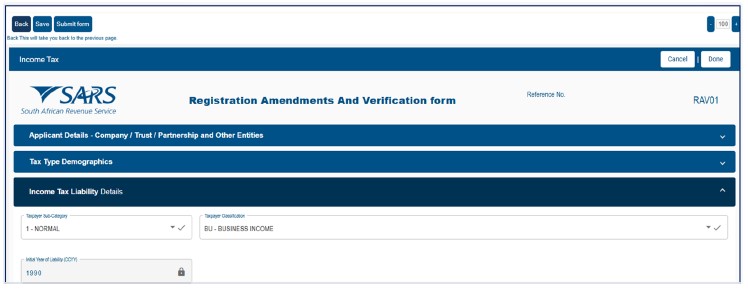
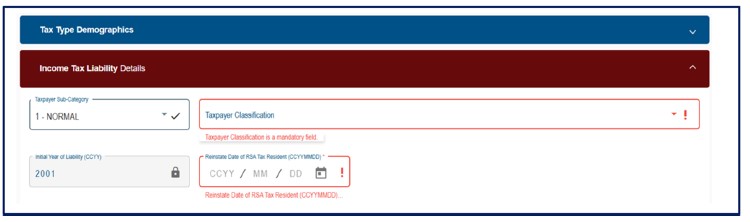
Income Tax Liability Details
- This Container is used to maintain Income Tax subscription details for Individuals and enterprises.
- This screen is accessed by the following Navigation Menu path:
- My Tax Products > Revenue > Income Tax > Income Tax Liability Details.
- The following fields will be displayed:
- Taxpayer Sub-Category > Initial Year of Liability >Taxpayer Classification.
- Taxpayer Sub-Category:
- Click on this field, a popup will be displayed with the following options:
- Taxpayer type – Provisional or Non Provisional.
- Taxpayer Category – Individual, Company or Trust.
- The pop up will also display two columns containing the list of taxpayer sub-category and
classification codes.- Select a sub category and classification from the list box on the popup and click ‘OK’
- In the case of a second income tax registration for the deceased estate, select “Non
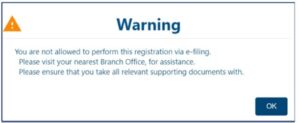
Provisional” and “Normal” as Sub-category. - If you select “Insolvent to date of Sequestration” and the first tax number is not coded as an
Insolvent Person, the following warning message will appear:
- Click on this field, a popup will be displayed with the following options:
- Select “Ok” when you have made your selections to continue.
- Initial Year of Liability:
- Initial Year of Liability – must not be prior to 1963 and not 2 years later than current date. Field
will be active on a new registration application and disabled for maintain details. - Note: In the case of a second income tax registration for the deceased estate, the liability date
must always be set as 2017 or the tax year in which the Taxpayer received the post date of death
income.
- Initial Year of Liability – must not be prior to 1963 and not 2 years later than current date. Field
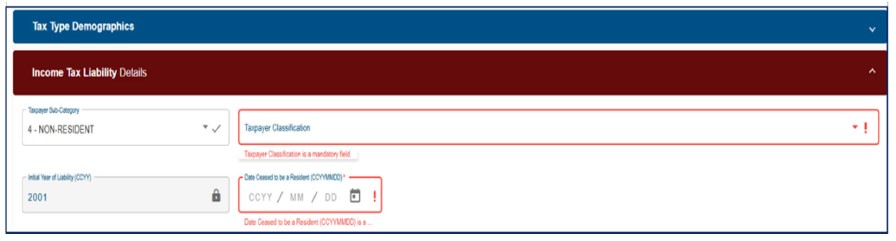
Ceased To Be RSA Tax Resident
- Where the taxpayer is leaving the country and immigrate to another country:
- Select “Code 4, Non-resident” under Taxpayer subcategory to change the Income Tax registration
status. - Complete Date Ceased to be a Resident and Taxpayer classification.
- Click Done to save changes.
- Click submit form. A case will be created requesting for relevant supporting documents to be
submitted. - Submit the relevant supporting documents. Refer to section SARS CORRESPONDENCE
on how upload and submit supporting documents.
- Select “Code 4, Non-resident” under Taxpayer subcategory to change the Income Tax registration
Reinstatement Of RSA Tax Residency
- As a taxpayer who previously ceased being an RSA tax resident, you may request reinstatement of your
RSA tax residency status. This process applies only to individuals, not to companies or trusts. - This screen is accessed by the following Navigation Menu path:
- My Tax Products > Revenue > Income Tax> Income Tax Liability Details
- To reinstate your RSA tax residency:
- Change the “Sub-category” from “Non-Resident” to another applicable status.
- Complete the “Reinstatement Date of RSA Tax Residency” field.
- Click Done
- Click submit form.
Submission of the RAV01
- Click Submit form button, then you be requested to approve your registration request online.
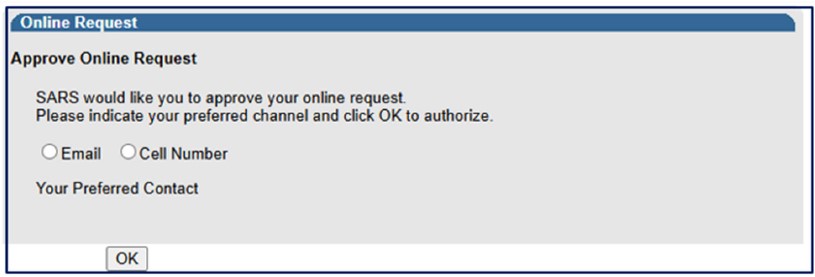
- Select the preferred method of contact and click Ok button.
- Enter the OTP number to authorise your request and click submit.
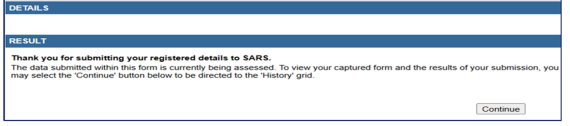
- The following message will display:
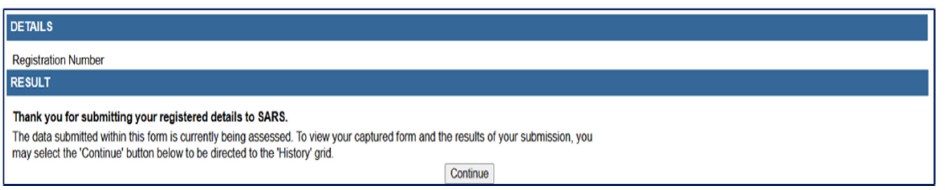
- Click the Continue button to return to the History page to view the results of the submission.
Biometric Facial Recognition Authentication.
- Registration for VAT and /or Payroll Taxes will require biometric facial recognition authentication on a
device with a camera. The following screen will be displayed after clicking on the submit button:
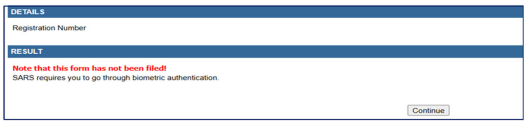
- Click the Continue button to proceed with facial biometric authentication
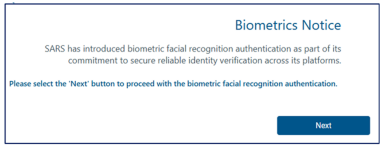
- Click next on the biometrics notice screen to proceed.
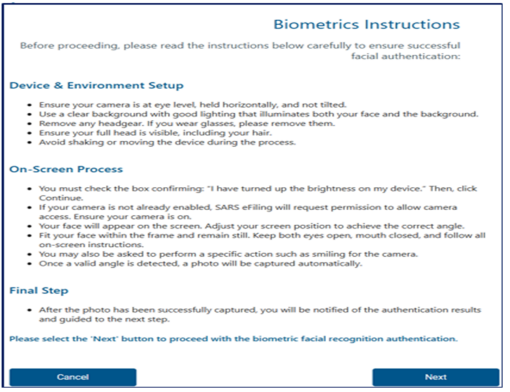
- Click Next on the biometrics instruction screen to continue.
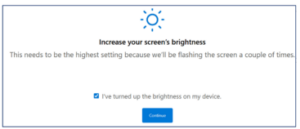
- Check the box confirming: “I have turned up the brightness on my device”, then click Continue.
- When the system is unable to process the captured face image, the message below will appear:
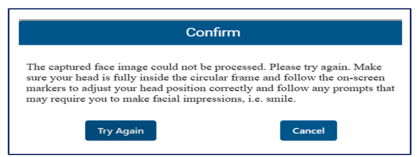
- Capture the face image again. Note: A maximum of three attempts is allowed.
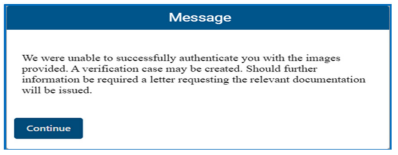
- The following message will be displayed when biometric facial recognition fails. A verification case will
then be created, requesting the submission of relevant documentation.
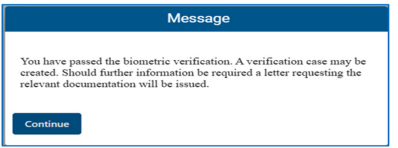
- The following message will be displayed when biometric facial recognition is successful. A verification
case may be created requesting relevant documents to be submitted
- Click Continue to proceed, the following screen will display:
- Click ‘Continue’ button to be directed to the registration work page to view status of submitted form.
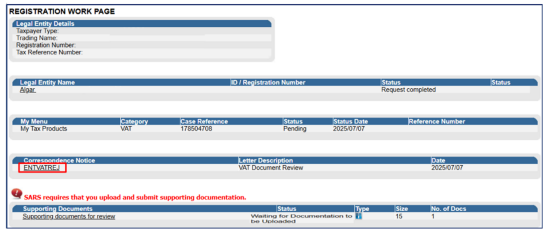
- Click the Correspondence Notice link to view the required supporting documents.
- Upload the supporting documentation. Refer to section SARS Correspondence on how to upload
and submit supporting documentation - Once the supporting documents have been submitted, the following screen will appear:

SAVED DETAILS
- A version of the form is saved if the user elected to “Save” changes for later submission during the
maintenance or capturing of the RAV01 form. “Save” implies that changes were provisionally made to
the registered details but not submitted to SARS. All issued and saved forms are displayed for the user - If there is no saved information, nothing will display.

- After the RAV01 has been saved, a list of saved RAV01 forms will display.
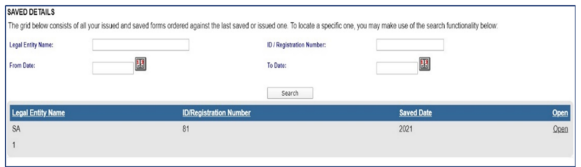
- Select the “Open” hyperlink and the Registration Work Page will display. Select the legal name hyperlink
to open the RAV01 form.
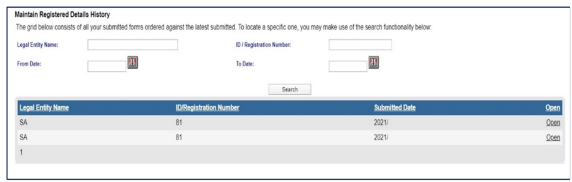
Maintain Registered Details History
- The “Maintain Registered Details History” menu item will display a history of all submissions of the
RAV01 to SARS - If there is no submitted information, nothing will display.
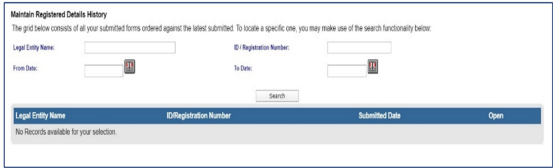
- If there is a RAV01 submitted already, an entry will display as below.
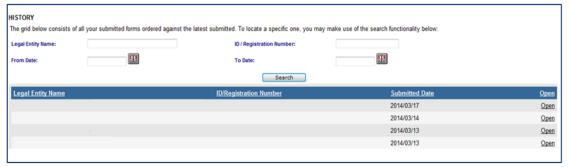
- Click the “Open” hyperlink and the Registration Work Page will display.
Register Withholding Tax on Interest
- Withholding Tax on Interest (WTI) is a fixed percentage of interest amount paid to a foreign entity and
is payable to SARS. The interest amount is derived when interest is paid by a South African resident to
a non-resident and a portion of interest amount is withheld by the resident. - The aim of the WTI process via eFiling is to provide the functionality for residents to self-declare the
amount on the interest paid to foreign entities. Registration for WTI, submission and payment will only
be available via eFiling. - Before you can continue with the registration of WTI on eFiling, ensure that you are registered as an
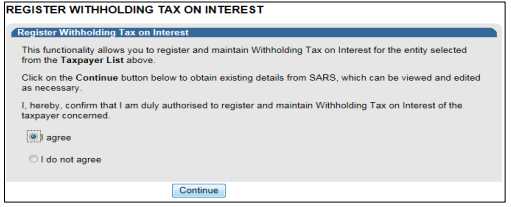
eFiling user and that your status is active. - The “Register Withholding Tax on Interest” functionality is hosted within the “SARS Registered
Details” option on eFiling. - Upon selecting “Register Withholding Tax on Interest, the disclaimer will display. Click “I agree” to
accept the disclaimer and click “Continue” button to proceed
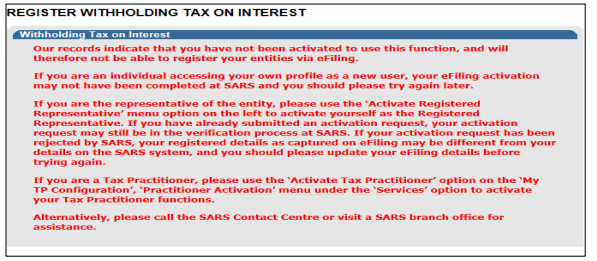
- In the case where representative is not active on eFiling, the practitioner access is not active or where
individual with a new eFiling profile is not active, the following message will display. Ensure that all
activations are completed prior to registering for Withholding Tax on Interest
- If all activations are correct, the Register Withholding Tax on Interest page will display. Select “Date of
Liability” and click “Register” to continue. If there is no Income Tax Reference number pre-populated,
complete the Income Tax Reference number before you proceed. - Note: The date of liability may only start from 1 March 2015 and may not be future dated.
- The following message will display if the registration was successful. Click “Continue” to proceed.
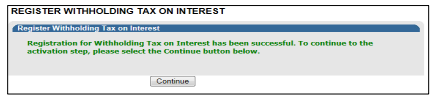
- The “Activation Withholding Tax on Interest” page will display. Check that all taxpayer details
displayed are correct. - If there are details that must be updated, click the “Update Details” button to update details
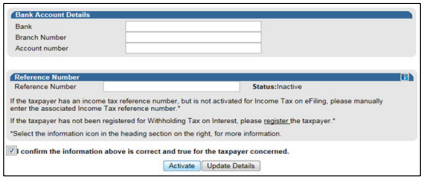
- If all information displayed is correct, click check box to confirm that all information is correct and true
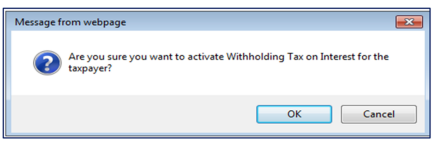
and click “Activate” to continue. - A confirmation message will display. Select “OK” to continue or “Cancel” to go back to the Activation
page.
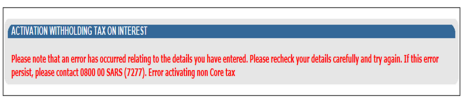
- If the taxpayer information details at SARS do not match the details submitted for the activation request,
the following error message will display. Ensure that you correct all information and re-submit the
activation request.
- Once the Activation of Withholding Tax on Interest is successfully activated, the status on the Activation
page will be updated to “Successfully Activated.
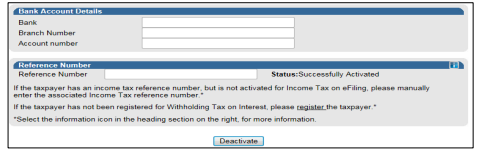
- To deactivate the WTI functionality on eFiling, click on the “Deactivate” button displayed in the above
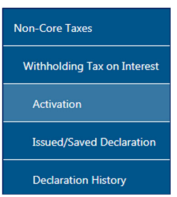
screen. A confirmation message to confirm the request will be received. - You can now select “Returns”, “Non-Core Taxes” and “Withholding Tax on Interest” option to submit
a declaration
- For the Organisations profile, ensure that Withholding Tax on Interest tax type is selected in the “Rights
Groups” functionality. - For more information regarding this process, the Withholding Tax on Interest external guide is available
on the SARS website www.sars.gov.za.
Definitions, acronyms and abbreviations
The definitions, acronyms and abbreviations can be accessed here – Glossary webpage.
Legal disclaimer: In the event of conflict or inconsistency between this webpage and the PDF version of the guide, the latter shall prevail.