
Summary
The purpose of this Webpage is to assist clients how to request and submit returns for Excise products
(focusing on local manufacturing declarations) on eFiling.
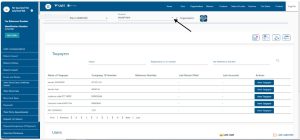
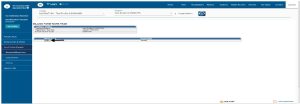
Portfolio Management
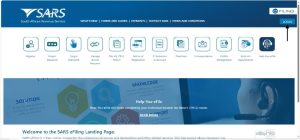
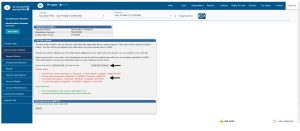
To access the SARS eFiling homepage, the client must:
- Go to www.sarsefiling.co.za on their internet browser.
- Click on Login.
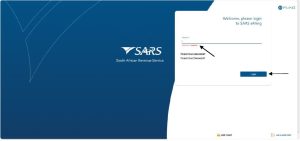
- Enter their username.
- Click on Next.
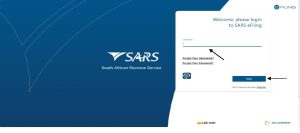
- Enter their password and click on Login.
- Once logged into SARS eFiling, the client must:
- Click on Duties & Levies.

- Click on the Portfolio drop down arrow to select the portfolio associated with their Excise products.
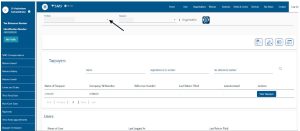
- Click on the Taxpayer drop down arrow to select the taxpayer linked to their Excise profile.
How to request a return
- Once the client has made the correct portfolio and taxpayer selections in Portfolio management, they can start the
process of requesting a return. This process is applicable for all excise products (except CEB01
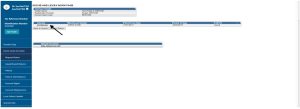
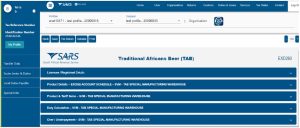
requests). The client must:- Click on Excise Levies & Duties.
- Click on Request Return.
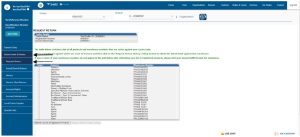
- Where specific excise product does not appear on the list provided, click on Refresh my list of
registered Products.
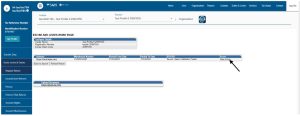
- Click on Select, at the radio button against the applicable industry and corresponding warehouse
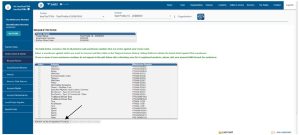
number. - Click on Request History Return Listing.
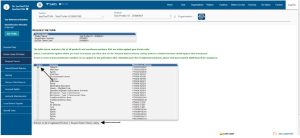
- Click on Select NEW.
- Click on Request Next Return.
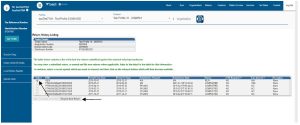
- The return has now been issued. The client must now click on the Industry hyperlink to generate the
return.
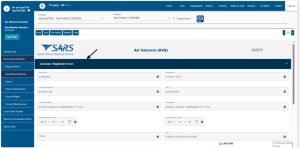
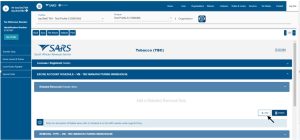
How to upload Comma-Separated Values (CSV) files
- Some excise products like Ad Valorem and the Health Promotion Levy on Sugary Beverages, require
CSV files to be uploaded before a requested return can be issued. When required to upload a CSV file,
the client must:- Click on Upload Data.
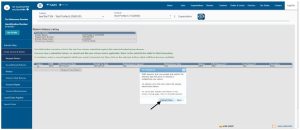
- Click on Choose File.
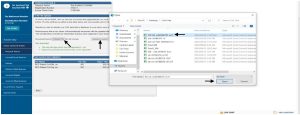
- Select the applicable CSV-file.
- Click on Open.
- Click on Upload and Submit.
- Where the upload had previously failed, choose a different CSV file or re-upload the amended
current file. - Click on Upload and Submit.
- Once the file has been uploaded successfully, click on the Industry hyperlink to commence capturing
the return.
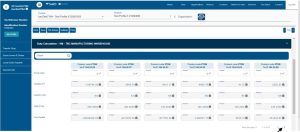
How to capture a return
- To commence capturing the return, the client must:
- Expand the Licensee/Registrant Details header to verify their registration details.
- Expand and collapse the following headers to verify their registered addresses as well as their
contact person’s particulars:- Licensee/Registrant Physical Address.
- Licensee/Registrant Postal Address.
- Particulars of Representative Person.
- Warehouse Physical Address.
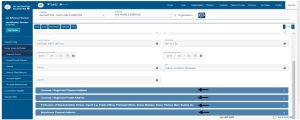
- The client must expand all applicable headers and capture all relevant information either by drop-down
list selection or insertion.
- Some excise products will require the client to:
- Add rebated removal items.
- Select the applicable rebate items via drop-down lists.
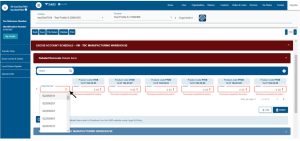
- Click on the “>” arrow to bring up the additional fields in order to capture more rebate items.
- When the capturing of all the rebate items is complete, the client click the save button to save the
return.
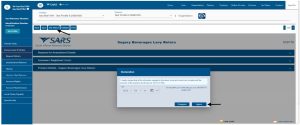
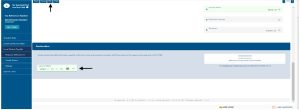
- A screen will appear to confirm that the return has been saved and provide the client prompts to
continue, - Click the Continue button, to access the return information captured.
- Click on the Industry hyperlink to activate the information captured. This will open up the
Declaration popup screen.

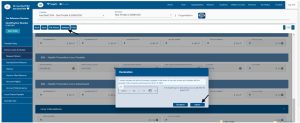
- Click on Validate to confirm that all information has been captured correctly.
- Click on Agree on the Declaration pop-up window.
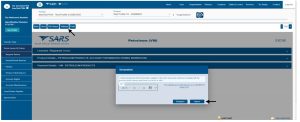
- Click on Continue.
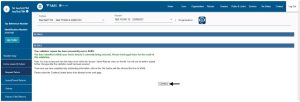
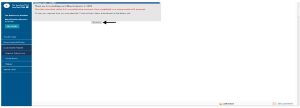
- If there were errors found in the return submission, the client must:
- Click on the View Errors hyperlink to analyse the errors found.
- Review the summary of the error(s) that require correction. These errors will be displayed in a
new window.

- Once all the errors have been corrected, click on Validate button thereafter a declaration pop up
window will open. Click on the Agree button to make the required declaration.
- Click on Continue.
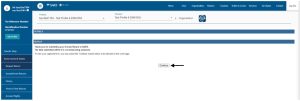
- Click on Back to Search once the return has been validated successfully.
- Click on File Return button then a declaration pop up window will open. Click on the Agree button
to make the required Declaration.
- Click on Continue.
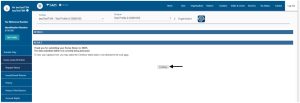
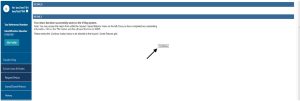
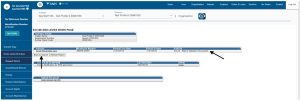
- The process is completed when the Status header reads Return Filed Successfully.
Request and submit of local manufacturing declarations – ZDP, ZGR and ZOL
(CEB01)
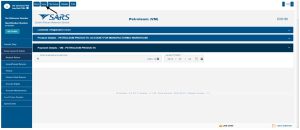
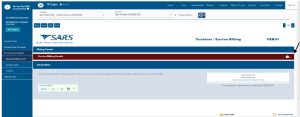
- To request and submit a CEB01 billing form, the client must:
- Click on Duties & Levies.
- Click on Local Duties Payable, and
- Click on Request Billing Form.
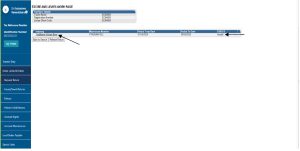
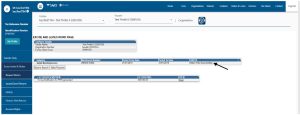
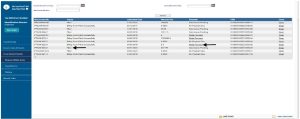
- The client must select the applicable billing form on the Industry, Warehouse Number and Action fields.
- The Status field indicates whether a billing form has already been issued to their profile.
- The following instructions applies to billing forms:
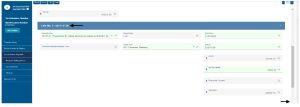
- If a billing form has already been issued, click on the Open hyperlink.
- If a billing form has not been issued, click on Request to request one from SARS.
- If a warehouse number(s) don’t appear on the list below, the client must make an appointment to
visit their nearest SARS branch for assistance.

- The client must click on the CEB01 hyperlink.
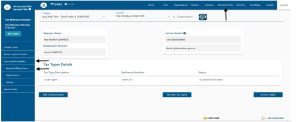
- To commence completing the form, the client must:
- Click on Excise Billing Details to expand its contents.
- Insert the Closing Date of the Account as well as the Due Date under the Excise Billing Details
ribbon. - Open the fields by clicking on the drop-down list and insertion under the Local Manufacturing
heading. - Scroll down to the Line No. 1 – SCH 1 P 2A heading.
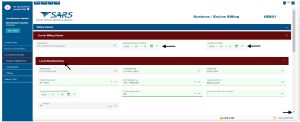
- Click the drop down list to open up the fields where the information will be captured. Capture all
information and under the Line No. 1 – SCH 1 P 2A heading. - Scroll down to the Declaration heading.
- Select the correct date under the Declaration heading.
- Click on the File button if satisfied that all information captured is correct.
- Click on Continue.
- The client will be able to keep track of the status of their return request as well as whether payment is
due. The client will be contacted by SARS to communicate the outcome of their request.
Definitions, acronyms and abbreviations
The definitions, acronyms and abbreviations can be accessed here – Glossary webpage.
Legal disclaimer: In the event of conflict or inconsistency between this webpage and the PDF version of the guide, the latter shall prevail.