
Summary
- The purpose of this webpage is to assist taxpayer to initiate a payment arrangement request on eFiling for outstanding debt.
- One of the 9 SARS strategic objectives is “Making it easy for Taxpayers to Comply” and in support of this objective, SARS digital channel (eFiling) has been enhanced with the functionality to enable Taxpayers to request Deferral Payment Arrangements.
- This functionality is available on eFiling website digital channel to allow the taxpayer to make a payment arrangement request without the need to visit a SARS branch or contact the SARS Contact Centre on 0800 00 7277.
Payment Arrangement Request Submission Process
- Log on to the SARS eFiling website and navigate to on eFiling where there is outstanding debt against an assessed return in order to initiate the payment arrangement request. Payment arrangement request can be initiated from any of the following places where there is outstanding debt and only one tax type request at a time will be allowed:
- Statement of account (SOA)
- SOA admin penalties
- Return Work-Page
- Notice of assessment
- Notice of Assessment for admin penalties
- My Compliance Profile (MCP) functionality
- Final demand letter
- Final demand reminder letter.
- Once a payment arrangement request has been initiated, eFiling will present the auto-simulated payment plan defaulted to 6 months to either accept, save, cancel or propose different terms;
- Accept – If you accept the simulation, you make a declaration that you have read and understood the agreement by selecting the checkbox. After that a check will be done to see if there is supporting documents required.
- Save – If you save, the simulation will be saved and you will be able to view the simulation at a later stage ( before midnight). The simulation will only be saved up until midnight. If the payment arrangement request is not finalised before midnight, the simulation will be discarded and a re-simulation will be required.
- Cancel – If you cancel the auto-simulation, it will be discarded/deleted, and you will have to start the process from beginning if you want to request a payment arrangement.
- Propose different terms – If you propose different terms, you will be asked to provide the payment term and the first instalment start date.
- A series of primary validation checks will be done against the taxpayer’s reference number and the tax type when initiating a payment arrangement request. If any of these validations fail, the taxpayer will be prevented from proceeding with the request, and the applicable validation error message(s) will be displayed on eFiling.The taxpayer will then have to contact SARS in order to rectify the error. These validation checks include the following:
- Where a taxpayer has outstanding return(s)
- Where a taxpayer has a pending approval payment arrangement request OR an active payment arrangement request for the tax type in question
- Where taxpayer has no debt / debit balance or has an unallocated credit on the account
- Where a taxpayer has defaulted a previous payment arrangement
- Taxpayer marked as “Address Unknown”, “Estate” or ‘Inactive’ deregistered or untraceable.
Payment Arrangement Functionality
- The payment arrangement request functionality will be made available across all portfolio types, being the Individual, Tax Practitioner and Organisation portfolio and will be limited to these tax types:
- Personal Income Tax (Assessed Tax / Admin Penalties)
- Company Income Tax (Assessed Tax / Admin Penalties, Dividends Withholding Tax)
- Trust (Assessed Tax / Admin Penalties)
- Pay As You Earn (PAYE)
- Unemployment Insurance Fund (UIF)
- Skills Development Levy (SDL)
- Value Added Tax (VAT)
- A new button labelled “Payment Arrangement” to initiate the payment arrangement request has been added to the following areas on eFiling, where there is outstanding debt:
- Statement of Account (Assessed Tax / Admin Penalties)
- Notice of Assessment
- Notice for Admin Penalties
- Work Page
- My Compliance Profile (MCP)
- Final demand letter / reminder.
Initiate Payment Arrangement Request
Access Payment Arrangement from notices
- Once you have successfully logged onto eFiling, follow the steps below to access the payment
arrangement button either from Statement of Account, Notice of Assessment or Notice for Admin Penalties.- Select <Returns> from the menu on the top.
- Select <SARS Correspondence> from the menu on the left.
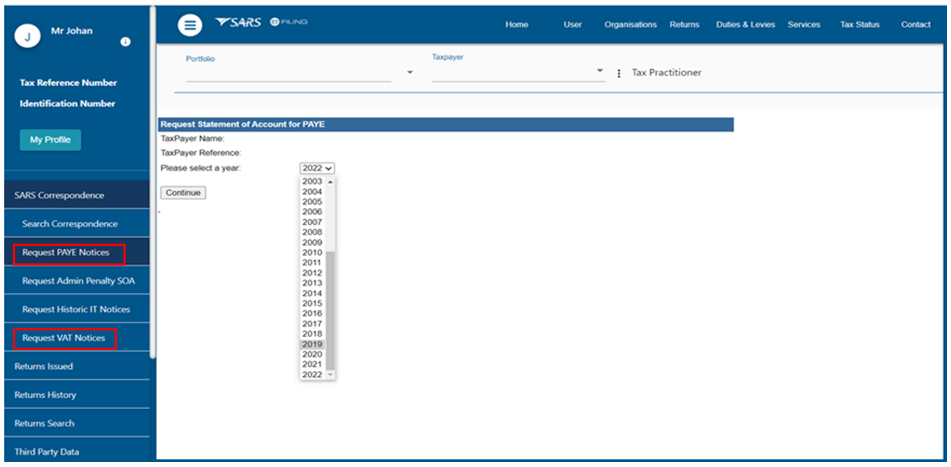
- Select either one of the notices from the menu:
- <Request PAYE Notices>
- <Request Admin Penalty SOA>
- <Request Historic IT Notices >
- <Request VAT Notices>

- For PAYE and VAT Notices:
- Select <Request VAT Notices or <Request PAYE Notices>
- Select the period, for which you would like to receive your Statement of Account.
- Click <Continue>
- For PAYE and VAT Notices:
- Select <Start period> and <End Period>
- Click <Submit>
- Click on the link to view statement of Account or Account.
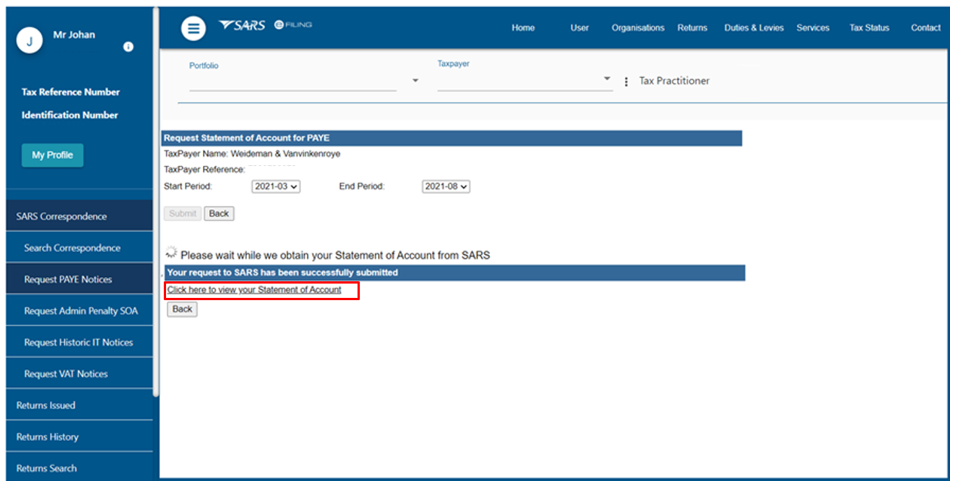
- Click <Payment Arrangement> button from statement of Account to initiate payment arrangement request.

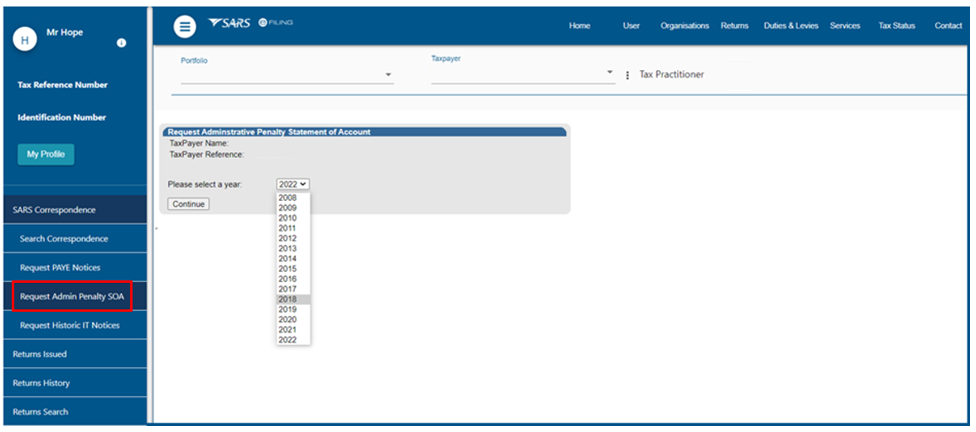
- For Admin Penalty Notices:
- Select <Request Admin Penalty SOA>
- Select the period, for which you would like to receive your Statement of Account.
- Click <Continue>
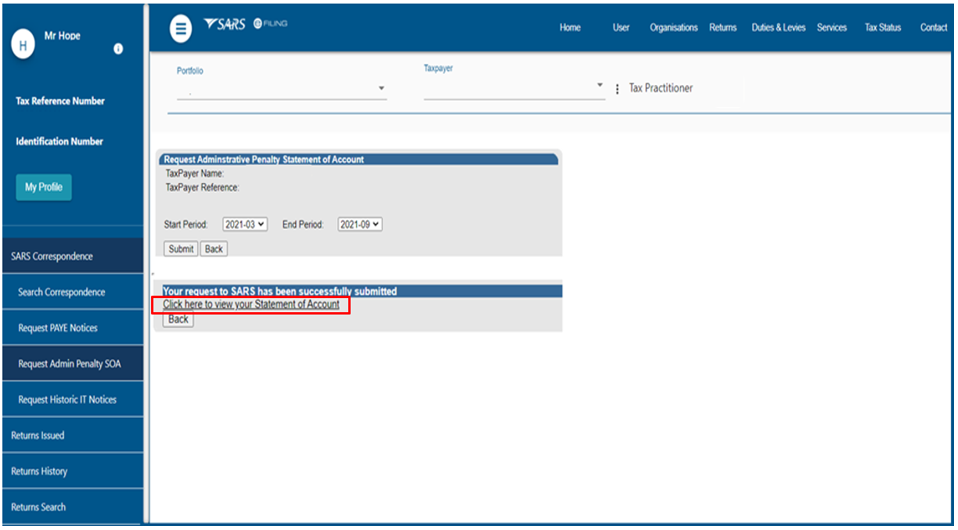
- For Admin Penalty Notices:
- Select <Start period> and <End Period>
- Click <Submit>
- Click on the link to view statement of Account.
- Click <Payment Arrangement> button from statement of Account to initiate payment arrangement request.
- Click <Payment Arrangement> button from statement of Account to initiate payment arrangement request.

- For Income Tax Notices:
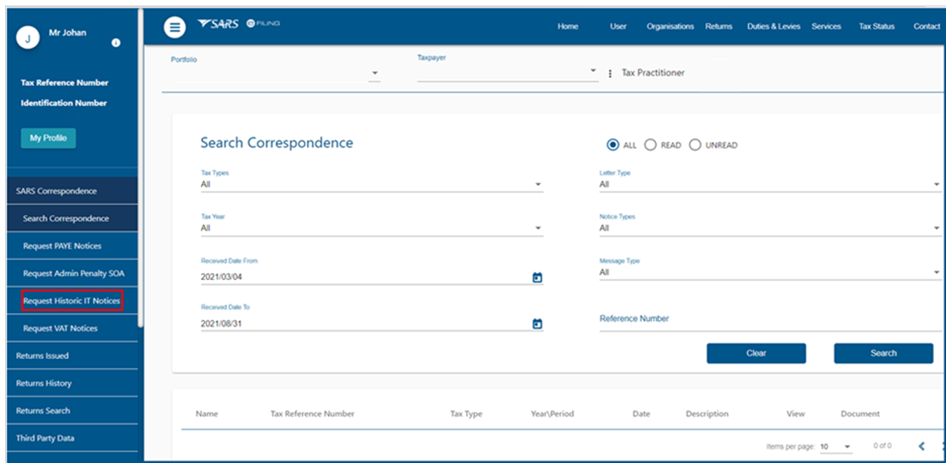
- Select <Request Historic IT Notices >
- Select <Notice of Assessment or Statement of Account >
- Click <Next>
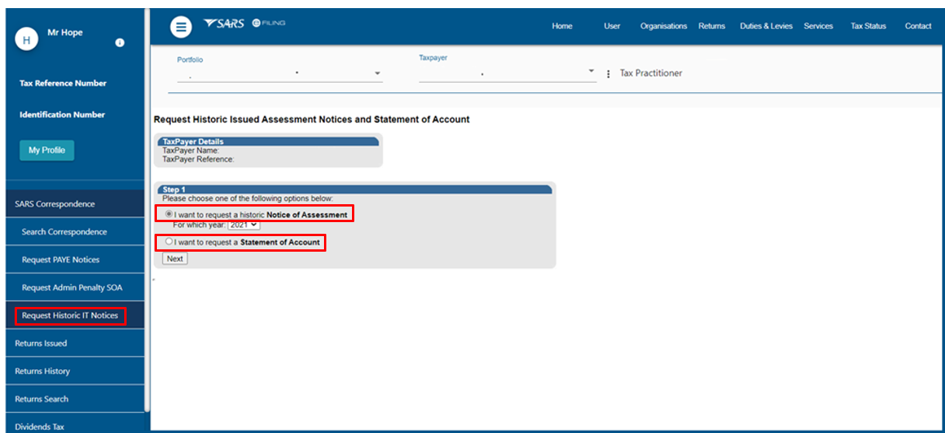
- Select the period for which you would like to receive your Notice of Assessment or Statement of Account.
- Click <Request>
- Click on the link to view the statement of Account or Notice of Assessment.
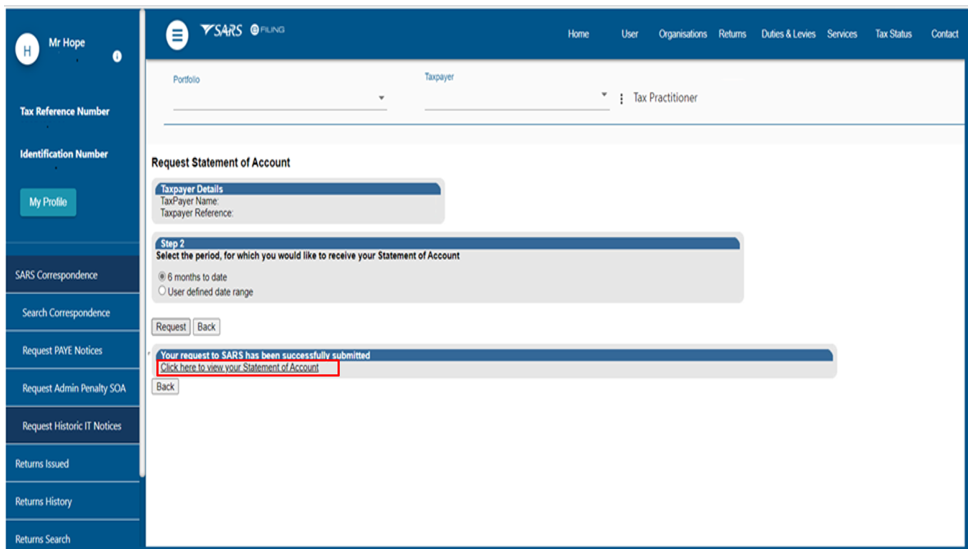
- Click <Payment Arrangement> button from statement of Account or Notice of Assessment to initiate payment arrangement request.

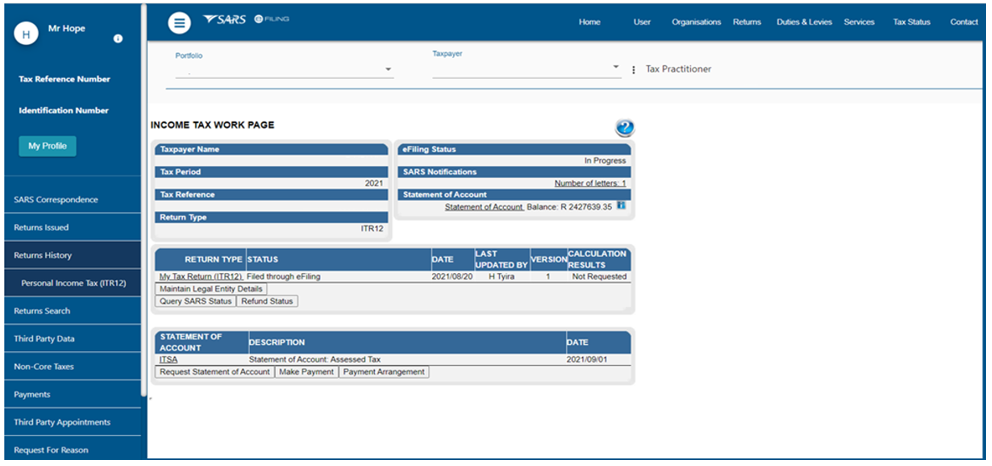
Access Payment Arrangement from Work Page
- Follow the steps below to access your payment arrangement button from work page:
- Select <Returns> from the menu on the top.
- Select <Returns History> from the menu on the left.
- Select the type of return.
- Click <Open> – this option will take you to the income tax work page.
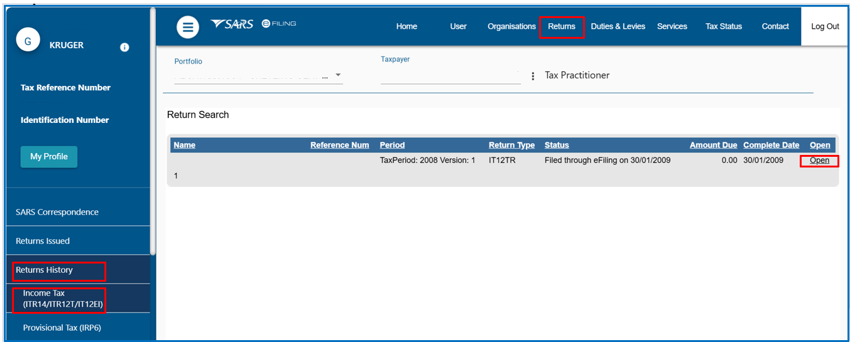
- Click <Payment Arrangement> button to initiate payment arrangement request.
Access Payment Arrangement from My Compliance Profile
- Follow the steps below to access your payment arrangement button from My Compliance Profile (MCP):
- Select <Tax Status> from the top menu.
- Select <Tax Compliance Status> from the menu on the left.
- Select <My Compliance Profile> – this option will take you to the MCP dashboard with the following status indicators(colours):
- Green – shows that the taxpayer is tax compliant
- Red – shows that the taxpayer is non-compliant

- Select the expand buttons
 on the left-hand side of Debt, more information regarding the compliance status will be displayed.
 - Select <Tax Type> with a red indicator.
- Select < Tax Reference number>
- Select the expand buttons
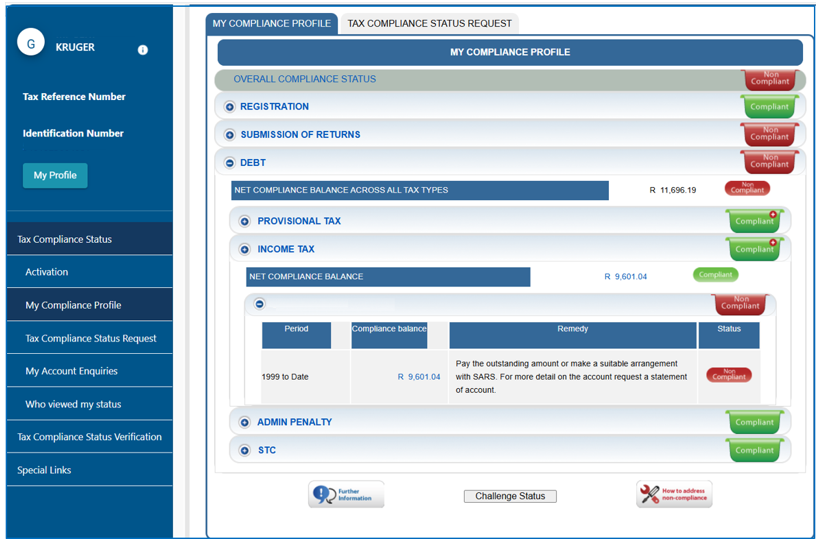
- Hover over the <Non-compliant> indicator and message will be displayed informing the taxpayer what to do next to address the specific non-compliance. – this option will take you to the payment arrangement page.
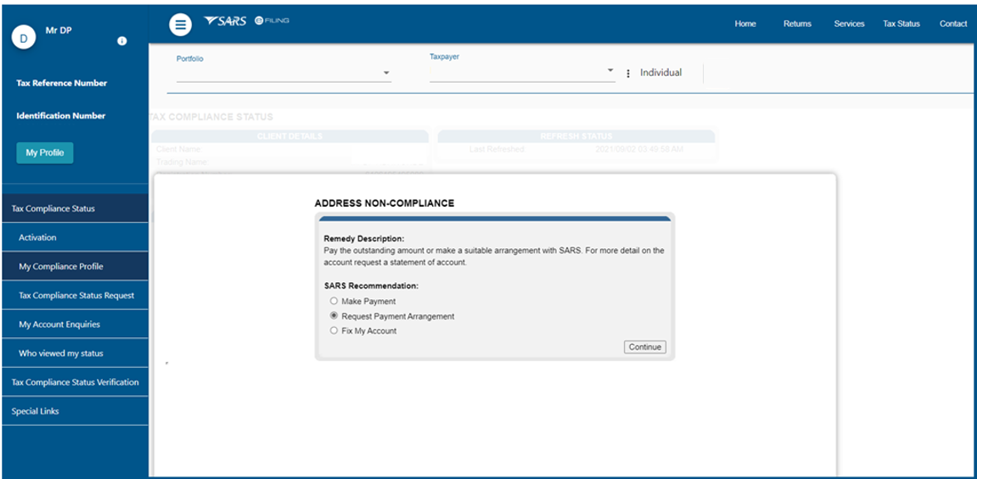
- Select<Request Payment Arrangement>
- Please note that the Request Payment Arrangement option is not available for Trust Admin Penalties on MCP.
- Select<Request Payment Arrangement>
Access Payment Arrangement from final demand letter / Reminder
- Follow the steps below to access your payment arrangement button from the final demand letter:
- Select <Returns> from the menu on the top.
- Select < SARS Correspondence> from the menu on the left.
- Select < Search Correspondence>
- Click <View> – this option will take you to the final demand letter / reminder.
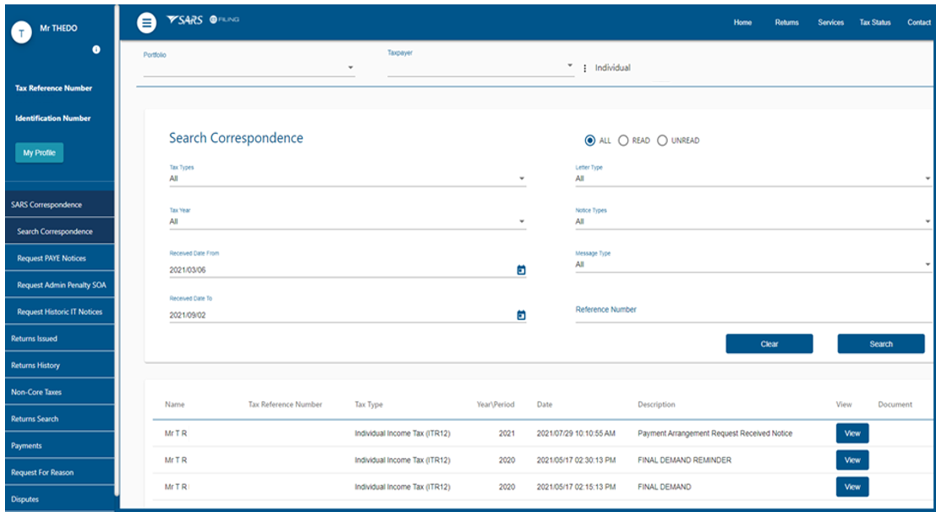
- Click <Make Payment Arrangement>

Capture Payment Arrangement
Simulated Payment Arrangement Plan
- After selecting the Payment Arrangement button where outstanding debt is indicated, choose the relevant tax type and click Continue to proceed.
Note: A payment arrangement can only be created for one tax type at a time, multiple tax types cannot be included in a single request.
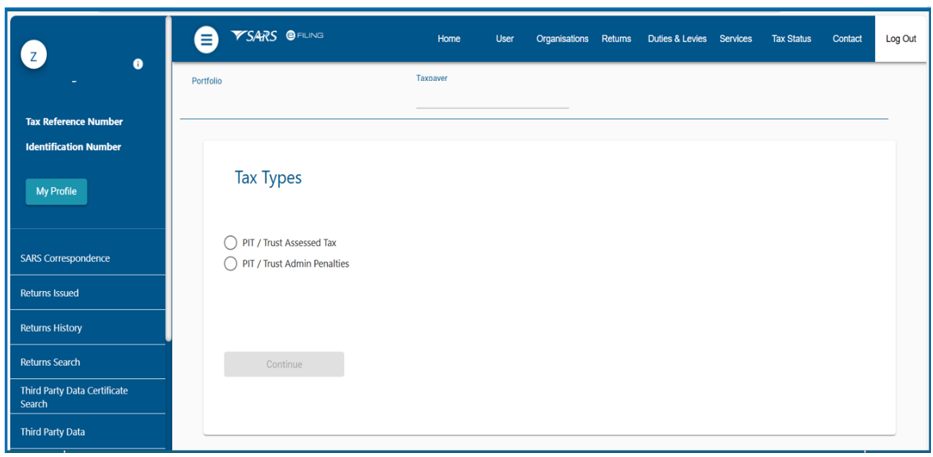
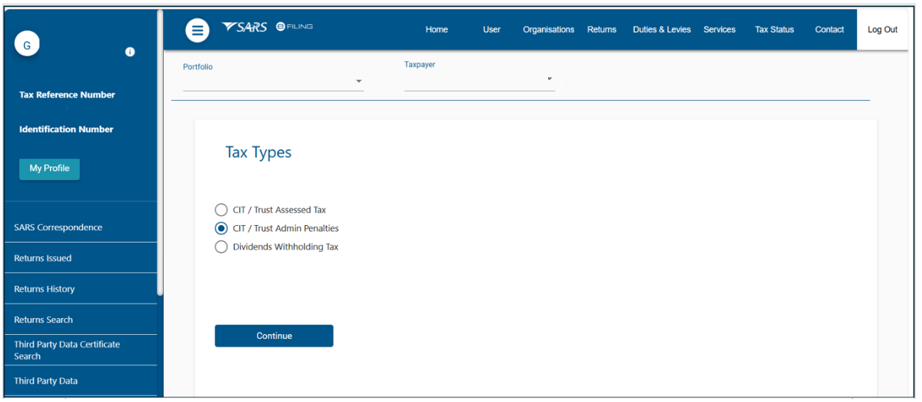
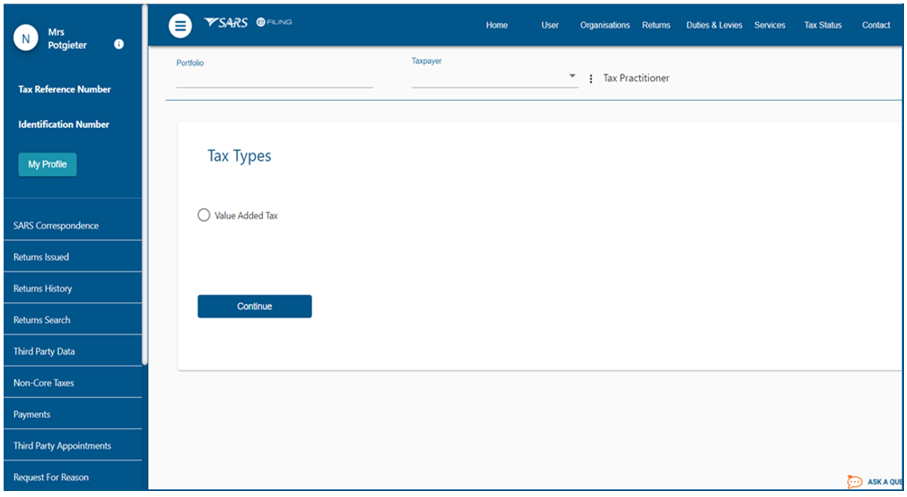
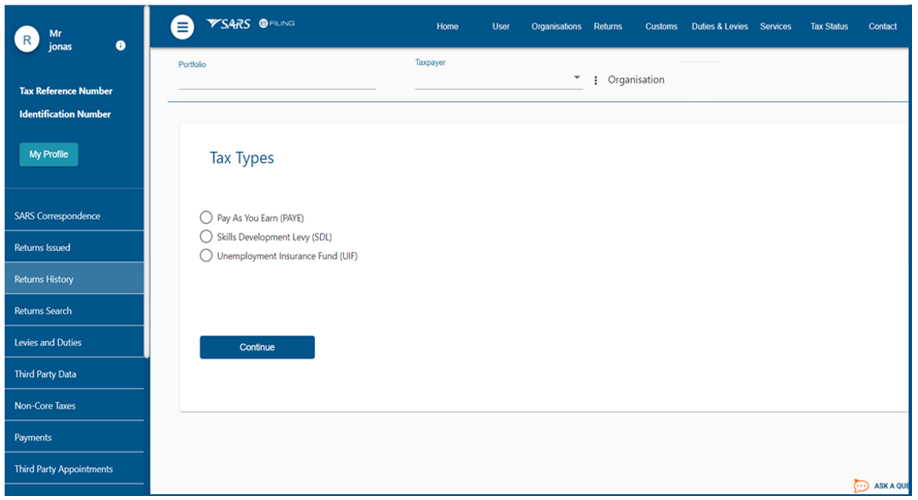
- The next screen will display the available tax type for selection:
- PIT and Trust Tax Types:
- CIT and Trust Tax Types:
- VAT Tax Type:
- PAYE Tax Type:
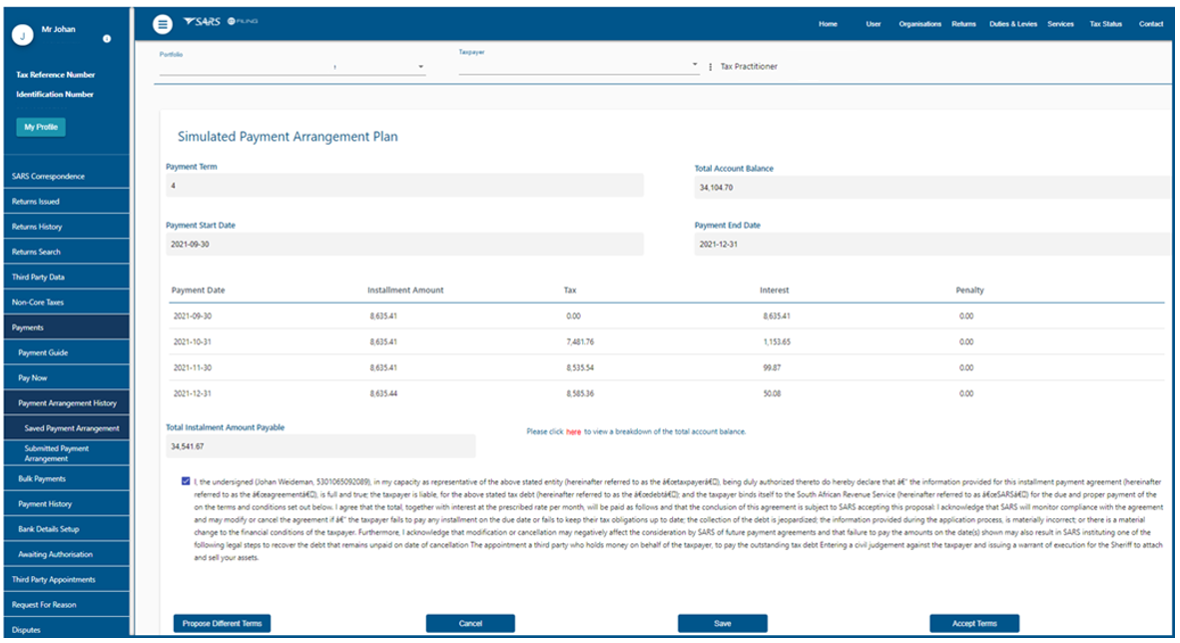
- After selecting the tax type and clicking Continue, the system will display an auto-simulated payment arrangement plan, which is set to a default period of 6 months. You will then have the options to Propose Different Terms, Cancel, or Save the auto-simulated plan.
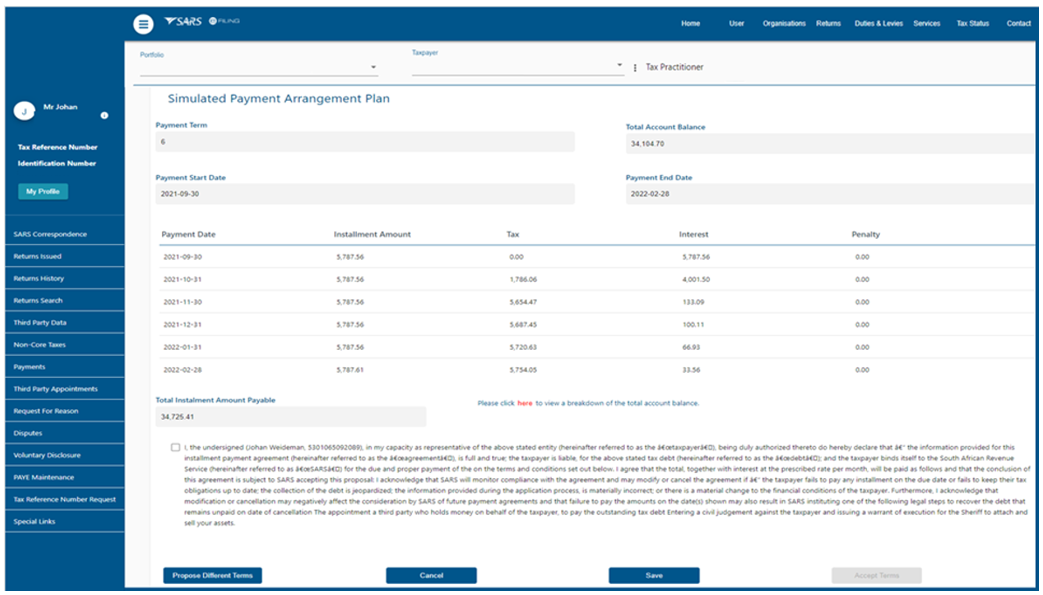
- Follow the steps below to continue with the auto simulated payment arrangement plan:
- Verify the following information displayed on the auto simulated payment arrangement plan:
- Payment term.
- Total Account Balance.
- Payment start date and payment end date.
- Payment date.
- Instalment amount.
- Tax, Interest, Penalty.
- Total Instalment Amount Payable.
- The Auto Simulated Payment plan will display the following buttons for selection:
- Propose Different Terms – If you select this option, you will be asked to provide the payment term and the first instalment start date.
- Cancel – If you cancel the auto-simulation, it will be discarded/deleted, and you will have to start the process from beginning if want you to request a payment arrangement.
- Save – If you select this option, the simulation will be saved and you will be able to view the simulation at a later stage, provided that it has not expired.
- Accept Terms – If you select this option, you are accepting the auto simulated payment arrangement plan and you make declaration that you have read and understood the agreement. The “Accept Terms” button will be disabled until you have acknowledged the “Agreement Details”.
- Click the “Agreement Details” checkbox if you accept the auto simulated payment arrangement plan.
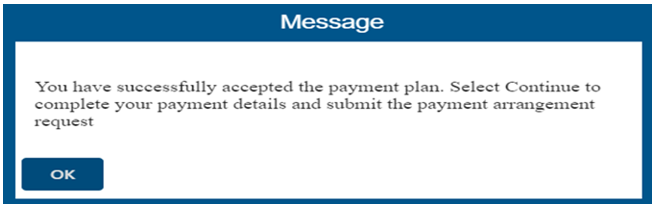
- Select < Accept Terms > – the following pop-up message will display if there is no supporting documents required.
- Verify the following information displayed on the auto simulated payment arrangement plan:
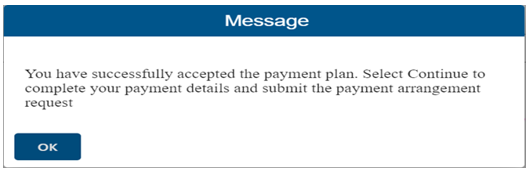
- Click on <OK> this option will take you to section Capture Payment Arrangement Details to capture your payment arrangement details.
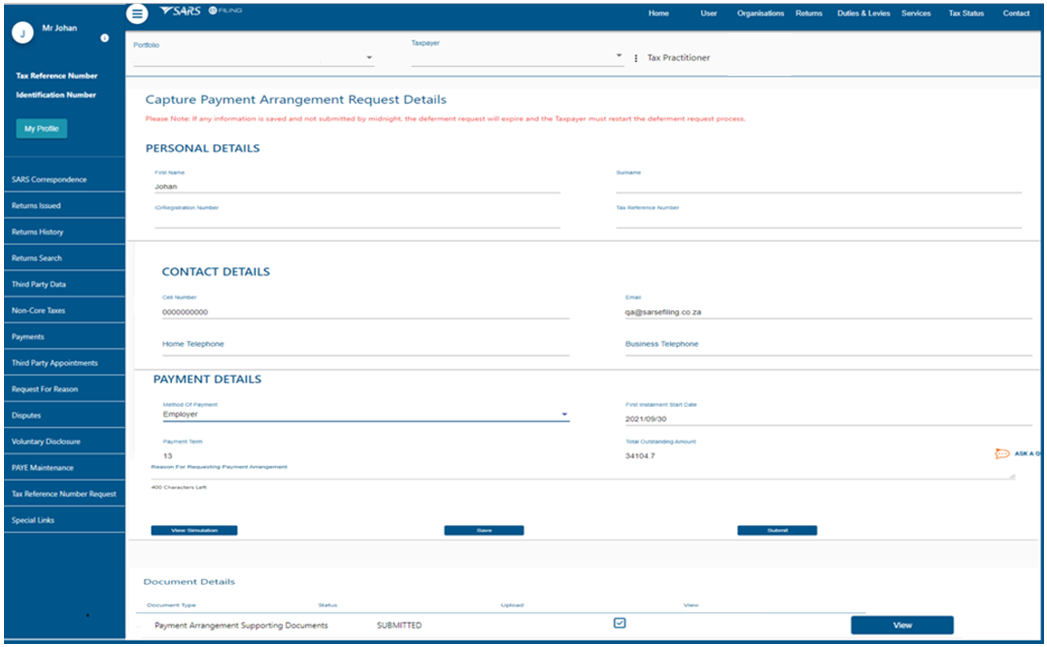
Capture Payment Arrangement Details
- After you have accepted the auto simulated payment arrangement plan, you will be redirected to this screen which will be prepopulated with your demographic details:
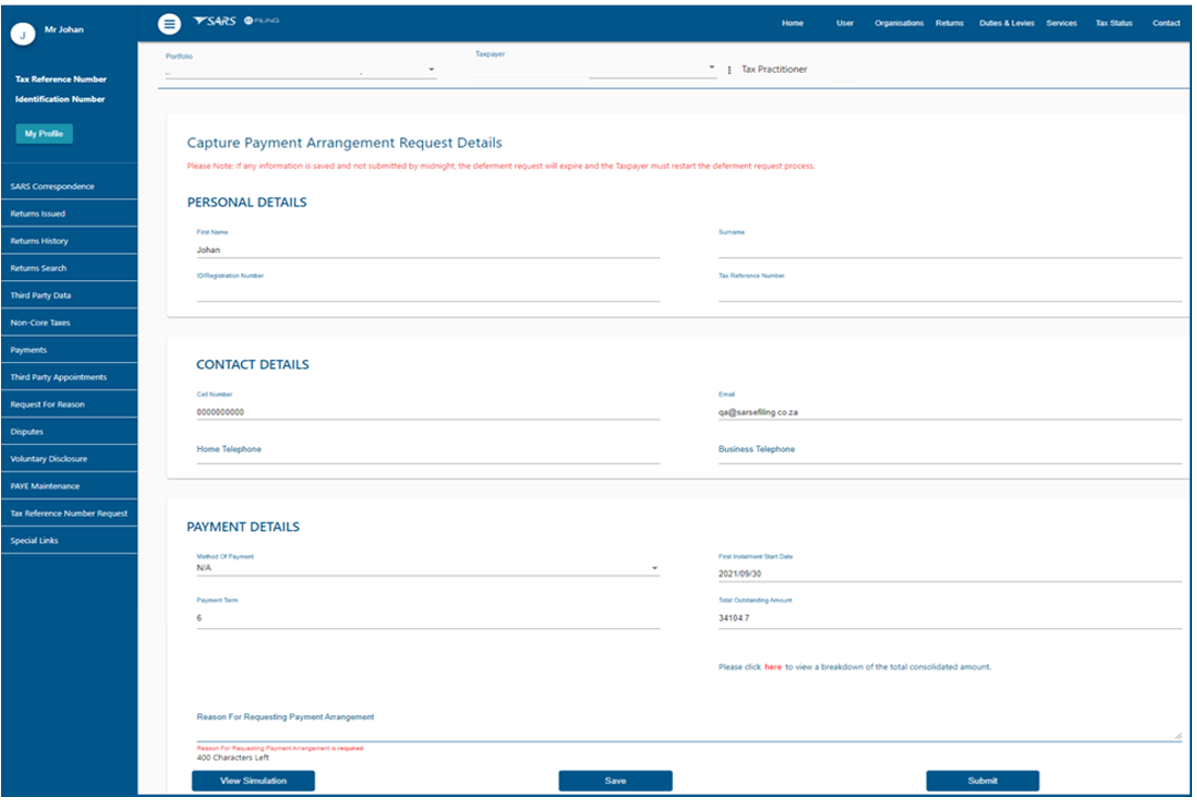
- Cell-phone Number – Enter the cell phone.
- Email Address – Enter valid email address.
- Method of Payment – Click on the dropdown, then you will be presented with the following method of payment to select:
- Debit Order – This debit order option does not send the payment instruction to your bank. You are required to make arrangements with your banking institution and load the debit order instruction in favour of SARS. If this option is selected, the captured banking details will be validated using the Account Verification System (AVS). You will not be allowed to submit the payment arrangement request if the captured banking details was not successfully validated.
- EFL ( eFiling) – If this option is selected, a check will be done to determine if there is banking details set-up on the profile. If there is no banking details set-up, you will be required to setup your bank details to make payment on eFiling. Refer to GEN-ELEC-11-G01-Guide-to-Bulk-and-Additional-Payments-on-eFiling-External-Guide
- EFT (Electronic Funds Transfer) – if this option is selected you will not be expected to capture any additional details relating to this option.
- Employer – If this option is selected, you will required to complete your Employer Name and Employment number, the rest of the other fields will be prepopulated based on your demographic details.
- Third Party – If this option is selected, you will be required to complete the Third Party Name and unique number, the rest of the other fields will be prepopulated based on your demographic details.
- Reason for requesting for payment arrangement – Capture the reason for requesting payment arrangement.
- The following buttons will be available on the payment arrangement details screen:
- Submit button: – Selecting this button will submit the information displayed. This button will be available provided there is no supporting documents required, and all the mandatory payment arrangement details have been completed.
- Save button: – Selecting this button will direct you to the saved payment arrangement grid. The simulation will be saved and can be viewed at a later stage, provided it has not expired.
- View Simulation button: – Selecting this button will take you to the simulated payment arrangement plan screen, and the simulation that has already accepted will be loaded.
- Click <Submit> you will be presented with the confirmation message that you have successfully submitted the Payment Arrangement Request.
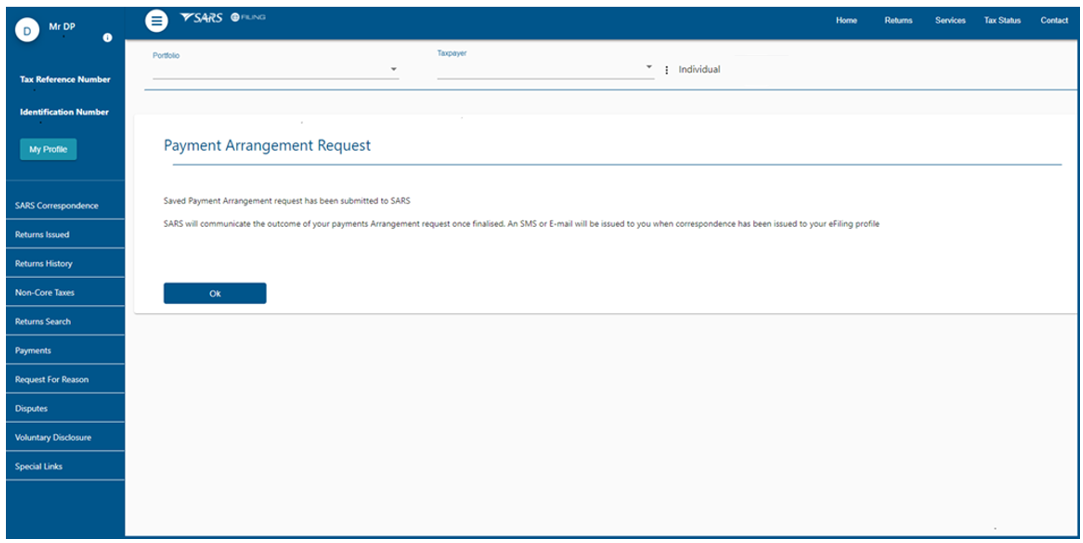
- Select <Ok> on the confirmation message, you will be redirected to the payment arrangement history screen to view the status of the payment arrangement request submitted.
Propose Different Payment Terms
- When you select the “Propose different Terms” button a page will be displayed where you may update the payment term value and choose to include / exclude the “debt not yet due” amount as part of the resimulation.
- Select <Propose Different Terms>

- Select <Payment Term > select any value from 1 month to 36 months.
- Select the checkbox < Include> – Selecting this button will give you the option of choosing to include / exclude the “debt not yet due” amount as part of the re-simulation.
- Click <Continue> – this option will take you to the proposed payment arrangement plan.
- Select <Check box> – by clicking on the checkbox you accept the proposed simulation payment arrangement plan and make a declaration that you have read and understood the agreement.
- Select < Accept Terms > Selecting this button will trigger either one of the messages:
- 1st message: >this message will display when supporting documents are not required, click OK button you will be redirected to capture your payment arrangement details.
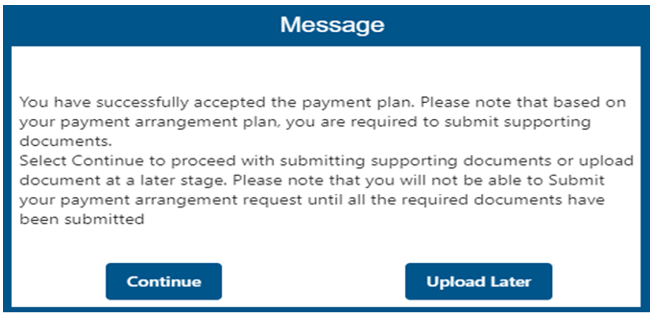
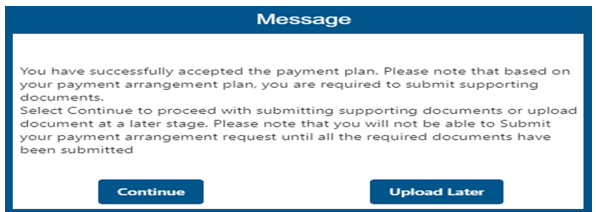
- 2nd Message: >this message will display when supporting documents are required:
- Continue – by selecting this button you will be redirected to supporting documents screen so that you can upload and submit supporting.
- Upload Later – by selecting this button you will be redirected to saved payment arrangement screen to upload document at a later stage.
- 2nd Message: >this message will display when supporting documents are required:
Submit Supporting Documents
- When you accept the simulation, a check will be done to see if supporting documents are required:
- If supporting documents are required, a message will be displayed. Please use the supporting documents functionality to upload the requested information, as indicated below. Once submitted, you will be able to complete the payment arrangement details so that the request can be finalised. You can choose to upload supporting documents at a later stage, however, the payment arrangement request will not be finalised without supporting documents been uploaded.
- If there is no supporting documents required, you will proceed to complete the payment arrangement request details and submit once all the mandatory fields have been captured.
- The required supporting documentation includes, but is not limited to:
- For Company / Close Corporation / Trust / Sole Proprietor/ Partnership
- Copies of bank statements for the past three months
- Cash flow statement for the next 12 months
- Previous three-year financial statements (where applicable, dependant on the request)
- Management accounts from last financial statements up to date
- A detailed asset register including disposals for the last 3 years.
- Detailed list of debtor and creditor’s analysis.
- For Individual (salary income)
- Copies of bank statements for the past six months
- Copy of most recent payslip
- Proof of outstanding accounts.
- For Company / Close Corporation / Trust / Sole Proprietor/ Partnership
- Follow the steps below to upload and submit supporting documents after selecting continue from this message:
- Select <Continue>
- Capture the following payment arrangement request details:
- Cell-phone Number
- Email Address
- Method of Payment
- Reason for requesting for payment arrangement.
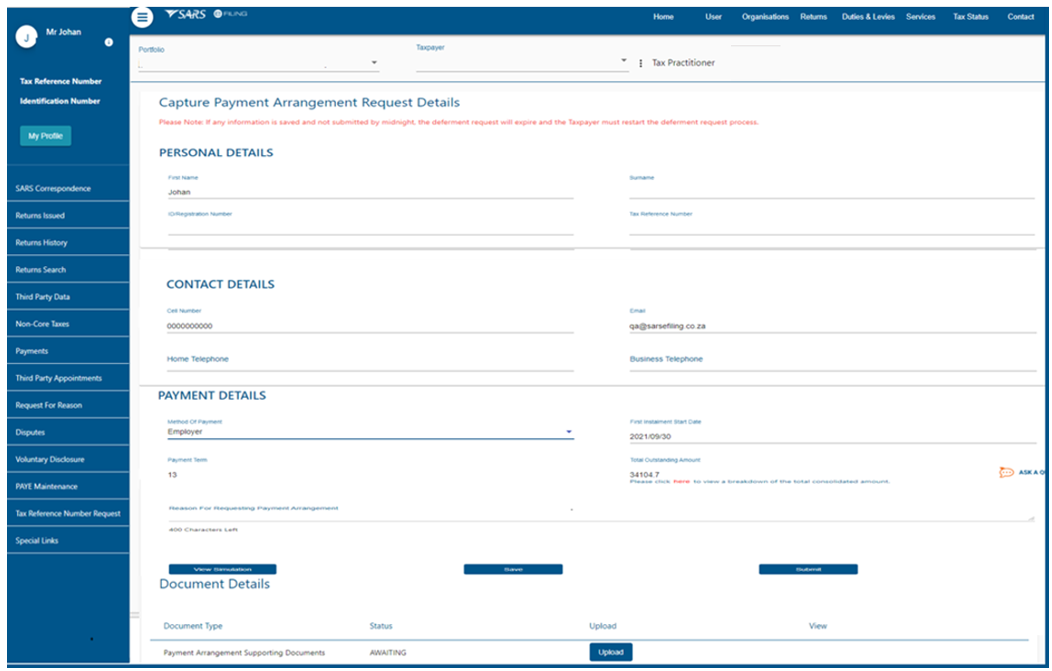
- Select <Upload> button on the payment arrangement request details screen, this option will take you to upload documents screen.
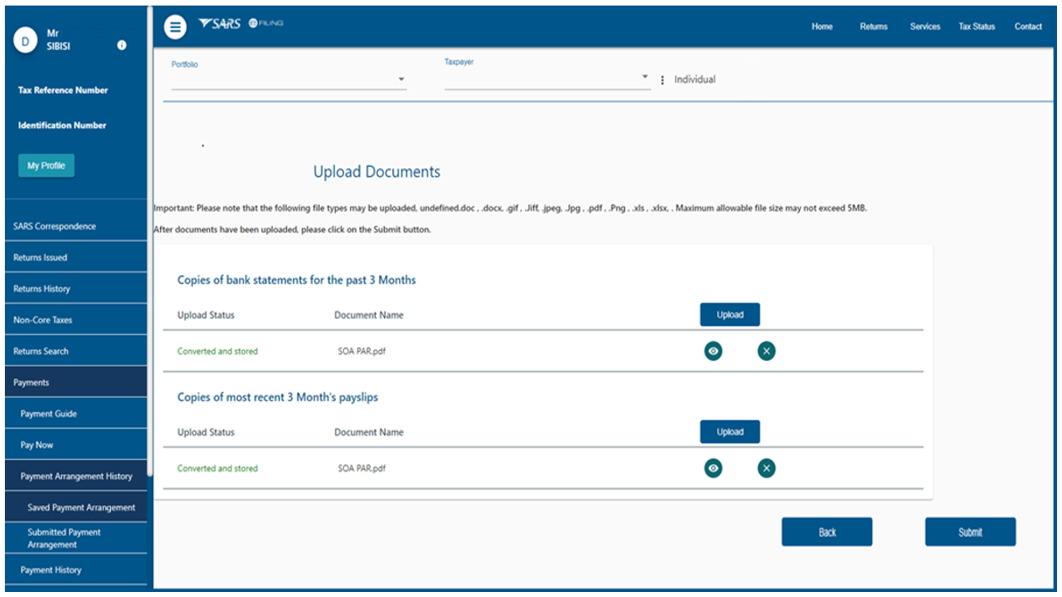
- Select <Upload>
- Browse for the file on your computer to select the documents to be uploaded.
- Upload the supporting documents.
- Select <Submit> by selecting this button a confirm submission message will display.
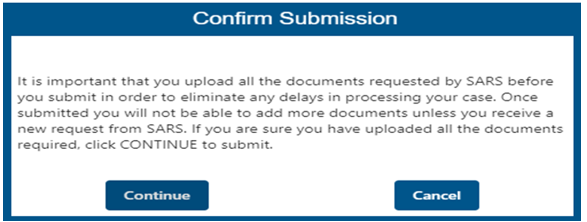
- Select <Continue> by selecting this button you will be redirected to the payment arrangement request details screen to view the supporting documents uploaded.
- Click <View> to check if you have uploaded the correct documents.
- Click <Submit> if the correct documents are successfully uploaded, by selecting this button you will be redirected to the confirmation screen indicating that the payment arrangement request has been submitted to SARS.
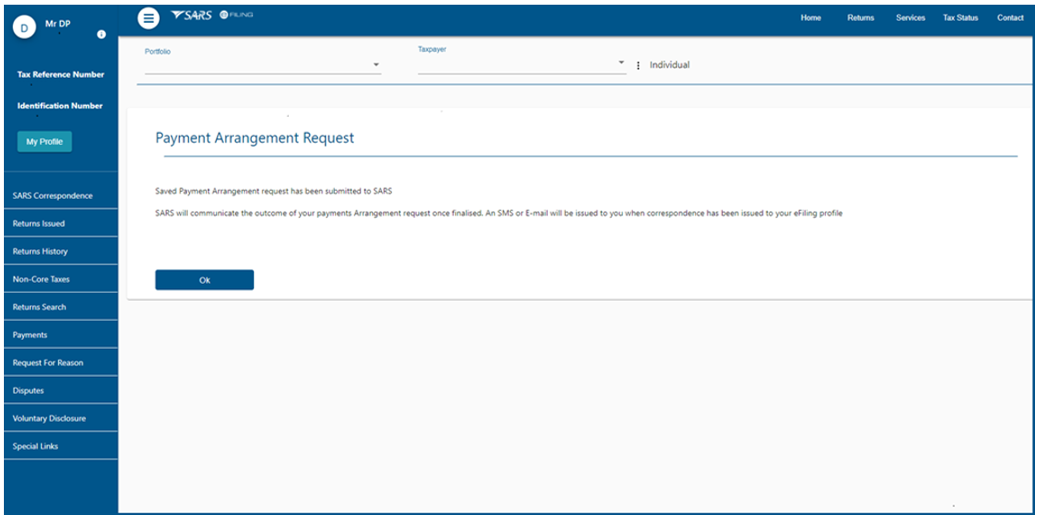
- Click <OK> by selecting this button you will be redirected to the submitted payment arrangement history screen:
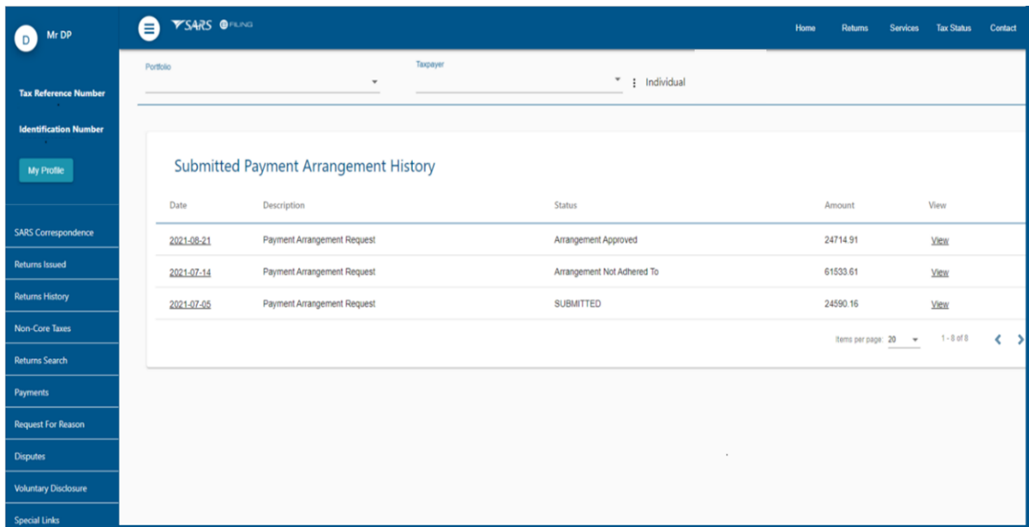
View History of Payment Arrangement Requests
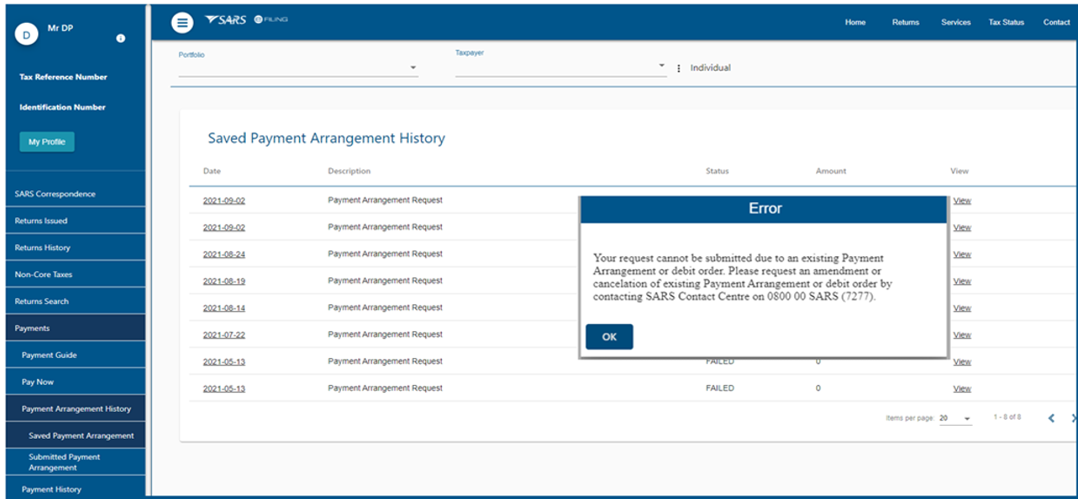
- A list of all the payment arrangement requests saved and successfully submitted will be available under the following grids:
- Saved Payment Arrangement History – this grid will display payment arrangement requests where a “SAVED” button, “Upload Later” button or where there was failed validations.
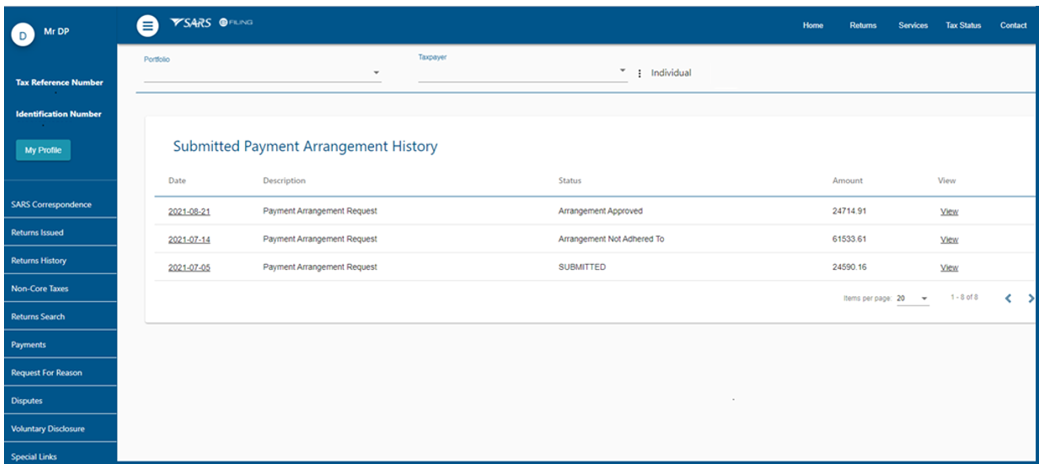
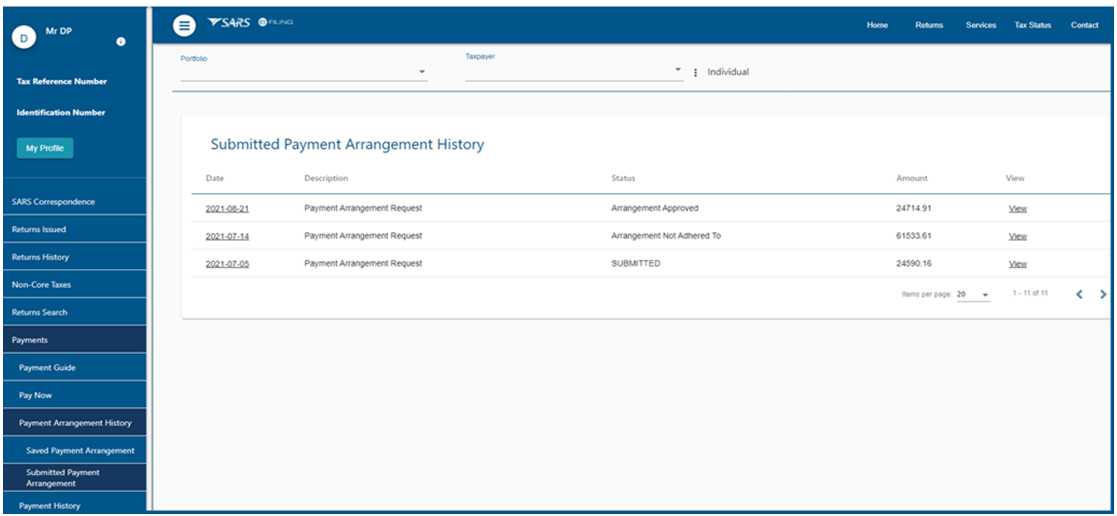
- Submitted Payment Arrangement – this grid will display payment arrangement requests with the following the following status:
- Submitted;
- Arrangement Approved;
- Arrangement Terminated;
- Arrangement Declined;
- Arrangement Finalised;
- Arrangement Not Adhered To.
- Follow the steps below to view saved payment arrangement requests:
- Select < Returns> top menu item
- Select <Payment> side menu item
- Select <Payment Arrangement History> sub-menu item
- Select <View >hyperlink on the Payment Arrangement Request page to view the appropriate error validation message.
- Follow the steps below to view submitted payment arrangement request:
- Select < Returns> top menu item
- Select <Payment> side menu item
- Select <Submitted Payment Arrangement> sub-menu item
- Select <View >hyperlink on the Payment Arrangement Request page to view the details of the payment arrangement.
- Note
- The taxpayer will not be able to cancel a payment arrangement request once it has been submitted.
- Note
Definitions, acronyms and abbreviations
The definitions, acronyms and abbreviations can be accessed here – Glossary webpage
Legal disclaimer: In the event of conflict or inconsistency between this webpage and the PDF version of the guide, the latter shall prevail.