
Summary
The South African Revenue Service (SARS) has introduced the Global Minimum Tax (GMT) as part of South Africa’s implementation of the Global Anti-Base Erosion (GloBE) framework.
Registration for the Global Minimum Tax must be completed on the SARS eFiling system using the Registration, Amendments and Verification (RAV01) form. The RAV01 form enables a Domestic Constituent Entity (DCE), through its Registered Representative, to perform the following functions on eFiling via the GMT RAV01 form:
- Subscribe to the Global Minimum Tax (GMT) tax product.
- Deactivate an active GMT tax product subscription.
- Reactivate a previously deactivated GMT tax product subscription.
- Amend GMT subscription information.
- Submit GMT Notification Form.
- Request correction against a submitted GMT Notification.
The Registered Representative must first activate their profile on eFiling before subscribing to a tax product and updating the taxpayer’s registered particulars using the RAV01 form.
Registered Representative
A Registered Representative is a person who is appointed with full rights to act on behalf of the Legal Entity (e.g. Companies, Trusts, etc.). A Legal Entity can only have one Registered Representative.
Note: An Accountant or Tax Practitioner cannot be appointed as a Registered Representative unless they are an employee of the legal entity.
The following capacities are regarded as authorised representatives:
- Public Officer,
- Accounting Officers,
- Main Partner,
- Main Trustee,
- Treasurer,
- Administrator, and
- Executor / Curator.
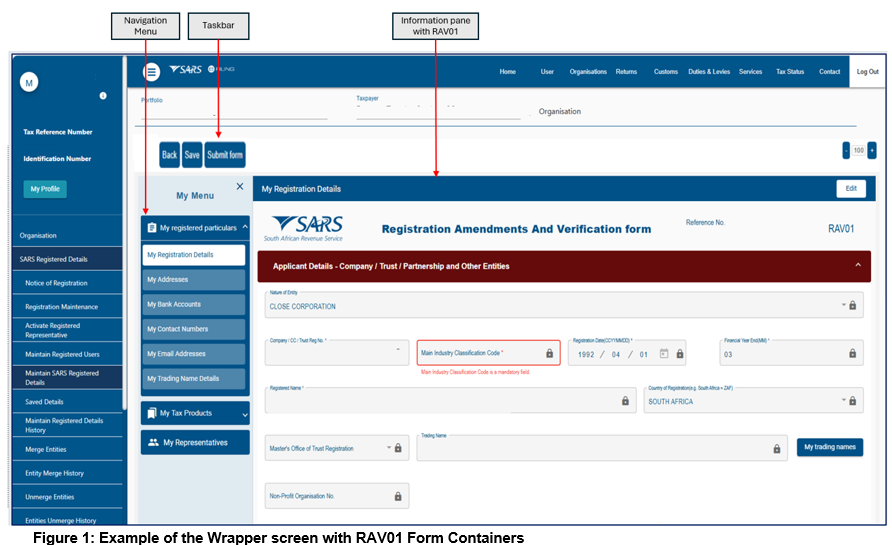
Introduction to the Wrapper Application
- The wrapper application serves as a navigation platform enabling users to interact with RAV01.
- The application wrapper can present two distinct types of screens: the form screen and the wrapper screen.
- Wrapper screens provide information about various sections within the legal entity profile. Users may navigate between wrapper screens using the menu. Actions are initiated from these screens.
- The Wrapper screen consists of the following components:
- Navigation Menu which allows the user to navigate between the various sections of the legal entity profile
- Taskbar which contains action buttons that may be activated by the user.
- Back – This button allows the user to go to the previous page. All changes made will be discarded.
- Save – This button allows the user to save the changes made in a temporary state for later completion.
- Submit form – This button allows the user to submit the changes made for update on SARS.
- Edit – Once the “Edit” button has been selected, you will be allowed to proceed with the relevant changes.
- Information pane which displays a predetermined section of the legal entity profile. The information pane may display either:
- A table showing a summary view of an information set e.g. the set of Bank Accounts linked to the legal entity profile.
- A set of RAV01 form containers to display a particular portion of the legal entity profile e.g. the legal entity registered particulars.
- The Navigation Menu – allows the user to navigate between the various sections of the legal entity profile. The full set of menu options available in the menu are as follows:
- My Registered Particulars – consists of the demographic details of the entity and has the following sub-categories
- My Registration details>My Addresses>My bank accounts>My Contact Numbers>My Email Addresses>My Trading Name Details.
- My Tax Products – The WRAV01 allows users to manage all tax products that are linked to the entity. Click “+” sign to view the following tax products:
- Revenue>Income Tax >MPRR Taxes>Payroll Taxes>VAT>Customs>Excise>APT>Diesel Refunds>Global Minimum Tax (GMT)>Tax Exempt Institutions.
- My Representatives – Allows the user to create and maintain a list of non-representative entities, which are connected to the legal entity. Non-representative relationship refers to an entity that is associated with the company, trust or individual, e.g., a Parent or Guardian of a registered minor child. New representatives may not be added on eFiling, but the existing one may be deleted.
- Who I Represent – allows the user to view a list of parties that are represented by a legal entity.
- My Tax Practitioner Details – allows the user to maintain tax practitioner and controlling body details that relate to their professional registration with SARS as a tax practitioner.
- My Registered Particulars – consists of the demographic details of the entity and has the following sub-categories
SARS Registered Details
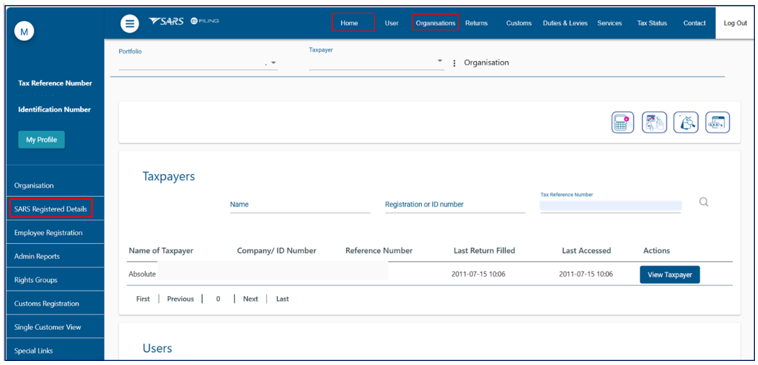
- The SARS Registered Details function lets eFilers view, edit, and update their demographic information on eFiling. Access depends on your eFiling profile and menu tabs.
- Tax Practitioner and Organisation eFiling profile:
- Navigate to the top menu and select “Organisations.”
- Tax Practitioner and Organisation eFiling profile:
- Register or activate a legal entity tax reference number on eFiling. See the guide ‘How to Register for eFiling and Manage Your User Profile.’
Notice of Registration
- The Notice of registration functionality is available on the Tax Practitioners and Organisations eFiling Profiles. Follow the steps below to access your notice of registration:
- Select “SARS Registered Details” from the menu on the left.
- Select “Notice of Registration”
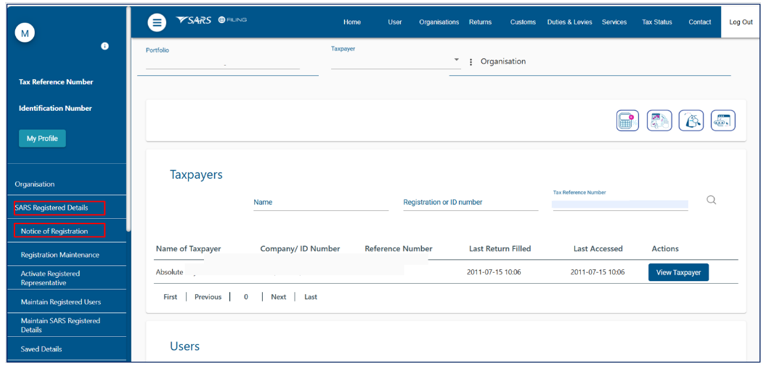
- On the Notice of registration screen, the system will display the notice of registration for each registered tax product.
- If there are previous requested notices, the user will have the option to “Request New” or to “View.”
Note: The latest notice as well as the “Date of issue” will be displayed.
- The user should be able to view, print and / or save the notice on the desktop. Notices can also be viewed on eFiling under SARS Correspondence.
- SARS may ask you to upload supporting documents. All letters, notices, and messages from SARS are available under ‘SARS Correspondence.’
- You have 21 business days from your application date to submit the required documents. If you miss the deadline, your application will be cancelled, and you will need to reapply.
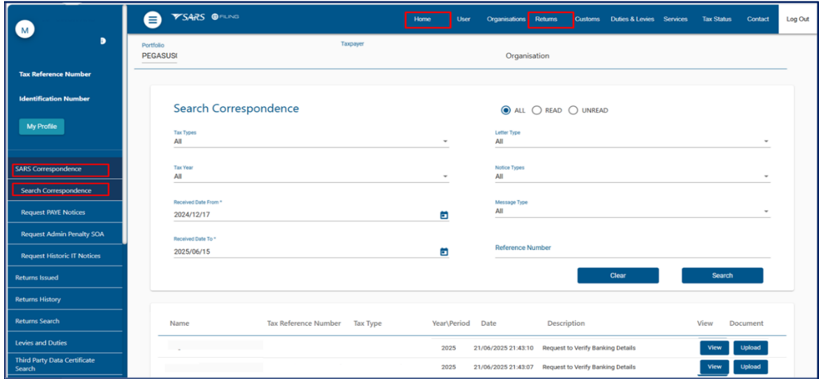
- To search for correspondence:
- Log on to eFiling and select “SARS Correspondence” from the menu on the left.
- Click on “Search Correspondence”, the search correspondence grid will display.
- You can use one or more of the following filters to search for correspondence:
- Tax Type
- Tax year
- Received Date From (i.e. start date)
- Received Date To (i.e. end date)
- Correspondence Type (e.g. Letters, Notices and Text Messages issued by SARS)
Please Note: If you navigate to other pages after logging on, you will no longer see <SARS Correspondence> on the menu on the left. To navigate back to “SARS Correspondence” select “Returns” from the top menu.
- To upload supporting document, click:
- ‘View’ – to access the correspondence and determine type of document that must be submitted.”
- Click ‘upload’ and the following screen will display:
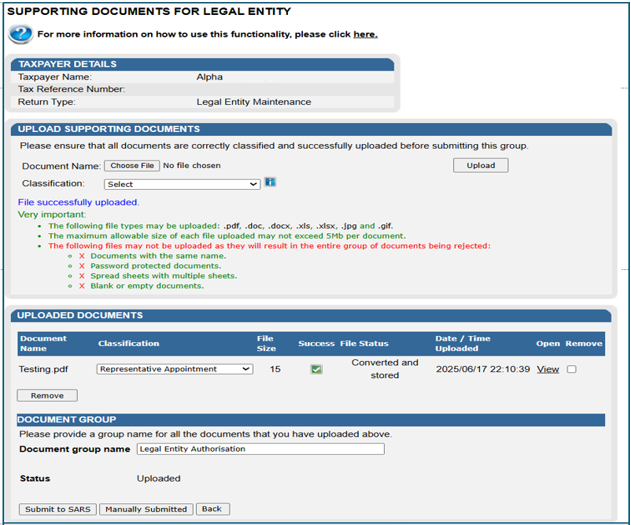
- Click on “Choose File” button and select the files to upload, then click “Open” button to continue.
- Ensure that you select the relevant classification per file to upload.
- Select “Upload” button to add the document(s), listing under heading “Uploaded Documents.”
- If you wish to remove the document that you have uploaded, click the document and select the “Remove” button.
- When you have uploaded all the documents, select the “Submit to SARS” button to continue. If you have submitted the relevant material at your nearest SARS branch, click on “Manually Submitted” to indicate it. Click on the “Back” button to return to the Income Tax Work Page.
- Confirm that you want to submit all the documents by clicking “OK” button.
- The status on the supporting documents section will be updated to “Submitted
Registered Representative
- If you are designated as the Registered Representative (RR) for an entity, you are required to activate your status on eFiling to conduct transactions on behalf of your client. The Activate Registered Representative feature enables you to be established and activated as the authorised representative for the Legal Entity.
- Registered Representatives must be activated by legal entity. There is no bulk functionality to activate a Registered Representative for multiple entities at once.
- If you are not listed as a Registered Representative on SARS records at the time of your activation request, SARS will initiate a case and require relevant supporting documentation to verify your eligibility for designation as the new Registered Representative for the taxpayer. It is essential that the Registered Representative’s personal contact information—including cell phone number and email address—remains current, as these details are utilised on eFiling to issue One-time Passwords (OTPs) for certain submissions and approvals.
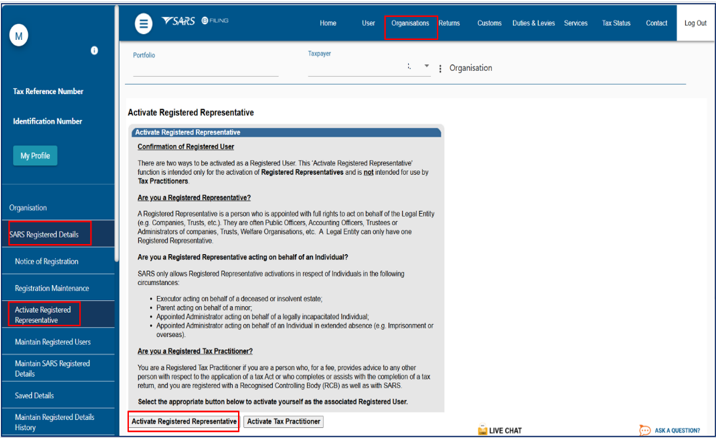
- The Activate Registered Representative functionality is available on the Tax Practitioner and Organisation eFiling portfolios.
- Select “Organisations” from the menu on the top.
- Select “SARS Registered Details” from the menu on the left.
- Select “Activate Registered Representative”
- Select the applicable option (i.e. Registered Representative or Tax Practitioner)
Activate Registered Representative
- Select “Activate New Registered Representative”
- Select “Activate New Registered Representative.”

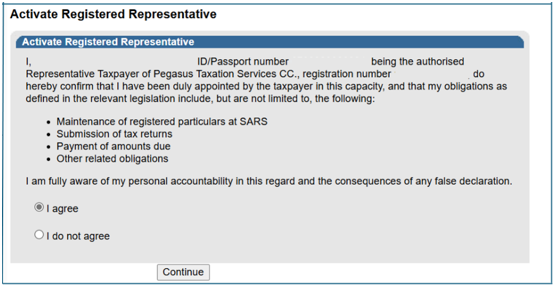
- Agree to declaration confirming that you are the authorised representative for the taxpayer. Click on “Continue.”
- Complete the applicable fields and select the representative capacity (e.g., accounting officer, curator, public officer, parent guardian, etc.)
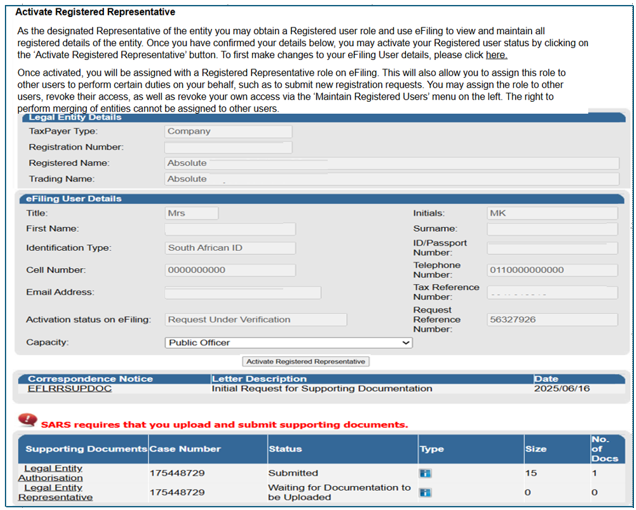
- Click on the “Activate New Registered Representative” button at the bottom of the screen.
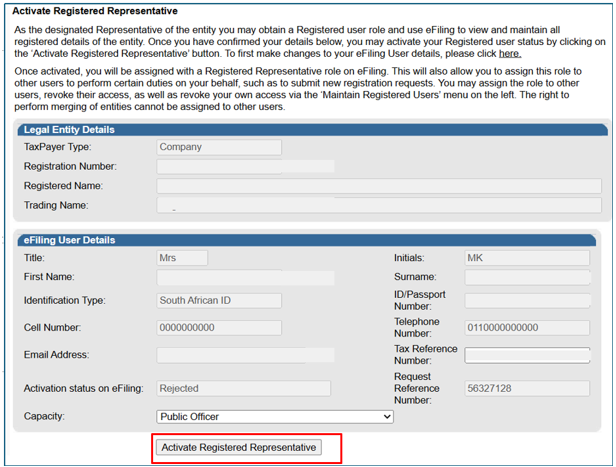
- One of the following statuses will be indicated next to the “Activation Status on eFiling” field in the Activate Registered User screen:
- Unconfirmed – the representative has not been confirmed as the registered user with SARS and the representative might be required to submit relevant material to confirm the representative relationship to the represented entity (Taxpayer). This status will also be applicable for setting of a new Representative prior to SARS approval. Continue to request activation and SARS will request you to submit the relevant supporting documents to verify your details and appointment as a representative taxpayer.
- Request under Verification – the representative must submit relevant material, and the case will be reviewed by SARS.
- Rejected – The captured details were not accepted due to validation errors (e.g. an invalid tax reference number).
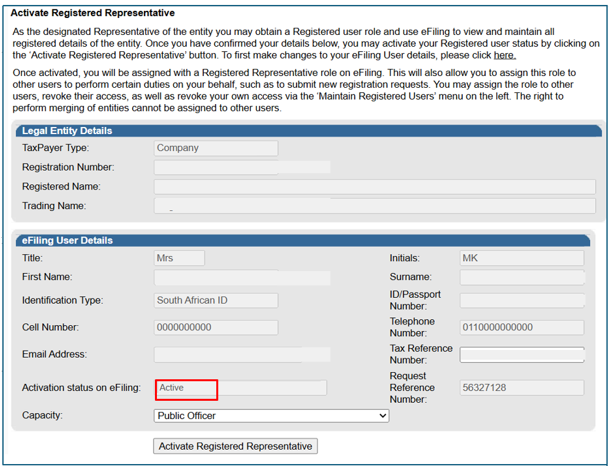
- Active – the activation request has been successfully completed, and the Registered Representative (RR) is authorised to transact on behalf of the legal entity.
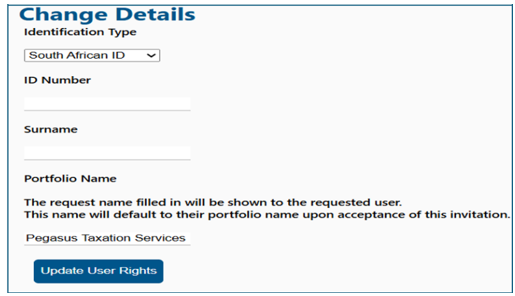
Change of eFiling User Details
- If you want to make changes to your personal details, click on the hyperlink.

- The “Change Details” screen will display to update your personal details on eFiling. After you have made the changes, click the “Update Details” button to continue. After updating your details, you will be able to see the changes made on the “Activate Registered User” screen.Note that the eFiling registration details are used for verification purposes and it should be aligned with your identity document or passport.
- Select the “Activate Registered Representative” button to continue, if the Legal Entity information and the eFiling User Details are all correct.
- Complete your tax reference number:
- If you are a Registered Representative of the entity according to the SARS records, upon the selection of the “Activate Registered Representative” button, you will be activated immediately
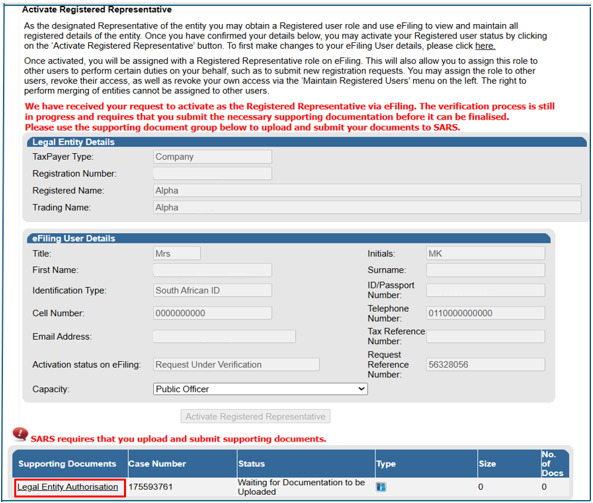
- If you are not a Registered Representative of the entity according to SARS records, upon the selection of “Activate Registered Representative” button, you will be required to upload and submit relevant supporting documents for SARS to verify your personal details and confirm your appointment as a representative taxpayer.
- Click “Legal Entity Authorisation” link and the “Upload Supporting Documents.” Refer to the ‘SARS Correspondence’ section on how upload and submit supporting documents.
- On successful activation of the registered representative the status field will indicate “Active.”
- The status of the registered representative will indicate “Rejected” where the tax reference number captured is incorrect.
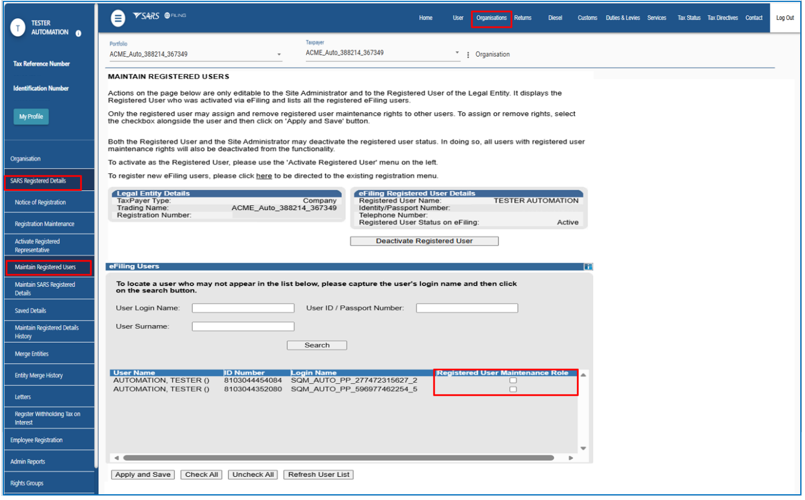
Maintain Registered Users
- This functionality is available on the Tax Practitioner and Organisation eFiling portfolios and allows the Registered Representative or registered tax practitioner to assign (delegate) and remove other eFiling users to have the same representative rights as the registered representative user. Once the users are assigned, they can perform the same functions as the representative on eFiling.
- To delegate Representative authority and activate additional users as registered users, you must first activate the Registered Representative using the ‘Activate Registered Representative.’
- Delegation is useful where a Registered Representative (RR) manages multiple legal entities and requires other users to assist with capturing and submitting information on eFiling. Delegation is done per legal entity.
- To delegate access to other eFiling users, actions are required from both parties involved, namely:
- The Requestor: An existing eFiling user (for example, an RR) who has the Manage User role and initiates the invitation for another person to access the organisation’s or tax practitioner’s portfolio.
- The User: The individual (for example, an employee of the organisation) who is invited to access one or more taxpayers managed by the requestor.
- For detailed instructions on how to invite users on an Organisation portfolio, refer to the section “Manage Users on an Organisation or Tax Practitioner Portfolio” in the Guide ‘How to Register for eFiling and Manage Your User Profile’
Confirm User Portfolio Status
- Once the process of inviting other eFiling users has been completed, follow the steps below to confirm whether the invited user appears as having access to one or more taxpayers managed by the requestor:
- Select “Organisations” from the top menu.
- Select “SARS Registered Details” from the menu on the left.
- Select “Maintain Registered Users.”
- On the Maintain Registered Users screen, the invited user’s name will appear in the list of registered users, and the checkbox will appear unticked under the maintenance role.
Delegate Registered Representative Right to other Users
- Once the process of inviting other eFiling users has been completed, the RR must follow the steps below to assign or delegate access:
- Select “Organisations” from the menu on the top.
- Select “SARS Registered Details” from the menu on the left.
- Select “Maintain Registered Users”
- From the Maintain Registered Users screen, select the checkbox alongside the username and then click on ‘Apply and Save’ button. Only the registered user may assign and remove registered user maintenance rights to other users.

- Once delegated users have been granted the same representative rights as the Registered Representative (RR) for the relevant legal entity, they must log in to eFiling using their own credentials and select the applicable legal entity from the Organisation portfolio.
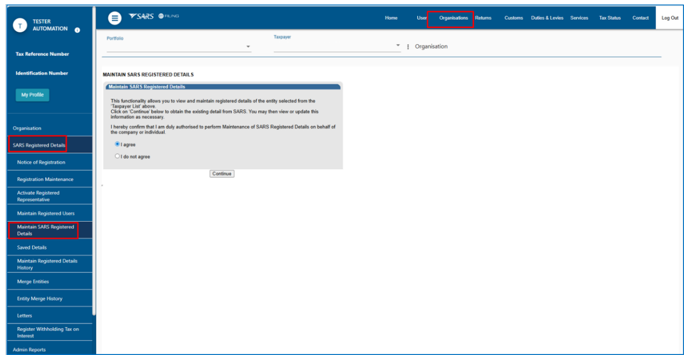
Maintain SARS Registered Details
- The ‘Maintain SARS Registered Details’ functionality allows the user to access the RAV01 form to view or update specific details of the legal entity, as well as to register new product for the entity.
- To Access ‘SARS Registered Details’ icon as a Registered Representative (RR), select the following:
- Taxpayer details from the list as a RR or select Home’ top menu as Individual Taxpayer.
- ‘Organisations’ top menu (applicable for RR).
- ‘SARS Registered Details’ sub-menu.
- ‘Maintain SARS Registered Details’ sub-menu.
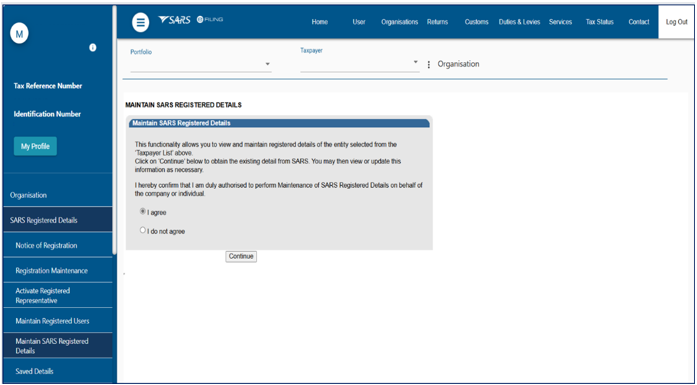
- Confirm that you are authorised to perform maintenance functions of the registered details of the company or individual:
- If you select the “I do not agree” button, the continue button will be greyed out and you will not be able to continue.
- If you select the “I agree” button and click Continue, you will be able to access the RAV01 form, provided the logged in user is a confirmed Registered Representative (RR).
- Confirm that you are authorised to perform maintenance functions of the registered details of the company or individual:
Viewing and Editing of RAV01 Form
- The Registration, Amendments and Verification (RAV01) form enables Registered Representatives or Registered Practitioners users to maintain the legal entity demographic information of the legal entity. Complete the RAV01 when there is a need to update the legal entity information.
- This form allows Registered Representatives or Registered Practitioners to maintain (view and update) registered details on eFiling, including the following:
- My Registered Particulars
- My Tax Products
- My Representatives.
- Supporting documents may be required to change some of the above information on RAV01.
- All the information on the RAV01 will pre-populate with the legal entity data that is available at SARS.
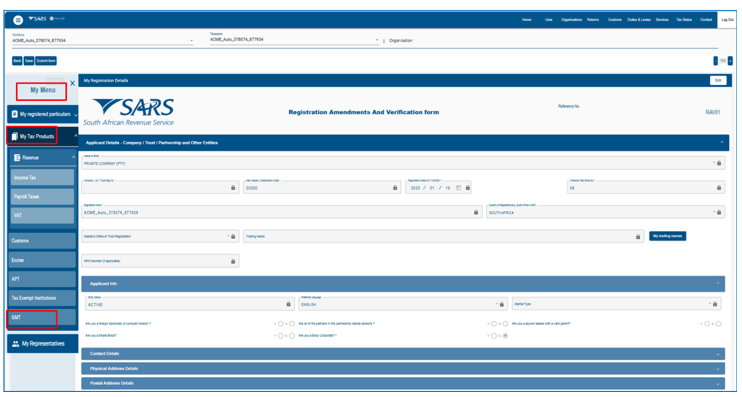
Applicant Details-Company / Trust Partnership and Other Entities
- This container is used to capture the demographic details of the applicant.
Editing legal entity registered details
- Click on Edit button. The following screen will be displayed:
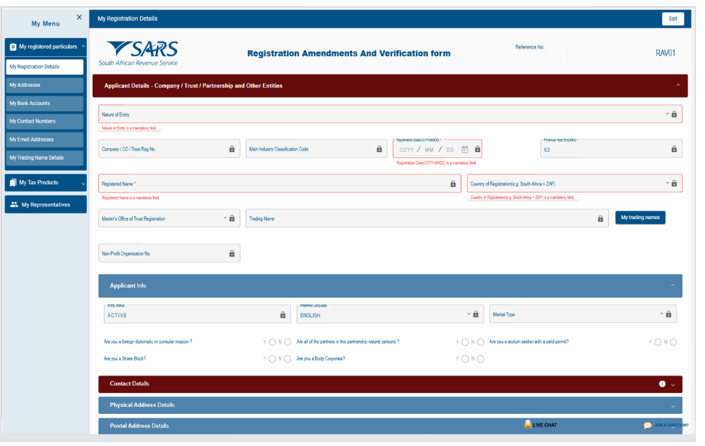
- Nature of Entity – The Nature of Entity field in the “Applicant Details” container cannot be edited except if the value for the Nature of entity is Partnership / Body of Persons. Click on dropdown list, a popup will be displayed which contains the following list of valid Nature of Entity.
- Company/CC/Trust Reg. No – The field Company / CC/ Trust Reg No.is mandatory.
- Main Industry Classification Code – select from the dropdown list.
- Registration Date –This change can only be performed at the SARS Branch.
- Financial Year End – This field will not be updated directly as it requires manual intervention and approval by SARS. The representative will be notified if the financial year end change was approved.
- Country of Registration –This field must be locked and populated with the value ZAF if the Nature of Business is a CIPC type or a Local Governmental Institution.
- Master’s Office of Trust Registration –This field will be editable and mandatory if the nature of business is one of the following:
- Inter-vivos Trust
- Testamentary Trust
- Other Trust.
Applicant Info
- This container is used to capture the status information of the Applicant and fields will be editable.
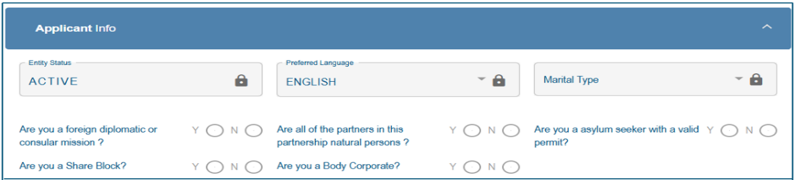
- Entity Status – This field will pre-populate with the status of the applicant at SARS.
- Preferred Language – This field will default to English and upon selection of the relevant option, the field will have the preferred language. The preferred language selection does not change the display language of the RAV01 form.
- Marital Status – If Enterprise is selected the fields will not be editable.
- Are you a foreign diplomatic or consular mission? – This field is editable and mandatory if nature of business is Foreign Governmental Institution.
- Are all the partners in this partnership of natural persons? – This field is editable and mandatory if nature of business is Partnerships.
- Are you an asylum seeker with a valid permit? – Field is editable and mandatory if nature of entity is Foreign Individual.
- Are you a Share Block Company? – Field is editable and mandatory if nature of entity is Public Company.
- Are you a Body Corporate? – Field is editable and mandatory if nature of entity is CIPC type or Body of Persons.
Contact Details
- This container is used to capture the contact details of the enterprise entity. In this context, it applies to the Domestic Constituent Entity (DCE), which is the entity submitting the Global Minimum Tax (GMT) subscription on eFiling.
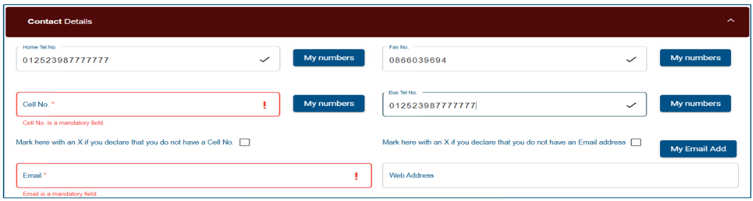
- Mandatory fields which are not completed will be indicated in red.
- The My numbers button contains the list of numbers stored in the contact number library (My Contact Details). The user may type a number into the text box or select a number from the list.
Important: SARS uses the eFiling Security Details that on record to issue the user with a One-Time PIN (OTP) for authentication purposes. To update this information, go to “eFiling Security Details Do not use the Contact Details container to update Security Details. This will NOT update the user’s “eFiling Security Details.”
Physical Address Details
Container is used to capture and display structured physical address information and enterprises, the Domestic Constituent Entity (DCE), which is the entity submitting the Global Minimum Tax (GMT) subscription on eFiling.
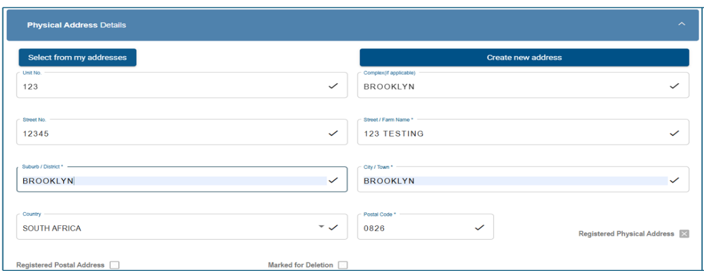
- “Select from my addresses” button – indicates a list of addresses stored.
- “Create new address” button – enter new unlisted physical address details.
- All mandatory fields will be highlighted in red to complete. Where an overseas address is used, four zeros should be entered in the postal code field.
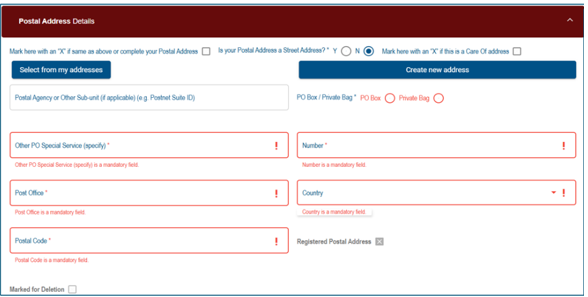
Postal Address Details
- Container is used to capture and display structured Postal address information the of enterprise, the Domestic Constituent Entity (DCE), which is the entity submitting the Global Minimum Tax (GMT) subscription on eFiling.
- Complete either of the following two fields: Mark here with an “X” if same as above or complete your Postal Address. Is your Postal Address a Street Address? (Y/N)
- If Mark here with an “X” if same as above or complete your Postal Address is completed the field Is your Postal Address a Street Address? (Y/N) must be cleared and locked.

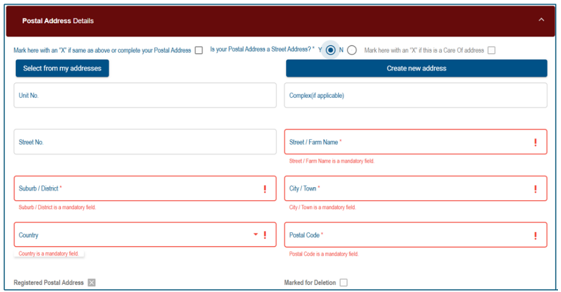
- The following fields must display if the question Is your Postal Address a Street Address? (Y/N) is answered with a No and the field Care of Address must be unlocked.
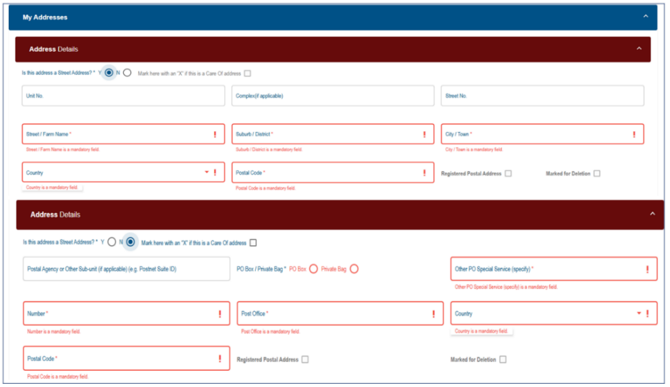
My Address
- This container is used to capture new additions to the list of My addresses. It is also used to maintain existing items from the list of My addresses. The functionality consists of two sets of fields:
- The first set is used for PO Box/Private Bag type addresses.
- The second set is used for Street Addresses.
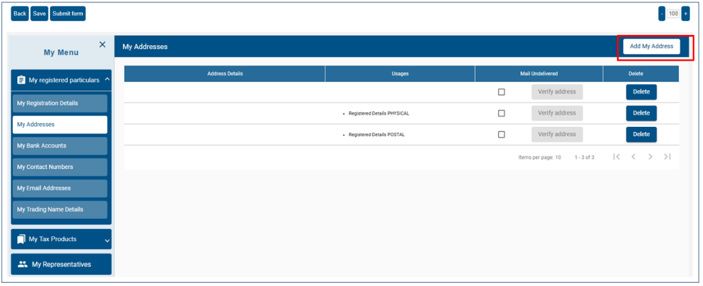
- When the user clicks ‘Add new address’ from the My addresses screen, the following screen will be displayed. Select Yes or No to this question “Is your address a street address” and capture all mandatory fields.
My Bank Accounts
- My Bank Accounts functionality allows users to create and manage bank accounts associated to the legal entity profile within the account library. These bank accounts can be reused across various tax products without the need to recapture the same details multiple times. The following functions are available for managing the bank account within the account library on the WRAV01 form:
- View bank account
- Edit a bank account
- Delete a bank account
- Add a new bank account
- Bank account settings
Viewing and edit Bank Account
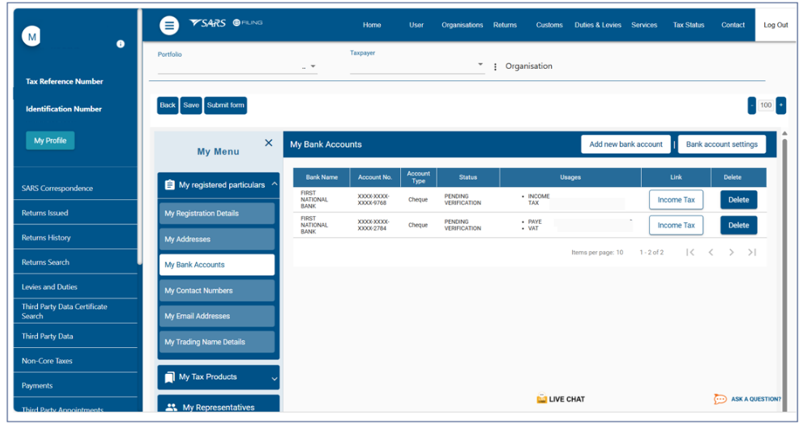
- To access and view all bank accounts currently saved to your profile, select:
- “My registered particulars.”
- “My Bank Accounts.”
- As a security enhancement, the bank account number displayed on the WRAV01 form is masked. Only the last four digits of the bank account number will be visible.
- To update editable fields (e.g., account number, account type, branch name, bank name, account holder name):
- Click on the specific bank account from the Bank Account Table, the RAV01 Bank Account Details container will display, pre-populated with the selected account’s information.
- Update the bank account field.
- Click OK and then “Done” button to save your changes and return to the bank account table.

- If no errors are detected after clicking the Done button, a pop-up message will be displayed.
Delete Bank Account
- Users will not be able to delete a bank account that is in use (i.e., linked to one or more tax products), the following error message will be displayed when attempting to delete a bank account:
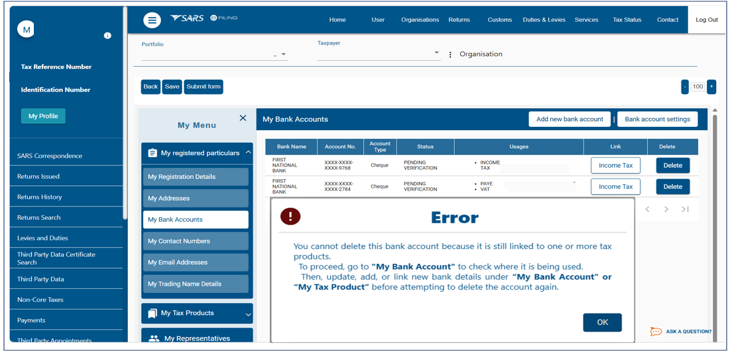
- To delete a bank account linked to one or more tax products:
- Navigate to the relevant tax product(s) under field “My Tax Products.”
- Update or reassign the associated bank account.
- Select “My Bank Accounts” to return to the bank account library.
- Select the bank account to be deleted.
- Click the delete button on the applicable line item from the bank account table.
Adding New Bank Account
- To add new bank account details to the library:
- Click Add new bank account button from the taskbar.
- Expand the “Bank Account” container.
- Expand the “Bank Account Details” sub- container
- Capture banking details.
- Click Done.
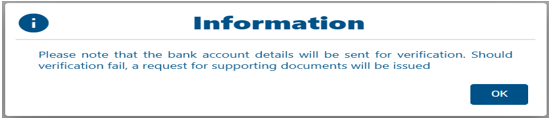
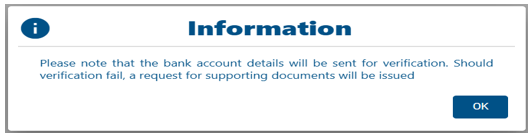
- When adding a new bank account or updating the existing bank account, the following pop-up message will be displayed after clicking the Done button:
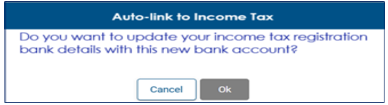
- Click on the OK button, this popup message will display:
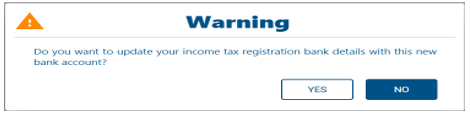
- Click ‘YES’ to link the new bank account to the existing income tax registration or click ‘NO’ if no linking is required.
- Once added, the account becomes available for selection across all relevant tax products. A Domestic Constituent Entity (DCE) is not allowed to register any Foreign Bank Accounts.
Auto-Linking Bank Account
- The WRAV01 will automatically link a bank account to an Income Tax product. This auto-linking removes the need to manually link a bank account to an Income Tax product. The auto-linking will happen under the following specific conditions:
- Bank account exists in the library, Income Tax product added later:
- When there is an existing bank account in the library and a new Income Tax product is later added, the system will automatically link the existing bank account to the new tax product on condition that there is only one bank account in the library and one Income Tax product.
- Income Tax product exists, Bank account captured later:
- Where an income tax product has already been registered but initially did not have a local bank account (e.g., declared “no local bank account” at the time of registration) and later a new local bank account is captured via the My Bank Accounts menu, the system will automatically link that bank account to the existing income tax product on condition that there is a single active bank account and a single income tax registration.
- A new bank account is captured while one is already linked:
- Where a bank account is already linked to an Income Tax product, and another new bank account is added, after capturing the new bank account and selecting “Done”, the system will not auto-link. Instead, it will display the following information message:
- Bank account exists in the library, Income Tax product added later:
- Clicking the “Cancel” button closes the pop-up without making any changes.
- Clicking the “Ok” button links the new bank account to the existing Income Tax registration and closes the pop-up message.
- Linking a bank account when multiple Income Tax registrations exist:
- When a taxpayer has multiple active or new income tax registrations, and a new or existing bank account needs to be linked, the system requires the user to manually select the appropriate income tax reference number.
Bank Account Settings
- The bank account settings functionality enables the user to define and modify bank account settings. If the user does not have defined bank account settings, the bank account settings pop up will display. Please note that while different bank accounts are permitted foreign bank accounts are not allowed.
- Click the bank account settings button from the taskbar.
- The bank account settings pop up will display as follows:
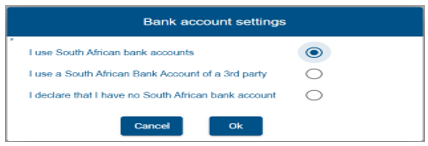
- Select either the first or second option above. The Domestic Constituent Entity (DCE) may not select the third option, “I declare that I have no South African bank account.”
- If the 3rd party option is selected, select a reason from the dropdown list provided.
- Non-resident without a local bank account
- Liquidation
- Company Deregistration
- Group Company Account
- Dormant
- Trust Administrator Account
Bank Account Details
- The ‘Bank Account Details’ container provides the user with the option to select a different bank account for usage / linkage to a tax product and create a new bank account.
Selecting Bank Account
- Selection of bank accounts from the list may be done if there is existing bank detail(s) set-up, the bank account details container will be prepopulated with the current registered income tax registration bank details and the bank account number will be masked except for the last four digits. In the case where there are no income tax registration bank details, the fields in the container will remain blank and the user must capture the necessary fields or select a bank account from the bank account library using the “Select from my bank accounts” button.
- Navigate to the Bank Account Details container under the “My Tax Products” menu.
- Select tax product.
- Expand the “Tax Type Demographic” container.
- Expand “Bank Account Details” container to display bank account details. The account number will be masked, only the last four digits of an account number will be displayed.
- Click on “Select from my bank accounts” button.
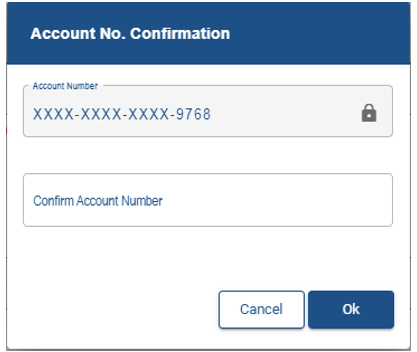
- Select a bank from the list of presented bank accounts and click OK.
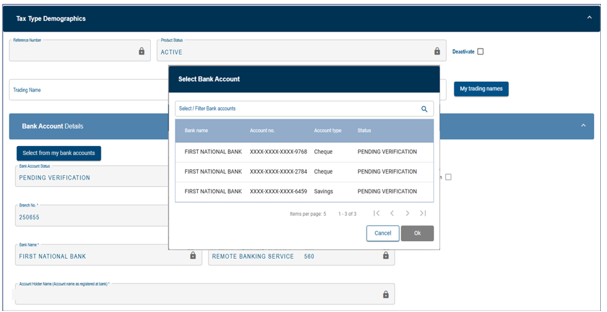
- Confirm the bank account number and click “OK.”
Note: The bank account number displayed on eFiling is intentionally masked for security purposes, with only the last four digits visible. Do not use the format shown on eFiling, as certain characters are obscured for security reasons. Always capture and verify the account number exactly as it appears on the official bank confirmation letter or bank statement.
- Select the “Done” button after selection of the bank account and then “Submit Form.”
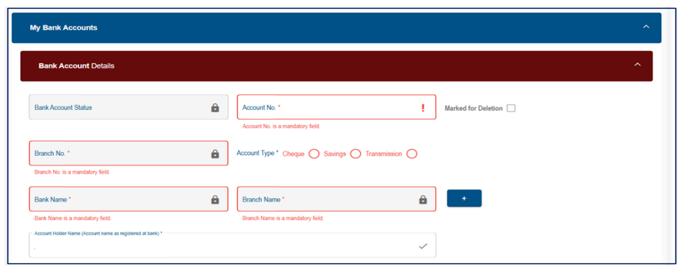
Create New Bank Account
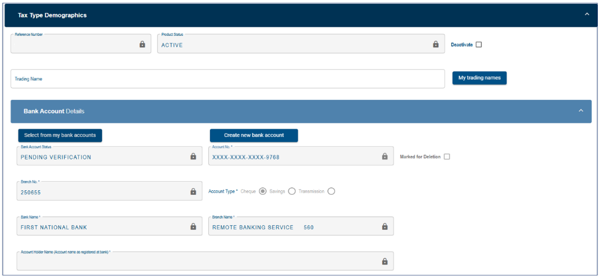
- Select “Create new bank account.” All fields will be unlocked.
- The new added bank details are subject to verification and will validate against a bank verification system. Added details will only be marked as confirmed once successfully verified.
- Bank Account Status
- Pending – implies the bank details are awaiting verification.
- Unverified – implies the bank details are not yet sent for verification.
- Valid – implies the bank details have been verified and are valid.
- Invalid – implies the bank details are invalid, and the entity needs to either correct the incorrect details on the form or at the bank.
- Account Number
- Account Type – Select Cheque, Savings or Transmission
- Account Holder Name (Account name as registered at bank) – This field will be pre-populated.
- Bank Account Status
- Complete the following fields after the selection of the Bank Name.
- Branch No: If the “Bank Name” has a universal bank code, this field will be locked and default to the universal branch code, or else this field will be editable and must be completed.
- Branch Name: If the “Bank Name” has a universal bank code, this field will be locked and default to “Universal branch,” or else this field will be editable and must be completed.
- Select the “Done” button after you have completed the relevant bank details and then “Submit Form” to proceed. The new bank details added will be displayed under “My bank accounts.”
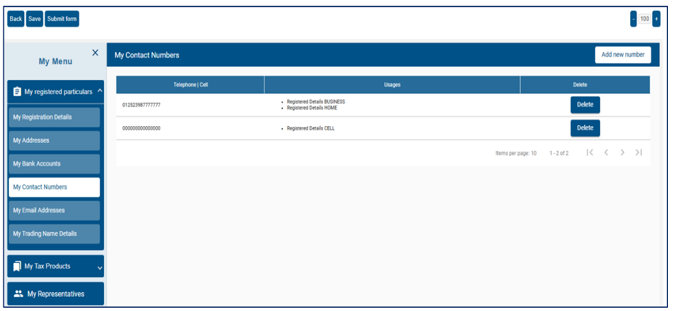
My Contact Numbers
- In this container, the user can maintain existing items in the My Contact Numbers list, by performing the following functions:
- View/Edit a contact number in the library.
- Delete a contact number from the library.
- Add a new contact number to the library.
View / Edit Contact Number
- Click the contact number to be viewed / edited from the contact number table.
- Make the necessary amendments.
- Click Done to save changes.
Delete Contact Number
- Select the contact number to be deleted by clicking the delete button on the applicable line item from the contact number table. If the contact number is being used, an error message will be displayed:
- This contact number is currently in use elsewhere in your profile and cannot be deleted.
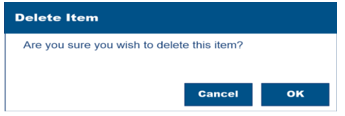
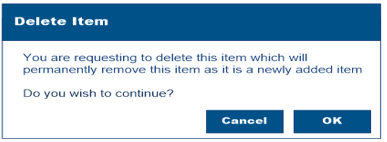
- The following pop-up will be displayed if a contact number to be deleted is a newly added item:

- Clicks ‘Ok’ to complete or click ‘Cancel’ the pop up will close and no further action will take place.
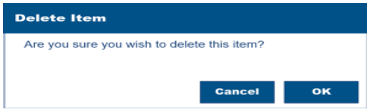
- The following pop-up will be displayed if a contact is an existing item:
Add Contact Number
- Add the new contact number button from the taskbar.
- Capture the new contact number.
- Click Done to complete.
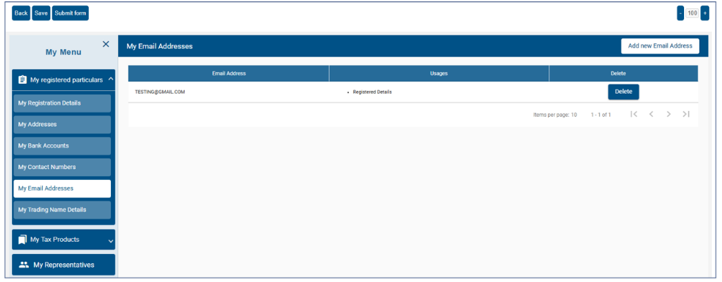
My Email Address
- This container allows users to perform the following functions:
- View / Edit an email address from the library.
- Deleting an email address from the library
- Add an email address to the library.
View /Edit Email Address
- To open the item, hover your cursor over to a specific line item in the table.
- Click on a line item.
- Make the necessary amendments.
- Click Done to save changes.
Delete Email Address
- Select the email address to be deleted by clicking the delete button on the applicable line item from the email details table.If the email address is being used, an error message will be displayed:
- This email address is currently in use elsewhere in your profile and cannot be deleted.
- The following pop-up will be displayed if the email address to be deleted is a newly added item:
- Click ‘Ok’ to complete or click ‘Cancel’ the pop up will close and no further action will take place.
- The following pop-up will be displayed if the email address is an existing item:
- Click ‘Ok’ to complete or click ‘Cancel’ the pop up will close and no further action will take place.
Add Email Address
- Click the Add new email address button from the taskbar.
- Capture the email address.
- Click Done to complete the process.
My Trading Name Details
- This container is used for viewing or editing existing trading names, deleting trading names, and adding new trading names to the library.
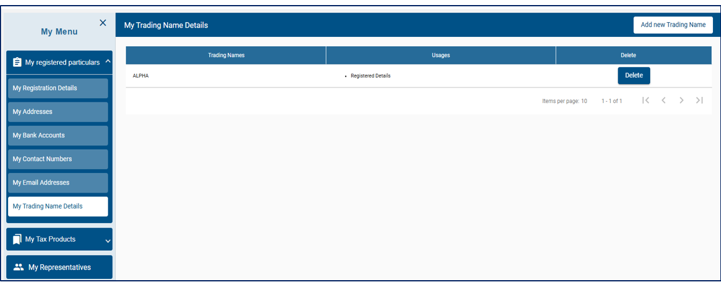
- Viewing or editing existing trading names:
- Click the contact number to be viewed / edited from the trading name table.The Trading Name details container will display with the trading name populated.
- Make the necessary amendments.
- Click Done to save changes.
- Deleting a trading name from the library:
- Select the trading name to be deleted by clicking delete button on the applicable line item.If the trading name is being used, an error message will be displayed:
- This trading name is currently in use elsewhere in your profile and cannot be deleted.
- Select the trading name to be deleted by clicking delete button on the applicable line item.If the trading name is being used, an error message will be displayed:
- Adding a trading name to the library:
- Click Add new trading name button and the Trading Names container will display.
- Capture the trading name.
- Click Done to save changes.
My Tax Products
Global Minimum Tax (GMT)
- This container allows Domestic Constituent Entities (DCEs) to subscribe for Global Minimum Tax (GMT) tax product on eFiling via the RAV01.
- If you are the appointed Registered Representative (RR) or a delegated user for an entity, you must first activate your status on eFiling to transact on behalf of the client. This enables you to be set and/or activated as the assigned Representative for the relevant Legal Entity.
- If you are not recorded as a RR on SARS records at the time you request activation, you will not be able to subscribe for the GMT tax product on eFiling using the RAV01 form. The following message will be displayed:

- Refer to the ‘Registered Representative’ section for steps on how to activate the Registered Representative.
Subscribing for GMT Tax Product
- After logging into eFiling, follow the steps below to subscribe for the GMT tax product:
- ‘Organisation’ top menu.
- ‘SARS Registered Details’ side menu.
- ’Maintain SARS Registered Details’ sub menu item.
- “I agree” radio button option on the ’Maintain SARS Registered Details’ landing page and click Continue. The RAV01 form container will display.
- Ensure that the legal entity registration details on the RAV01 form container are correct. To amend the legal entity registration details:
- Click Edit.
- Make the required amendments and select Done to save. The updated details will be reflected in the relevant form containers.
- Ensure that the legal entity registration details on the RAV01 form container are correct. To amend the legal entity registration details:
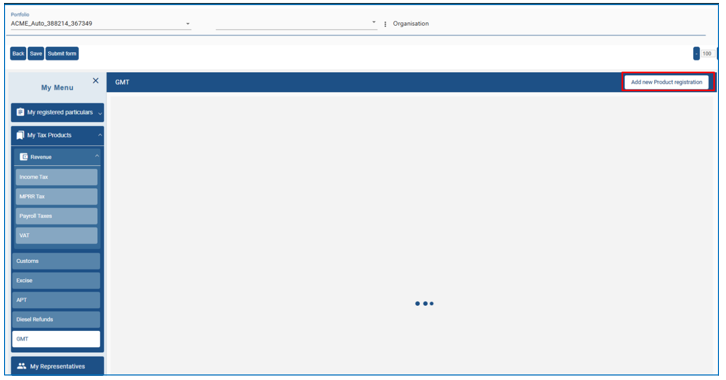
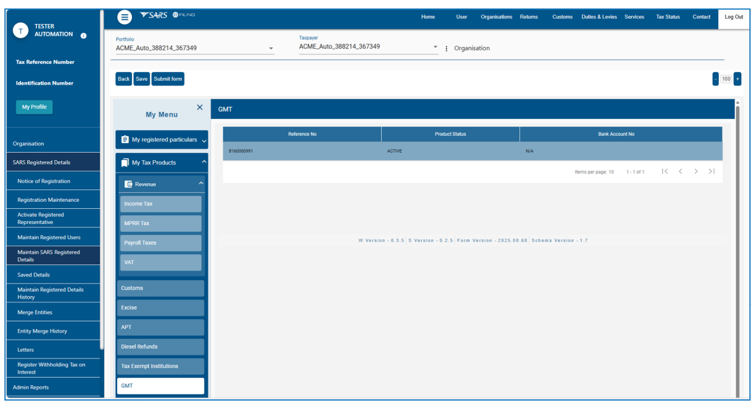
- To subscribe, navigate to “My Menu” on the toolbar and select “My Tax Products.”
- Select “GMT” to enable the Add New Product registration button.
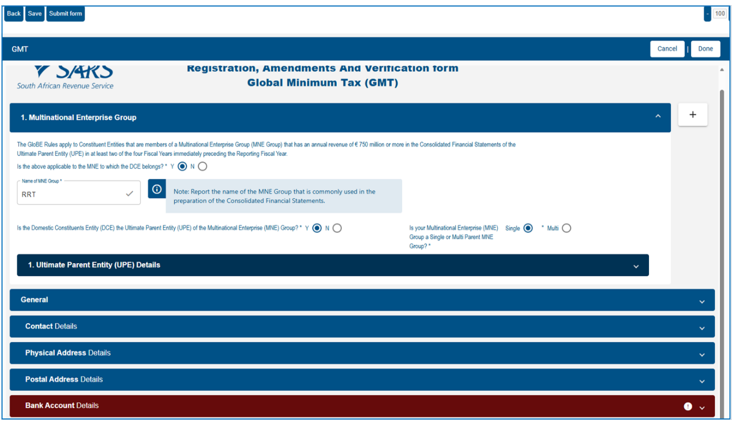
- From the GMT RAV01 form screen, click the Add New Product Registration button.
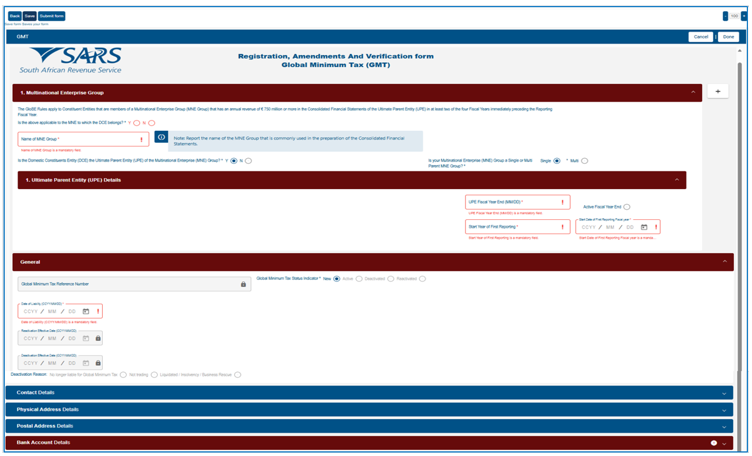
- From the GMT RAV01 form screen below, complete the following mandatory fields marked in red to subscribe for the GMT Tax Product:
- Is the above applicable to the MNE to which the DCE belongs? Select [Y/N]:
- If No is selected, the system will display the message: “The criteria for a Global Minimum Tax Type Subscription is not met.”
- If Yes is selected, capture the name of the MNE Group.
- Is the Domestic Constituents Entity (DCE) the Ultimate Parent Entity (UPE) of the Multinational Enterprise (MNE) Group? Select [Y/N]. Additional fields will be displayed on the GMT RAV01 form based on the selection made.
- Is your Multinational Enterprise (MNE) Group a Single or Multi Parent MNE Group? Select [Single/Multi]. Additional fields will be displayed on the GMT RAV01 form based on the selection made.
- Under the Ultimate Parent Entity tab, complete the following details:
- UPE Fiscal Year End
- Start Year of Reporting
- Start Date of the First Reporting Fiscal Year
- Click on “Active Fiscal Year”
- Under General section, complete the Date of Liability.
- Capture the Bank Account details.
- Is the above applicable to the MNE to which the DCE belongs? Select [Y/N]:
- Click Done. The following screen will be displayed:
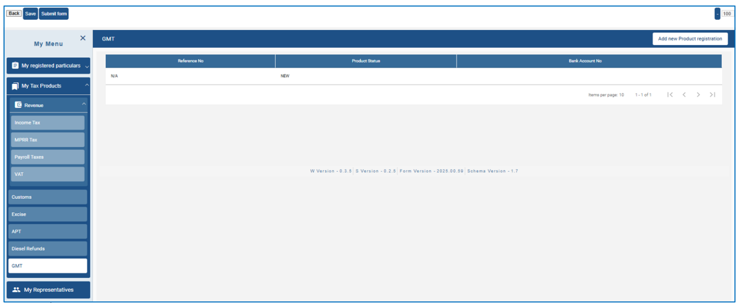
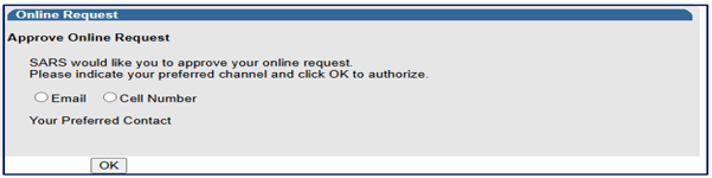
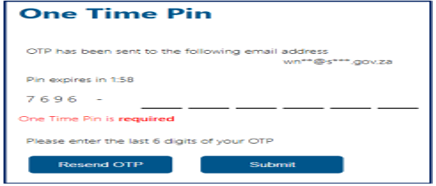
- Click “Submit Form.” You will then be prompted to approve your registration request online, select your preferred contact method, and enter OTP to authorise the request.
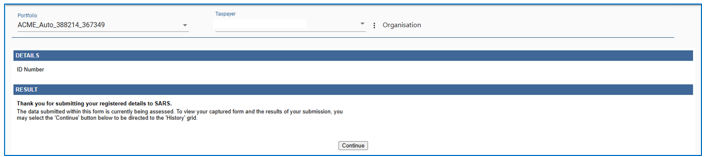
- After approving the registration request online, the following submission confirmation screen is displayed:
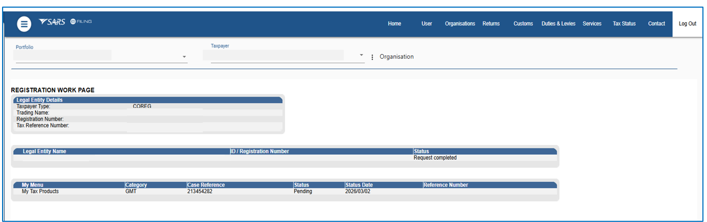
- Click Continue to be redirected to the Registration Work Page to view the submission status.
- The GMT subscription request will be evaluated, and the outcome will be communicated via eFiling as one of the following:
- Review – Where the outcome is review, a Registration Review Notice will be issued on eFiling with a case number requesting the submission of the required supporting documents.
- Declined – If the outcome for GMT subscription request is declined, a Registration “Application Rejection Notice” will be issued.
- Approved – Where the outcome is approved a Notice of Registration / Subscription will be issued.
- After successful subscription to the GMT tax product, the product status will be updated to “Active,” and a GMT Tax Reference Number will be issued. However, when the Taxpayer receives a GMT Tax Number, the GMT Tax Type must be activated before any transactions.
- The GMT subscription request will be evaluated, and the outcome will be communicated via eFiling as one of the following:
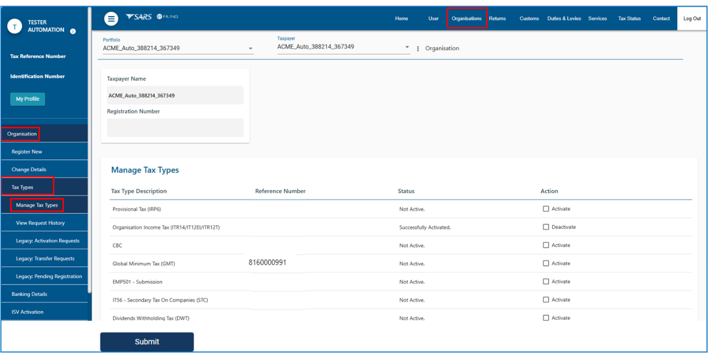
- The purpose of this function is to allow the activation or deactivation of specific tax types (e.g. GMT Tax Type). To transact on eFiling (such as submitting returns or submitting a GMT notification), the GMT tax type must be activated on your profile.
- To activate / deactivate GMT tax type on your portfolio:
- Select
- ‘Organisation’ top menu.
- ‘Organisation’ side menu.
- ‘Tax Types’
- ‘Manage Tax Types’. A table will display with the following information:
- List of tax types linked to the selected taxpayer.
- Reference numbers
- Activation Status
- Action that can be selected for that number (e.g. request activation, request tax type transfer, deactivate)
- Select
- To request activation / deactivation GMT tax type:
- Select the tick-boxes for the applicable actions required (“Activation” or “deactivation”)
- Click on the <Submit>button.
- A screen will display with the summary of the actions you selected. Click on <Continue>
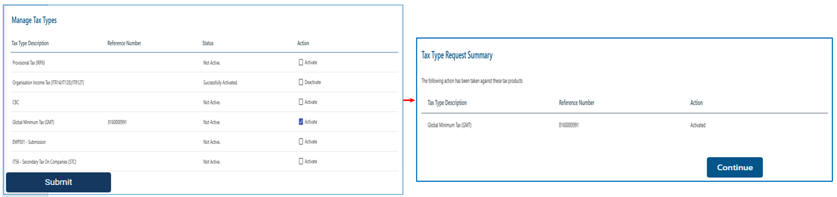
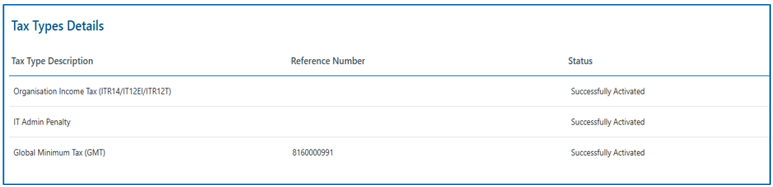
- The status will be updated to “Successfully Activated” or “Successfully Deactivated.
Maintain GMT Subscription Details
The purpose of this function is to maintain GMT subscription details, including any amendments to GMT tax product liability information, to ensure that SARS has accurate and up-to-date information relating to the Domestic Constituent Entity (DCE) subscription details.
- To maintain or amend the GMT tax product, select as follow:
- ‘Organisation’ top menu.
- ‘SARS Registered Details’ side menu.
- ’Maintain SARS Registered Details’ sub menu item.
- “I agree” radio button option on the ’Maintain SARS Registered Details’ landing page
- Click Continue.
- “My Tax Products.”
- GMT Tax Product to be maintained or amended by clicking the relevant line item in the GMT Registrations table
- Upon selecting GMT tax product to be maintained or amended, the GMT RAV01 form will be displayed.
- Amend the GMT subscription details and click ‘Done’.
- Click “Submit Form” to submit the amended the GMT subscription details. The request will be evaluated, and the outcome will be communicated via eFiling as one of the following:
- Review – Where the outcome is review, a Registration Amendment Review Notice will be issued on eFiling with a case number requesting the submission of the required supporting documents.
- Declined – If the outcome for maintaining the GMT subscription details is declined, a notice of Subscription Rejection letter will be issued.
- Approved – Where the outcome is approved no outcome will be communicated, the GMT subscription details will be updated.
Deactivating the GMT Tax Product
- Deactivation of the GMT Tax Product can be done on eFiling via the RAV01.The deactivation is done against the existing GMT reference number allocated to the taxpayer. Deactivation will be accepted if the taxpayer is no longer liable for GMT/ not trading / liquidated / insolvent / Business Rescue.
- To deactivate the GMT tax product, select the following:
- ‘Organisation’ top menu.
- ‘SARS Registered Details’ side menu.
- ’Maintain SARS Registered Details’ sub menu item.
- “I agree” radio button option on the ’Maintain SARS Registered Details’ landing page
- Click Continue.
- “My Tax Products.”
- GMT Tax Product to be deactivated by clicking relevant line item in the GMT Registrations table.
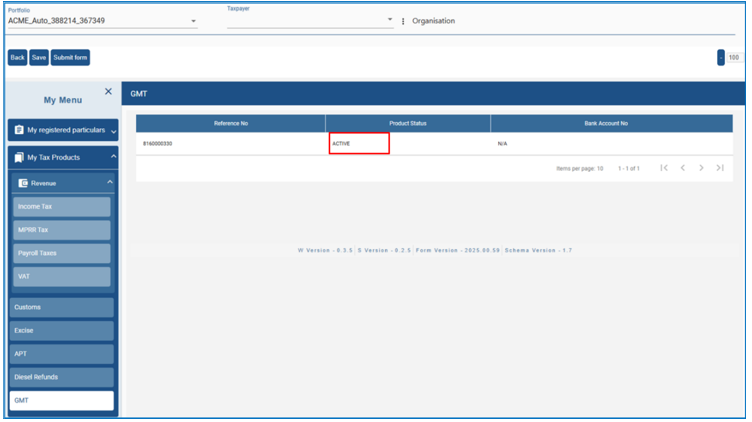
- The product status will be displayed as Active on the selected line item.
- Under the General tab, select Deactivate and complete the Deactivation Effective Date and Deactivation Reason.
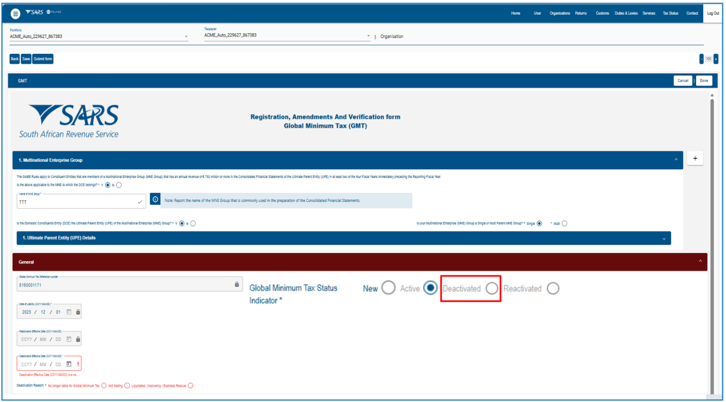
- Complete all mandatory fields and click ‘Done’.
- Click “Submit Form” to submit the GMT tax product deactivation The request will be evaluated, and the outcome will be communicated via eFiling as one of the following:
- Review – Where the outcome is review, a Registration Amendment Review Notice will be issued on eFiling with a case number requesting the submission of the required supporting documents.
- Declined – Where the outcome is declined, a Registration “Unsuccessful Deactivation” Notice will be issued on eFiling, informing the user that the GMT tax product deactivation request has been declined.
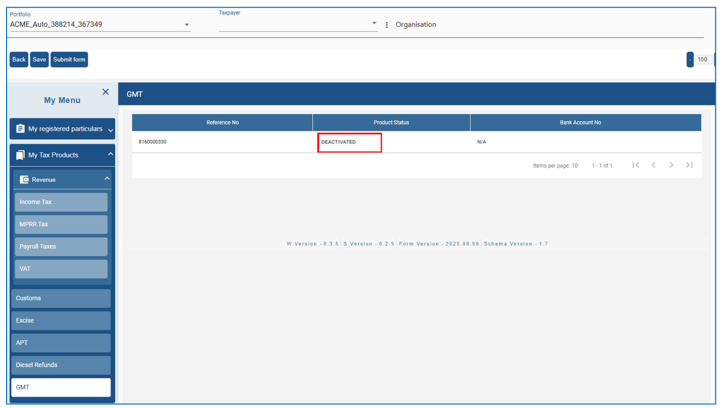
- Approved – Where the outcome is approved, a Confirmation of Deactivation letter will be issued on eFiling, informing the user that the GMT tax product deactivation request has been approved.
- After deactivating the GMT tax product, the next step is to deactivate the GMT tax type. Refer to the ‘Manage Tax Types’ section for instructions on deactivating the GMT tax type.

Note: If an entity has deactivated their GMT tax product subscription, they can reactivate at a later stage. The same GMT reference number will always be reinstated post successful reactivating of the GMT tax product subscription.
Reactivating the GMT Tax Product
- The taxpayer can reactivate a previously deactivated GMT Tax Product to reinstate the GMT Tax Product status on eFiling.
- To reactivate the GMT tax product, follow the steps below:
- Select the ‘Organisation’ top menu.
- Select the ‘SARS Registered Details’ side menu.
- Select ’Maintain SARS Registered Details’ sub menu item.
- Select the “I agree” radio button option on the ’Maintain SARS Registered Details’ landing page and click Continue.
- Select “My Tax Products”.
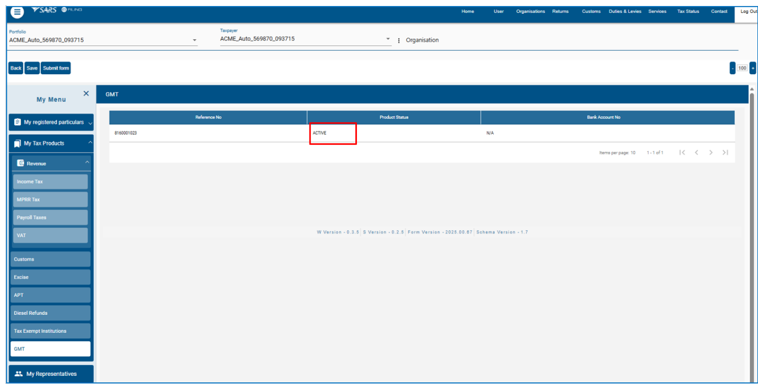
- Select the GMT Tax Product to be reactivated by clicking the relevant line item in the GMT Registrations table. The product status will be displayed as Deactivated on the selected line item.
- Under the General tab, select Reactivate and complete the Reactivation Effective Date.

- Complete all mandatory fields and click ‘Done’.
- Click “Submit Form” to submit the GMT tax product reactivate The request will be evaluated, and the outcome will be communicated via eFiling as one of the following:
- Review – Where the outcome is Review, a Registration Amendment Review Notice will be issued on eFiling with a case number requesting the submission of the required supporting documents.
- Declined – Where the outcome is Declined, a Registration “Unsuccessful reactivation” Notice will be issued on eFiling, informing the user that the GMT tax product reactivation request has been declined.
- Approved – Where the outcome is Approved, a Confirmation of reactivation letter will be issued on eFiling, informing the user that the GMT tax product reactivation request has been approved.
- After successfully activating the GMT tax product on eFiling, the status of the GMT tax product will be updated to “ACTIVE.”
Submit Global Minimum TAX (GMT) Notification
- The purpose of this function is to enable a Domestic Constituent Entity (DCE) to request a Global Minimum Tax (GMT) Notification Form for a specific financial year, for submission to SARS.
- Under the Global Minimum Tax Administration Act No. 47 of 2024, every DCE must notify SARS of the identity of the entity responsible for filing the GloBE Information Return (GIR).
- The selected Ultimate Parent Entity (UPE) Fiscal Year End for the MNE Group will be used to determine the due date for submitting information to SARS.
- To submit the GMT Notification form, follow the steps below:
- Select the ‘Returns’ top menu.
- Select the ‘GloBE Minimum Tax’ side main menu.
- Select ‘Submit Global Minimum Tax Notification’ sub menu item, eFiling will display the Global Minimum Tax Notification landing page.
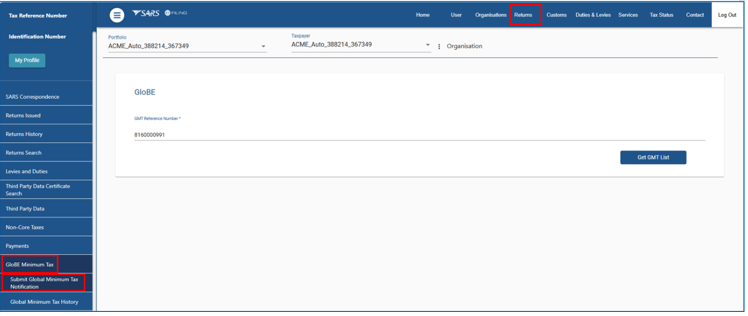
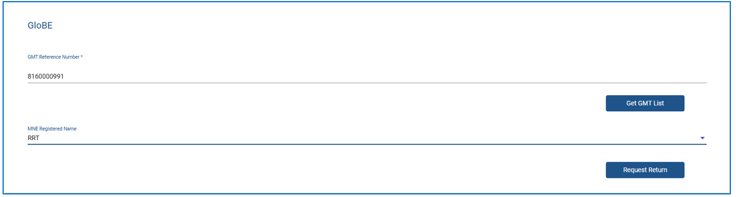
- From the Global Minimum Tax Notification landing page, perform the following actions:
- Click the “Get GMT List” button.
- Select the relevant MNE group name from the dropdown list.
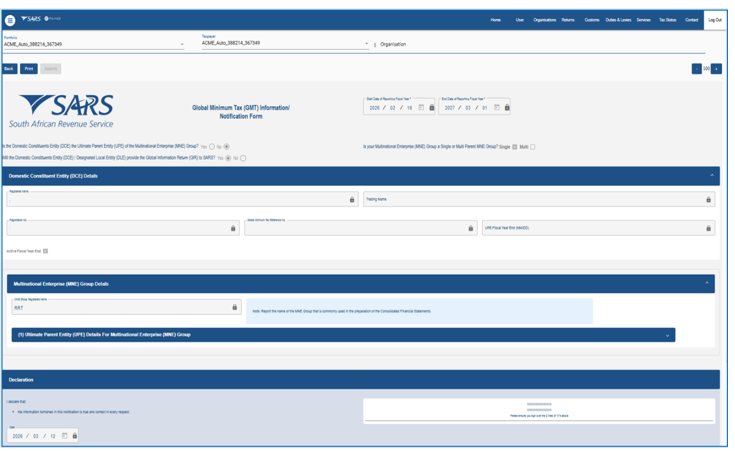
- Select the “Request Return” button, Global Minimum Tax (GMT) Information / Notification Form will be loaded.
- From the Global Minimum Tax Notification landing page, perform the following actions:
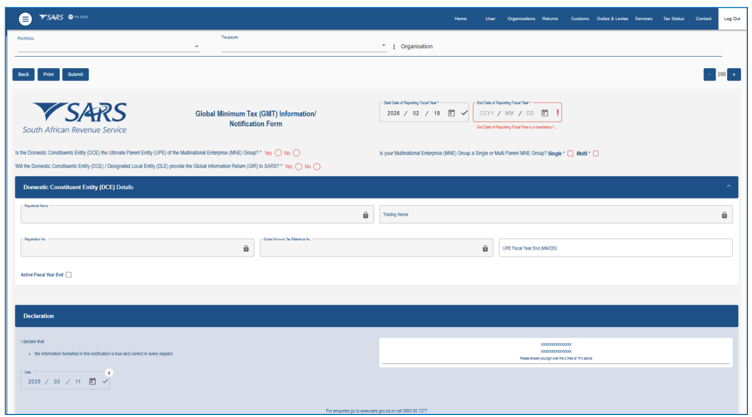
- Complete the Global Minimum Tax (GMT) Information / Notification Form.
- Click the “Submit” button on the Global Minimum Tax (GMT) Information / Notification Form. The request will be evaluated, and the outcome will be communicated via eFiling as one of the following:
- Review – Where the outcome is Review, a Registration Review Notice will be issued on eFiling with a case number requesting the submission of the required supporting documents.
- Declined – Where the outcome is Declined, a description detailing the reason for declining the request will be provided.
- Approved – Where the outcome is Approved, and the Fiscal Year End of the UPE was updated and the Ultimate Parent Entity – Fiscal Year End will change
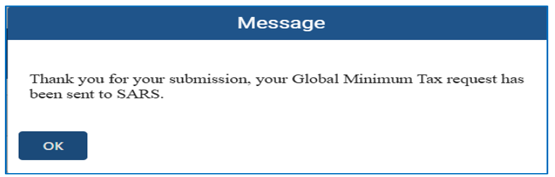
- The following confirmation message will be displayed after submission. The GMT Notification submission will be moved to the Global Minimum Tax History.
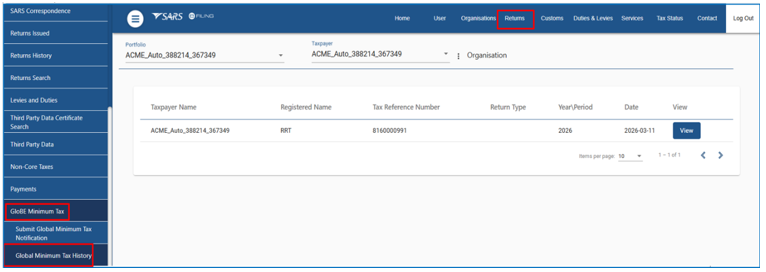
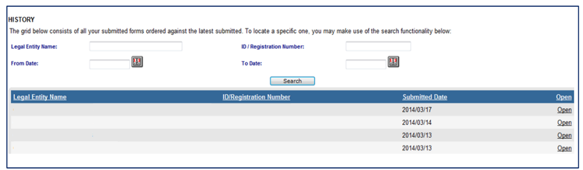
Global Minimum Tax History
- The purpose of the Global Minimum Tax History functionality is to enable a Domestic Constituent Entity (DCE) to view a history of submitted GMT Notification(s) and to request corrections against Submitted GMT Notification.
- To view and correct the GMT Notification form, follow the steps below:
- Select the ‘Returns’ top menu.
- Select the ‘GloBE Minimum Tax’ side main menu.
- Select ‘Global Minimum Tax History’ sub menu item.
- Select the “View” hyperlink to open the submitted GMT Notification. The workpage of a submitted GMT Notification Form will display.
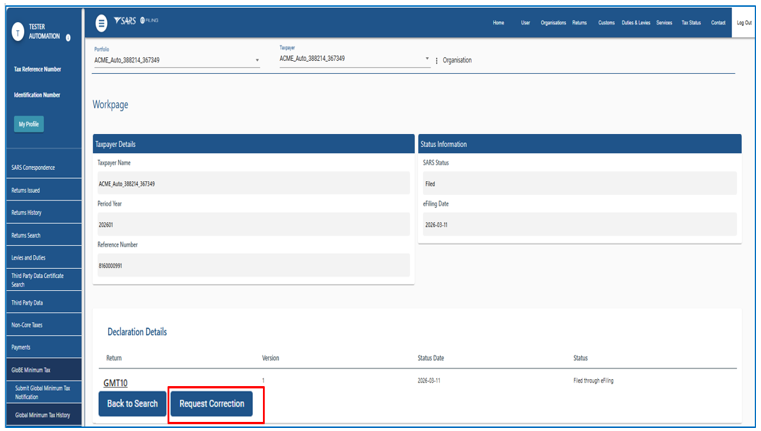
- The work-page of a submitted GMT Notification Form will display after selecting the “View” hyperlink.

- Open the submitted GMT Notification Form (GMT10) link from the work page. Please note that the information displayed on the GMT Notification Form (GMT10) may not be edited
- Follow the steps below to request a correction against a submitted GMT Notification:
- Select ‘Request Correction’ button from the the workpage.
- The Global Minimum Tax (GMT) Information / Notification Form will be loaded after selecting the Request for Correction button.
- Complete details on the GMT Notification Form and Submit the Form.
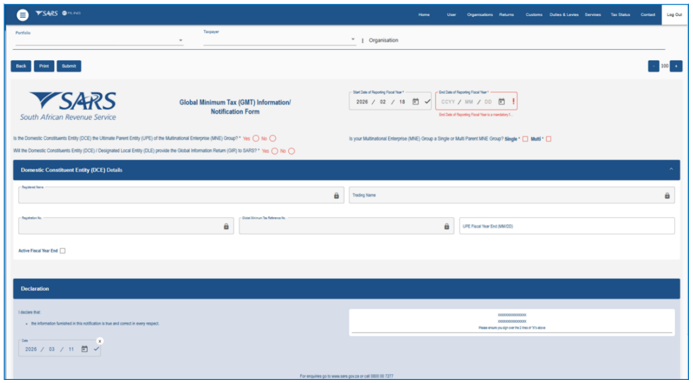
- Once the GMT Notification Form has been amended and submitted, an updated version of the form will be created and displayed in the Global Minimum Tax History.
Submission of RAV01
- Click the Submit Form The user will be prompted to approve your registration request online.
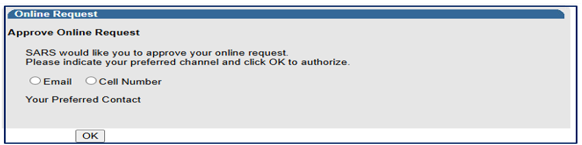
- Select the preferred method of contact and click Ok button.
- Enter the OTP number to authorise your request and click submit.
- The following message will display:

- Click the Continue button to return to the History page to view the results of the submission.
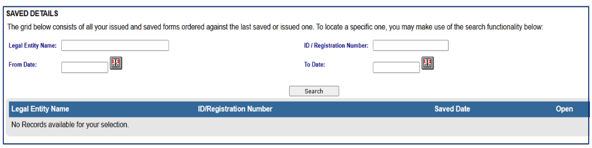
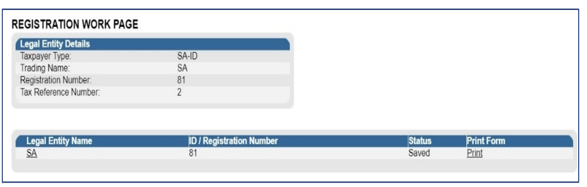
Saved Details
- A version of the form is saved if the user elected to “Save” changes for later submission during the maintenance or capturing of the RAV01 form. “Save” implies that changes were provisionally made to the registered details but not submitted to SARS. All issued and saved forms are displayed for the user.
- If there is no saved information, nothing will display.
- After the RAV01 has been saved, a list of saved RAV01 forms will display.
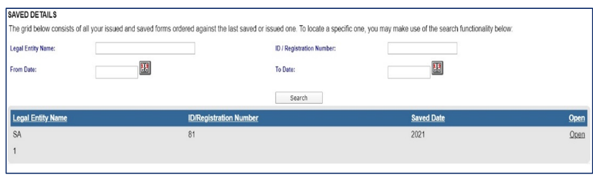
- Select the “Open” hyperlink and the Registration Work Page will display. Select the legal name hyperlink to open the RAV01 form.
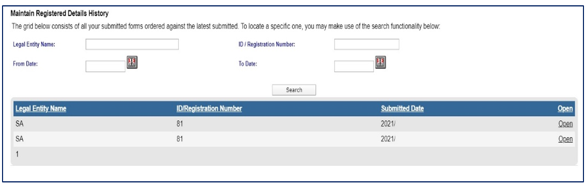
Maintain Registered Details History
- The “Maintain Registered Details History” menu item will display a history of all submissions of the RAV01 to SARS
- If there is no submitted information, nothing will display.
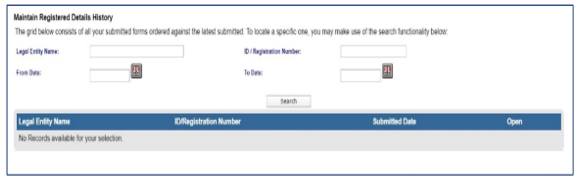
- If there is a RAV01 submitted already, an entry will display as below.
- Click the “Open” hyperlink and the Registration Work Page will display.
Definitions, acronyms and abbreviations
The definitions, acronyms and abbreviations can be accessed here – Glossary webpage.
Legal disclaimer: In the event of conflict or inconsistency between this webpage and the PDF version of the guide, the latter shall prevail.