
Summary
This webpage is designed to assist Fund Administrators / Long-term Insurers / Employers / Tax Practitioners and/or Individuals with the Tax Directive administrative functions on eFiling:
- To activate the Tax Directive function;
- Set applicable rights for the user(s) of eFiling;
- To assist with the completion and submission of the IRP3(b) and IRP3(c) tax directives forms, by Organisations, Tax Practitioners and/or Individual taxpayers, and to ensure that they are successful;
- Obtain a simulation of the Lump Sum tax calculation;
- Provide guidance with the uploading and submission of supporting documents; and
- Any other relevant functions on eFiling.
Introduction
The purpose of a tax directive is to enable SARS to instruct an Employer, Fund Administrator or Insurer on how to deduct employees’ tax from certain lump sums payable to a taxpayer or member.
Tax calculations, according to the tax directive, should be regarded merely as an estimate according to the information on the SARS tax directive system. Some Employees may find that they still have to pay in substantial amounts or that a credit may be due to them once the final liability is determined on assessment. On assessment the final tax liability will be determined according to the date of accrual on the tax directives submitted.
The Employer / Fund Administrator / Insurer must ensure that the correct application form is used, according to the reason for the exit from the fund / Employer’s service and the nature of the amount payable to the Employee / member of the fund.
Who must Complete and Submit a Tax Directive Application
Employers (including an Administrator of a pension fund, pension preservation fund, provident fund, provident preservation fund, retirement annuity fund defined in section 1(1) and Long-term Insurers) are required in terms of paragraph 9(3) of the Fourth Schedule to the Income Tax Act No.58 of 1962, as amended (‘the Act’) to apply for a tax directive in respect of any lump sum benefit payable.
An Employer, Fund Administrator or a Long-term Insurer must submit a tax directive application form irrespective of the amount payable.
On the Individual eFiling Portfolio, the following IRP3 Employer application forms will be available:
- IRP 3(b) – Employees’ tax to be deducted at a fixed percentage (e.g. commission agents / personal service company / personal service trust).
- IRP 3(c) – Employees’ tax to be deducted at a fixed amount (e.g. Paragraph 11 of the 4th Schedule (hardship) / assessed loss carried forward).
- Relief of SA Tax Form:
- RST01 – Directive Application by Non-Resident for Relief of SA Tax for Pension and Annuities
On the Tax Practitioner eFiling Portfolio, the following IRP3 Employer application forms will be available:
- IRP 3(b) – Employees’ tax to be deducted at a fixed percentage (e.g. commission agents / personal service company / personal service trust).
- IRP 3(c) – Employees’ tax to be deducted at a fixed amount (e.g. Paragraph 11 of the 4th Schedule (hardship) / assessed loss carried forward).
- IRP 3(f) – Doubtful Debts 11(j)(1)(2)
- IRP 3(q) – Foreign Tax Credit under paragraph of 10 of the 4th Schedule of Income Tax Act
- Relief of SA Tax Form:
- RST01 – Directive Application by Non-Resident for Relief of SA Tax for Pension and Annuities
On the Organisation eFiling Portfolio, the following applications will be available:
- Directives Form:
- Form A&D – Lump sums paid by pension, pension preservation fund, provident or provident preservation fund. (e.g., death before retirement / retirement due to ill health / retirement / provident fund – deemed retirement).
- Form B – Lump sums paid by pension or provident fund (e.g. resignation / withdrawal / winding up / transfer / Section 1, Paragraph (eA) of the definition of gross income transfer or payment / future surplus / unclaimed benefit / divorce – transfer, divorce – non-member spouse / divorce – member spouse / housing loan / involuntary termination of employment (retrenchment) including withdrawals from a pension preservation or provident preservation fund).
- Form C – Lump sums paid by a RAF to a member (e.g. death before retirement / retirement due to ill health / retirement / transfer from one RAF to another / discontinued contributions / future surplus / divorce – transfer, divorce – non-member spouse / divorce – member spouse / emigration withdrawal / visa expiry).
- Form E – Lump sums paid after retirement by an insurer or a fund (e.g., Death Member / Former Member after Retirement, Par. (c) Living Annuity Commutation, Death – Next Generation Annuitant, Next Generation Annuitant Commutation and Transfer of an annuity to another insurer).
- IRP3 Employer Form:
- IRP3(a) – Gratuities paid by employer (e.g., death / retirement / retirement due to ill health / retrenchment / other – to supply reason for payment).
- IRP 3(b) – Employees’ tax to be deducted at a fixed percentage (e.g. commission agents / personal service company / personal service trust).
- IRP 3(c) – Employees’ tax to be deducted at a fixed amount (e.g. Paragraph 11 of the 4th Schedule (hardship) / assessed loss carried forward).
- IRP3(s) – Employees’ tax to be deducted on any amount to be included under section 8A or 8C of the Income Tax Act.
- IRP 3(f) – Doubtful Debts 11(j)(1)(2)
- IRP 3(q) – Foreign Tax Credit under paragraph of 10 of the 4th Schedule of Income Tax Act
- Recognition Of Transfer Forms:
- ROT01 – Recognition of transfer between two funds before retirement must be used where a benefit was transferred to another approved fund.
- ROT02 – Recognition of GN18 purchase of a member / beneficiary owned pension / annuity from an insurer must be used to acknowledge the purchase of annuities.
- Cancel ROT – Request to cancel existing Recognition of Transfer
- Relief of SA Tax Form:
- RST01 – Directive Application by Non-Resident for Relief of SA Tax for Pension and Annuities
- Directive Cancellation Request
- Cancel Directive – Request to cancel existing directive.
The IRP3(b) directive application process has been changed. Applicants are no longer permitted to select a percentage of their own choice as was allowed in previous years. This process is now completely automated, and the system calculates the percentage based on the income and expenses declared by the applicant.
For more information on the completion of lump sum tax directive application forms, refer to the following external guides on the SARS website:
- Guide to complete Tax Directive Application forms;
- Completion Guide for IRP3(a) and IRP3(s) Forms; and
- Guide to complete, submit and cancel a Recognition of Transfer Form.
NOTE: Only Fund Administrators of a pension fund, pension preservation fund, provident fund, provident preservation fund, retirement annuity fund defined in section 1(1) of the Act and Long-term Insurers can complete the tax directive application forms applicable to lump sum benefits. A member of a fund / the member’s tax representative / a Tax Practitioner / Financial Advisor cannot complete and submit a tax directive application form for lump sums payable by a Fund Administrator or Long-term Insurer.
How to obtain a Tax Directive Application Form
The tax directive application forms can be obtained through any of the following channels:
- eFiling:
- If your organisation is not registered as an eFiler, please log on to www.sars.gov.za to register and refer to the guide: ‘How to Register, Manage Users and Change User Password on eFiling’.
- Electronically (via an Interface Agent or eFiling)
- Fund Administrators or Long-term Insurers can be registered as an Interface Agent or use established Interface Agents to capture the tax directive application forms online.
How to Submit a Tax Directive Application
NOTE: It is recommended that the Fund Administrator or Long-term Insurer makes use of either eFiling or the electronic submission of tax directive application form/s through the Interface agencies to obtain a tax directive.
A completed tax directive application form can be submitted through any of the following channels:
- Electronically: Through an Interface Agent.
- eFiling: Employer / Fund Administrators / Long-term Insurers registered on eFiling can complete the forms online and obtain the finalised tax directive online.
The Fund Administrators / Long-term Insurers can submit tax directive applications, that requires supporting documents, only through eFiling, for example tax directives for non-residents that require the certificate of residence, ‘Visa expiry’, etc.
Registration of eFiling
Registration forms part of the process that must be completed for the use of eFiling. This will allow your details to be processed to the SARS system. This section will provide a short introduction on how to register and log onto eFiling in order to submit your Income Tax return to SARS.
New eFiling Users
- Navigate to the SARS website www.sars.gov.za and the following screen will be displayed.

- Click the eFiling Tab and the ‘Register Now’ button.

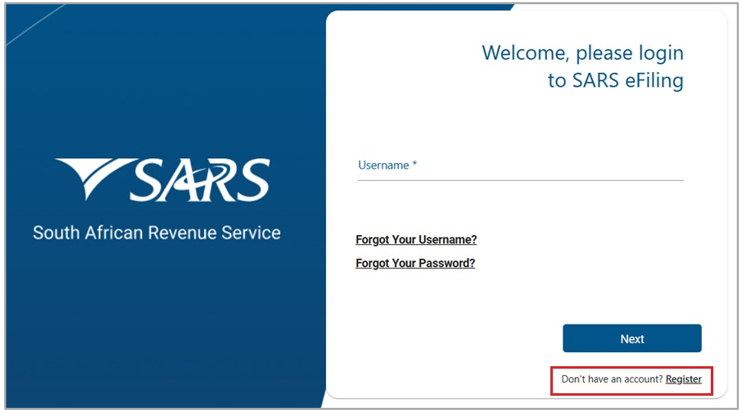
- Alternatively, click the ‘Login’ button and the Login screen will be displayed.

- If you are not registered, click the ‘Register’ hyperlink at the bottom of the screen.
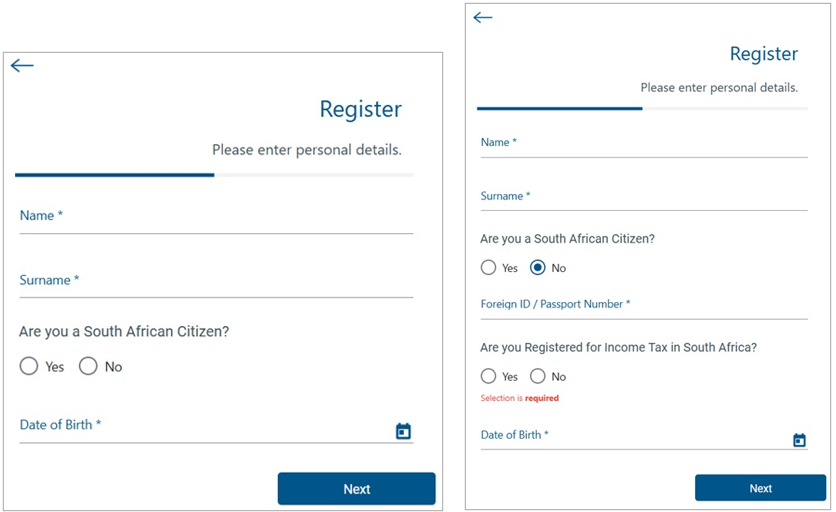
- Complete all the relevant information on the personal details screens and click the ‘Next’ button to proceed with the registration process.
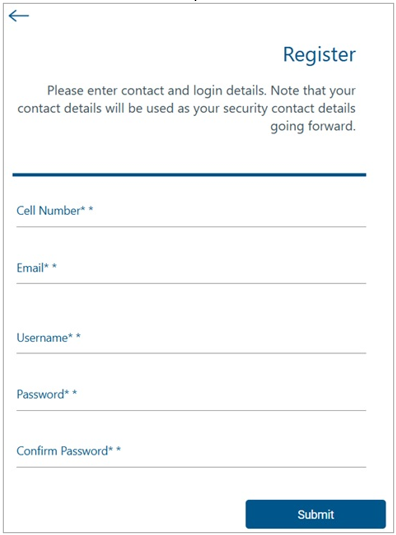
- Enter contact details (Cell number and Email address), Username, Password and Confirm Password. Click ‘Submit’ to proceed.
- Upon successful registration, proceed to login to eFiling.
- For further assistance with eFiling registration or profile management, refer to the ‘How to register for eFiling and manage your user profile’ available on the SARS website www.sars.gov.za
Registered eFiling Users
- Once registered, you are required to keep your login credentials (username and password) which will always be used to gain access to your profile and usage of the system.
- Navigate to the SARS website www.sars.gov.za and click ‘Login’.

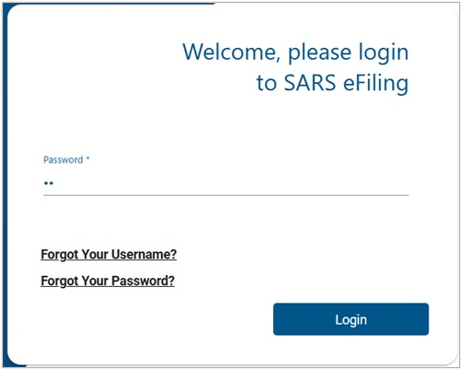
- Enter your ‘Username’ and click the ‘Next’ button to continue.
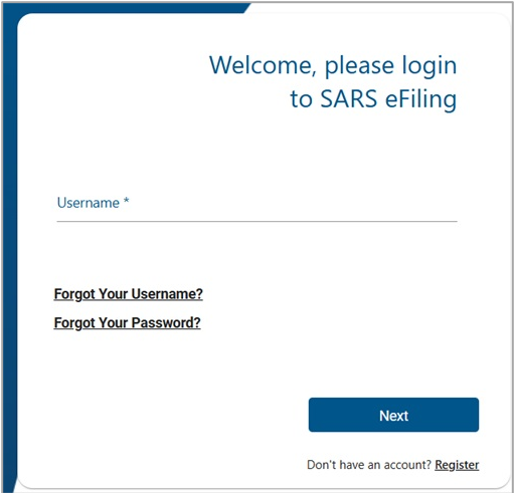
- If you have forgotten your Username and / or Password, click on the ‘Forgot Your Username?’ or ‘Forgot Your Password?’ hyperlinks.
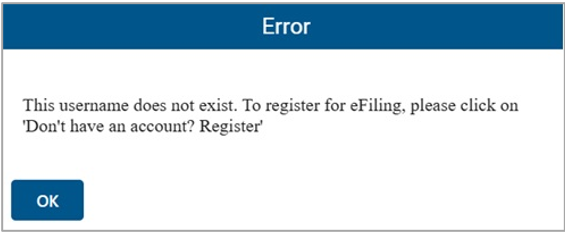
- If the username entered is incorrect, the following error message will be displayed.
- Enter your ‘Password’ and click the ‘Login’ button to proceed.
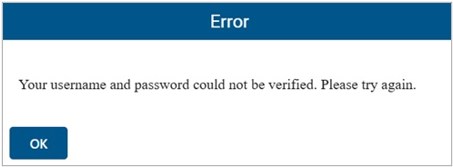
- Note: If the login and password details are incorrect, an error message will be displayed on the screen for the user.
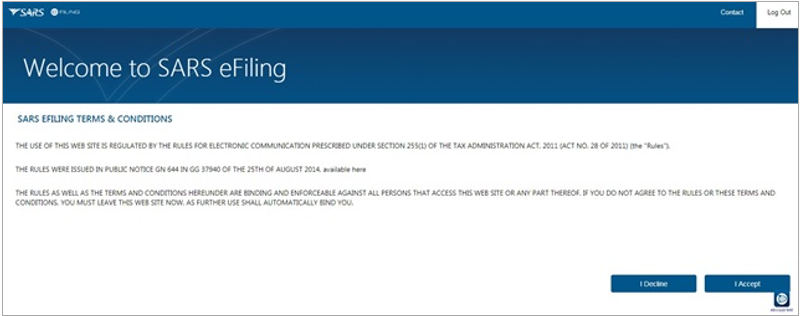
- If you are a newly registered eFiling user, after successful first login to eFiling, the Terms and Conditions screen will be displayed. You are required to read the Terms and Conditions carefully and scroll to the bottom. Select ‘I Accept’ to proceed.
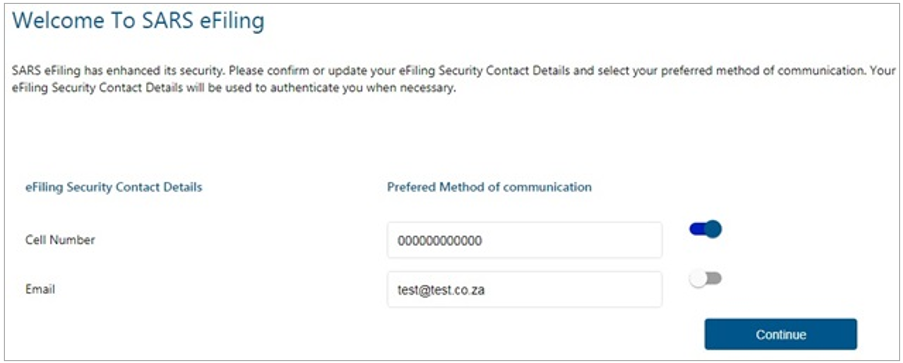
- Each eFiler must confirm or update his / her eFiling Security Contact Details of either cell number or email address, which will be used to authenticate the eFiling user.
- Update the cell number or email address (if the information presented differs) and click the ‘Continue’ button to proceed with the Login process.
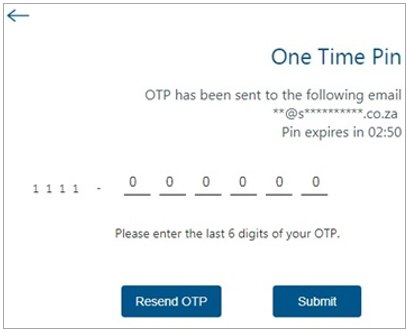
- A One Time Pin (OTP) will be sent to indicate preferred method of communication of the eFiling user. Only one preferred method of communication is allowed, where the OTP will be sent.
- Enter the last 6-digits of OTP that has been sent to indicated preferred method of communication and click the ‘Submit’ button.
- Upon successful login, the eFiling Dashboard will be displayed.
eFiling Portfolios
A registered eFiler can act in different ‘roles’ on eFiling (e.g. Tax Administrator). These ‘roles’ are referred to as Portfolio Types. For example:
- Individual – a person acting as himself / herself to administer his / her own individual taxes
- Tax Practitioner – a person registered with SARS and a Recognised Controlling Body (RCB) and has a signed Power of Attorney to act on behalf of another taxpayer.
- Organisation – a representative of a tax paying entity acting either as the representative taxpayer (e.g. Public Officer, Executor of an estate, Fund Administrator, etc.) or an appointed representative with a signed Power of Attorney in place.
eFilers with a Tax Practitioner and Organisation portfolio type can:
- Activate multiple taxpayers against that portfolio type
- Group taxpayers under the same portfolio type
- Specify a descriptive name for each group (for ease of reference).
If you registered for different portfolio types prior to 1 July 2019, you would have accessed the abovementioned portfolios by using a unique username and password for each. As from 1 July 2019, you will only use one username and password (referred to as the primary login) to login to eFiling. You can then choose the portfolio that you want to access.
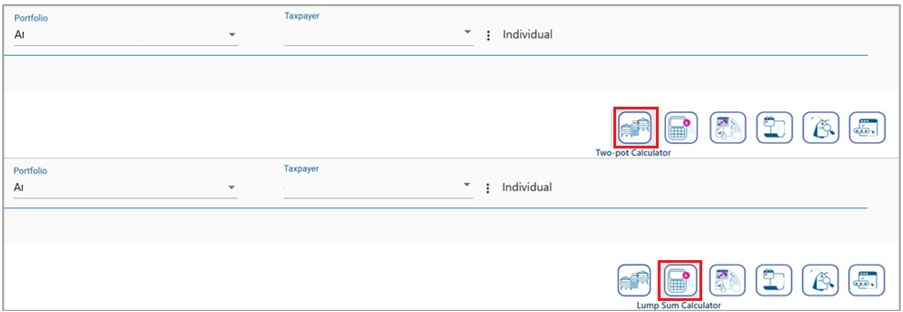
The eFiling Dashboard screen was enhanced to assist taxpayers in navigation to the following services:
- Two-pot calculator – this option allow you obtain an estimation of the possible tax that would be levied based on the annual remuneration and savings withdrawal amount captured only. Provide you with sufficient information to assist in the decision regarding a withdrawal from their retirement funds i.e. saving component and provide your detailed tax compliance information.
- Lump Sum Calculator – this option allows you to obtain a simulated tax calculation on the lump sum amount.
- Online Booking – this option will route you to the SARS Online Booking link to schedule an appointment with SARS.
- Statement of Account (only available on individual portfolio)
- My Compliance Status
- Notice of Registration
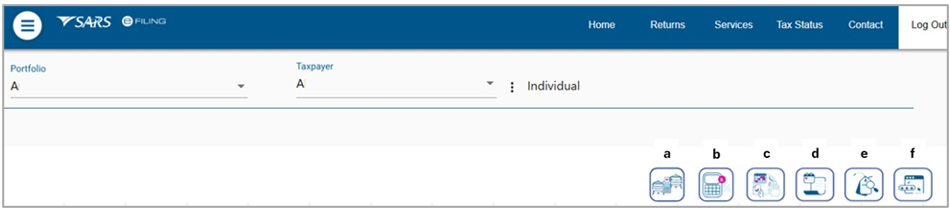
By clicking on each tab, you will be navigated to the specific function on eFiling.
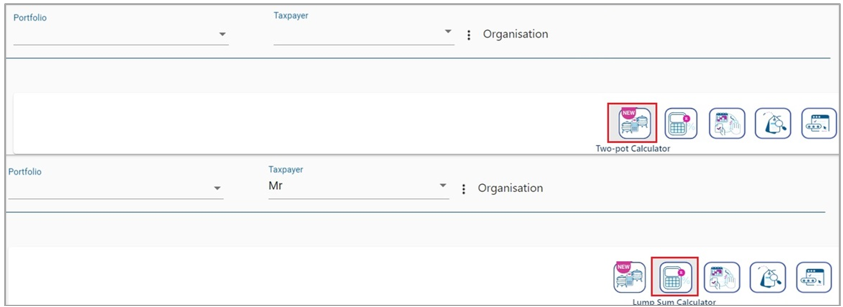
Below are examples of the different eFiling Dashboard screens for Individual, Tax Practitioner and Organisation, that indicate where the Two-pot and Lump Sum Calculator tabs is located.
Individual:
Tax Practitioner:
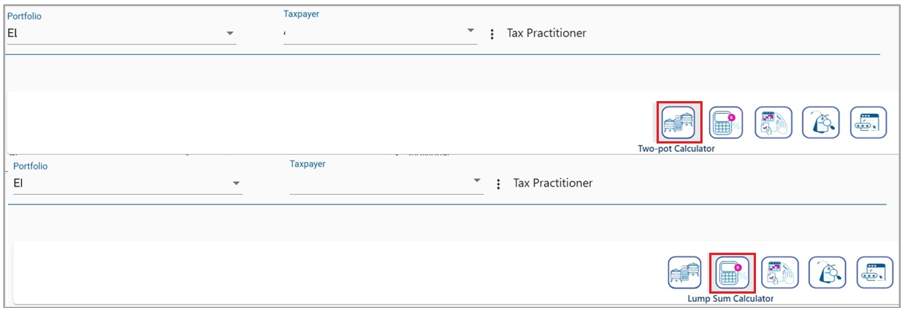
Organisation:
For further assistance with eFiling registration or profile management, refer to the “How to register for eFiling and manage your user profile” available on the SARS website www.sars.gov.za.
Rights Group Functionality on eFiling
- The following section of the guide deals with configuring of new groups, assigning taxpayers and users, already on your portfolio, to a group, access rights to groups.
- In addition to the above, this section will also deal with how to activate the Tax Directive functionality on eFiling. You must ensure that the correct rights and authorisation levels have been allocated to users on your portfolio to successfully utilise the Tax Directive functionality.
How to create a new Group
- In order to create a new group:
- Select ‘Organisation’ from the menu on the top
- Select ‘Organisation’ again from menu on the left
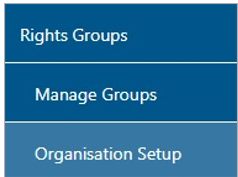
- Click on ‘Rights Group’ from menu on the left (scroll down if required).
- Click on ‘Manage Groups’ from menu on the left.
- The ‘Group Details’ screen will display.
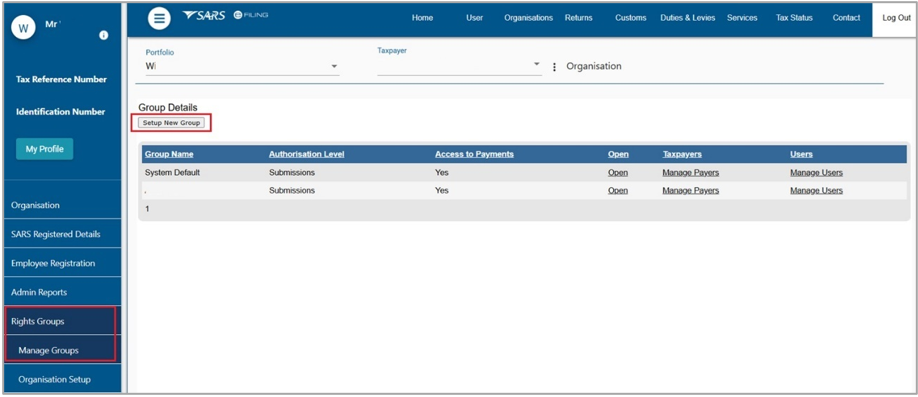
- Click on ‘Setup New Group’ button and the ‘Create new Group’ page will be displayed.
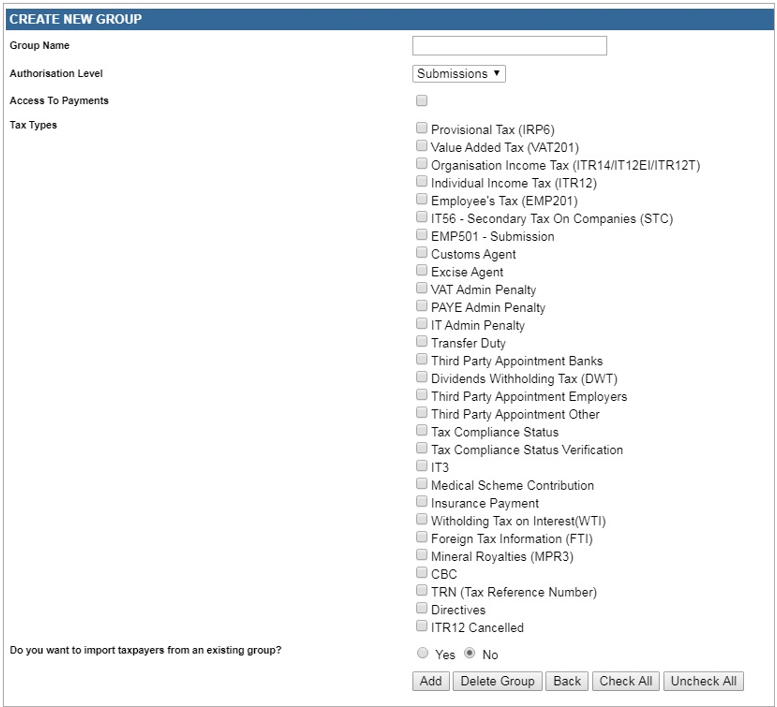
- Complete the ‘Group Name’.
![]()
- Select the applicable ‘Authorisation Level’:
- View Only: This will allow you to only have view access
- For the tax file, you will be able to view the letter. The view button must be visible but disabled “greyed out” for the viewer to open or download.
- Completions: You will only be able to view and complete forms or applications
- For the tax file, you will be able to view and download the file and complete application forms.
- Submissions: You will be allowed to view, complete and submit tax directive applications.
- For the tax file, you will be able to view the letter, complete, and submit application forms. In addition, the submitter must be able to open and download the tax rate file.
- View Only: This will allow you to only have view access

- Indicate if the group will have ‘Access to Payments’, by selecting the tick box.
- The tick box must be selected if the users in the group must pay the IT88L (stop-order) amounts and /or the PAYE on the tax directive over to SARS via eFiling.
![]()
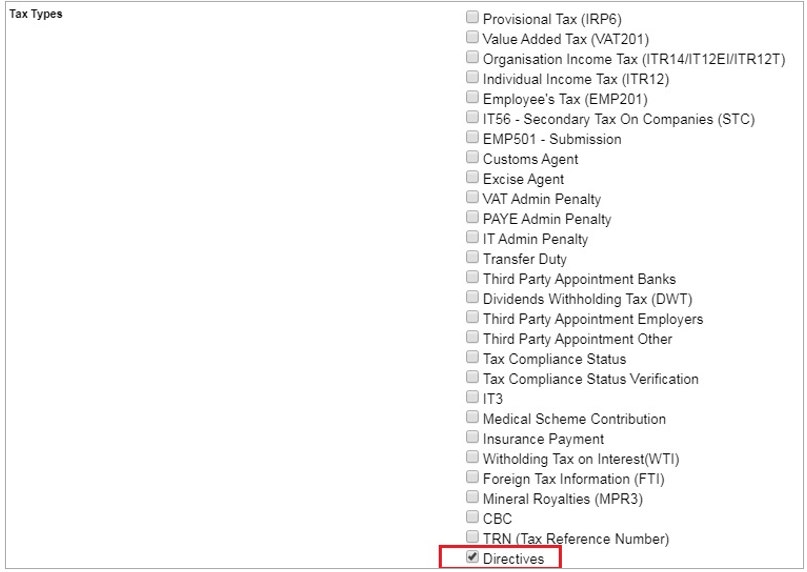
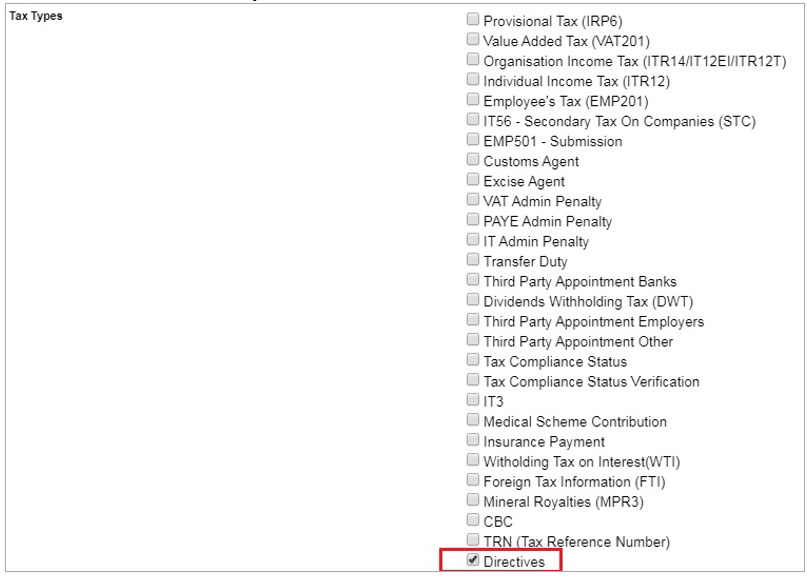
- Select the applicable tax types to be activated. Here you will select ‘Directives’.
- If you wish to import taxpayers (already part of your portfolio) from an existing group, select the ‘Yes’ indicator. If not, ensure that the indicator is ‘No’. Select the ‘Add’ button to complete the creation of the new group.
- If the taxpayer / user is not part of your portfolio refer to paragraph 13 ‘Manage users on an Organisation or Tax Practitioner portfolio’ in the external guide ‘How to register for eFiling and manage your user profile”
![]()
- The new group will be listed on the Group Details page.

- To view the details of the group, click the ‘Open’ link and the ‘Update Group Details’ screen will be displayed.
Assigning taxpayers to the group
- Click on the ‘Manage Payers’ hyperlink and a list of the current taxpayers will be listed.

- Select the taxpayers that you wish to add to the new group and click the ‘Save’ button to continue.
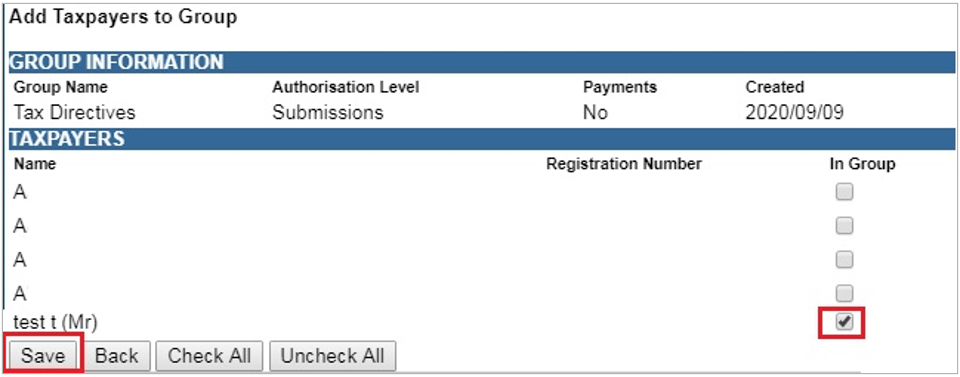
- You will receive a confirmation message, select ‘OK’ to proceed to add the taxpayer to the group or ‘Cancel’ to return to the list of taxpayers to add to the group.

- You will receive a successful message upon confirmation.

Assigning users to the group
- If you select the ‘Manage Users’ hyperlink, you will be able to allocate users (already part of your portfolio) to the new group that you have created.

- Select the applicable user and drag this person into the grey box.

- Click on the ‘Save’ button to complete.

- Click the ‘OK’ button to proceed to add the user to the group or ‘Cancel’ to view the unallocated user screen.

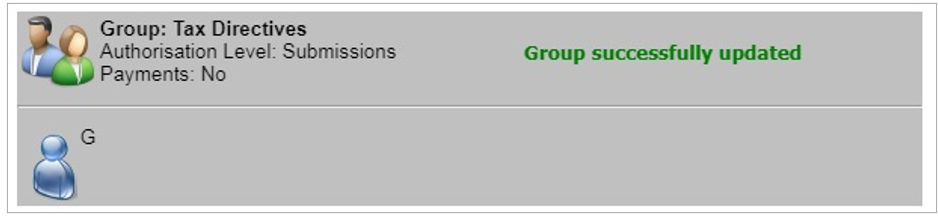
- A confirmation message will be displayed after the user have been successfully added the user to the group.
- Select ‘Switch to Grid view’ and the list of users will be displayed to add to groups as explained above. If you select ‘Switch to Drag and Drop View’ the screen will be as the original displayed screen.
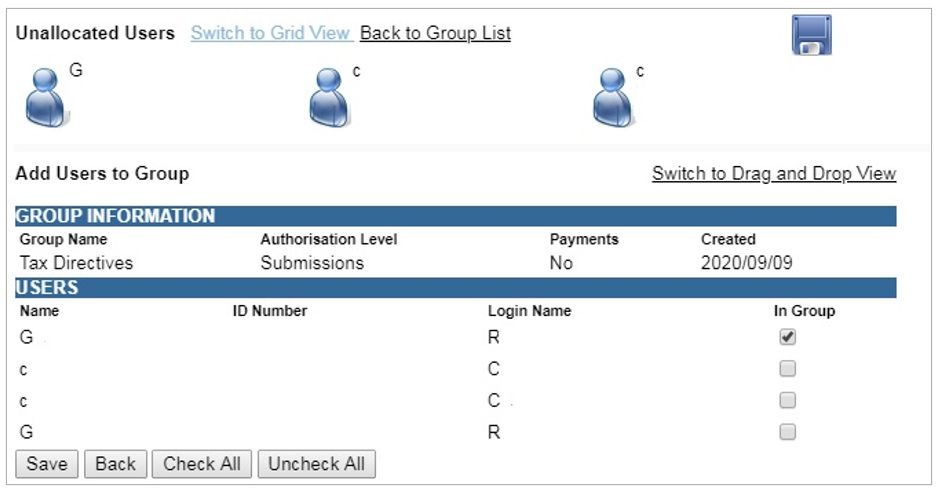
- Tick the checkbox next to the user and click on the ‘Save’ button to link the users to the group.
Activation of Tax Directive functionality for an existing group
In order to activate the tax type functions and services on eFiling (e.g. Tax Directives, Tax Compliance Status, etc) you must ensure that the correct rights and authorisation levels have been allocated to users on your portfolio.
To activate the tax type functions and services:
- Select ‘Organisation’ from the menu on the top
- Select ‘Organisation’ again from menu on the left
- Click on ‘Rights Group’
- Click on ‘Manage Groups’
- The ‘Group Details’ screen will display.

Click on the ‘Open’ hyperlink on the Group you want to activate the Tax Directive functionality for:
- Insert/edit the ‘Group Name’ where applicable.
- Ensure the correct ‘Authorisation Level’ is selected:
- View Only: This will allow you to only have view access
- For the tax file, you will be able to view the letter. The view button must be visible but disabled “greyed out” for the viewer to open or download.
- Completions: You will only be able to view and complete forms or applications
- For the tax file, you will be able to view and download the file and complete application forms.
- Submissions: You will be allowed to view, complete and submit tax directive applications.
- For the tax file, you will be able to view the letter, complete, and submit application forms. In addition, the submitter must be able to open and download the tax rate file.
- View Only: This will allow you to only have view access
- Select the ‘Tax Directive’ tax type to be activated.
- Click ‘Update’ to activate the specific tax type functionality required. You also have the option to ‘Delete Group’.
If you wish to import taxpayers from an existing group, select the ‘Yes’ indicator. If not, ensure that the indicator is ‘No’. Select the ‘Add’ button to complete the creation of the new group.

Refer to ‘Manage users on an Organisation or Tax Practitioner portfolio’ section in the external guide ‘How to register for eFiling and manage your user profile”
Organisation Setup
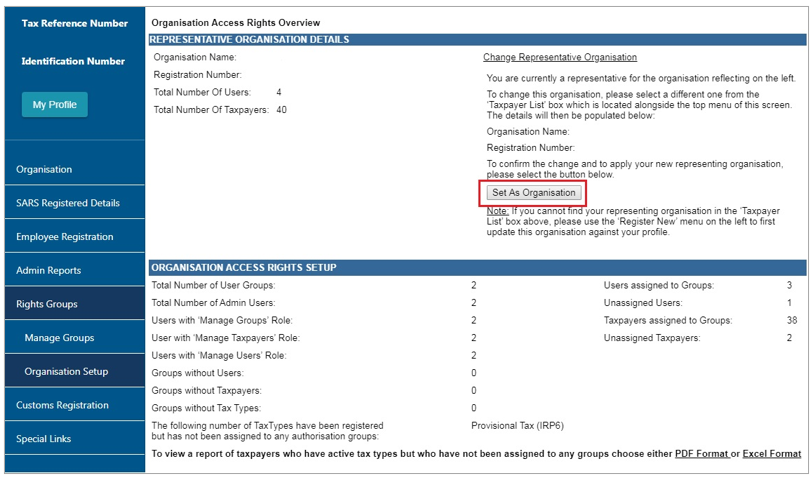
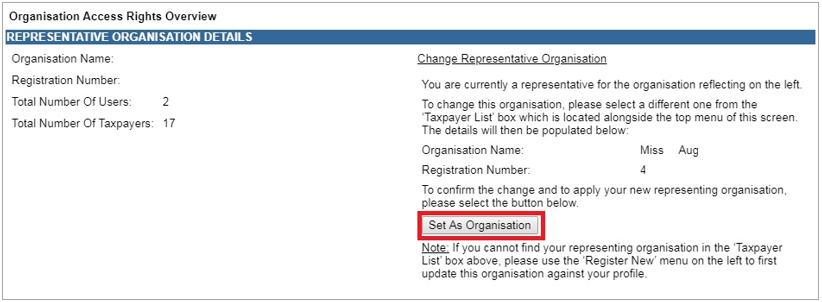
- Select ‘Organisation Setup’ and the Organisation Access Rights overview page will be displayed with information on Representative Organisation Details and Organisation Access Rights Setup.
- ‘Organisation’ refers to the organisation that is responsible for rendering the service.
- If you wish to change the default organisation, select the applicable organisation from the taxpayer list and select the ‘Set As Organisation’ button. Ensure that the entity displayed is the organisation or main holding company for the profile.
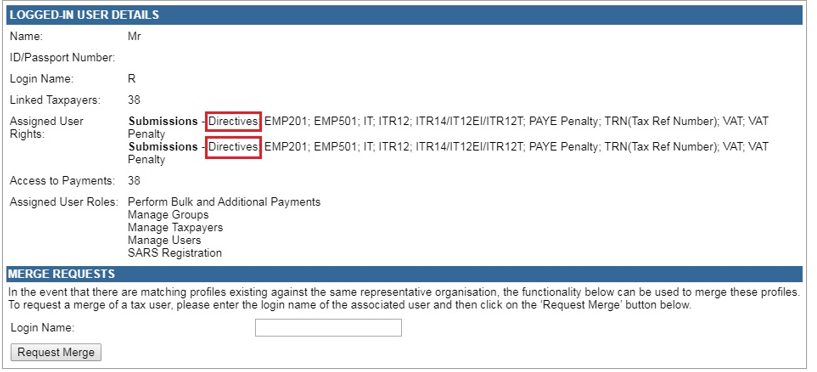
- Logged in User Details displays information about the user that is logged into the profile.
- Directives have been added as part of the User’s Rights.
- When you click on ‘Services’ your eFiling profile, the taxpayer will default to your default profile. This means that all the tax directives will be stored under this taxpayer on the default profile.

- Note: If the default profile is changed, the directive that was submitted on the previous default profile will not move to the new one as it remains on the original default profile.
- If you would like to change the default setting, the following steps must be followed:
- Click on the ‘Organisations’ tab on the top ribbon.

- Then on the right-hand side click on ‘Rights Group’ and ‘Organisation Setup’
- At the top of the screen, select the taxpayer you want use as the default.

- Once selected you click on ‘Set as Organisation’
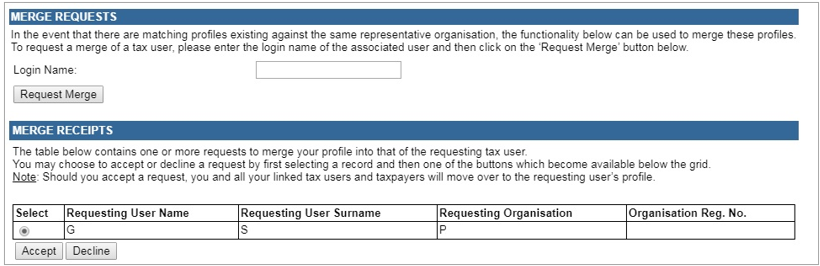
Merge Requests
- This functionality allows you to merge profiles into one in order to better manage the organisations profile and information. This may be used when you have more than one matching profile against the same organisation.
- Capture the login name of the user profiles you want to merge with your profile.
- Click on the ‘Request Merge’ button.

- Click on ‘OK’ to confirm the request.

- Once you have accepted the merge request an email will be sent to the requested user and the following screen will be displayed.

- The receiving user will be required to accept or reject the request. Once accepted or rejected an email will be sent to the requesting party. If you decline a request, the request will be removed from your profile.
- The receiving user will access the ‘Organisation Setup’ functionality and ‘Merge Receipts’ details will be displayed at the bottom of the screen.
- If you click ‘Accept’ or ‘Decline’, you must confirm to merge profiles. Click ‘OK’ to continue.

- If you accepted the merge request, you would receive the following message to confirm the merge.

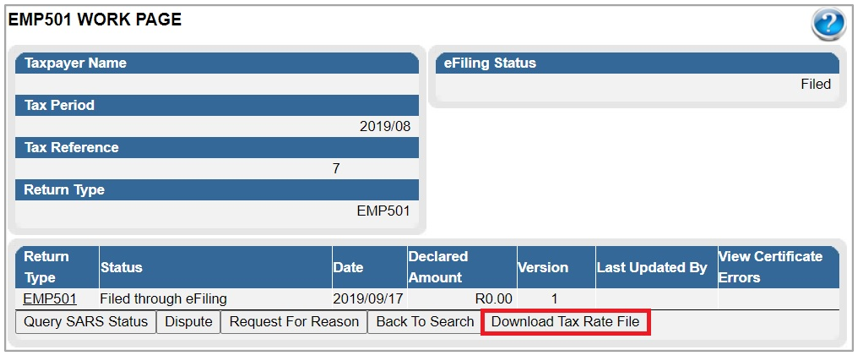
Employers accessing the Tax Rate Files
- The tax rate file will inform the tax rate to be applied in the calculation of PAYE for each taxpayer. This Tax Rate File will be accessible on eFiling for employers with employees 50 and below number of employees.
- In order to download the tax file, ensure that the user rights selected are “Submission” or “Completion”. If you selected “View Only” as the user right, you will not be able to download the tax file.
- User or employer will access the EMP501 Work Page
- The ‘Download Tax File’ button will be displayed, as indicated below, to download the file.
- This button will only be displayed if there is a tax rate file issued to the employer.
- The file will be downloaded in .csv format or you will be able to select in which program to open the file.
- The file will also be linked to the corresponding letter that can be located in the eFiling ‘’SARS correspondence’’ side menu.
Two-Pot Calculator Functionality
The Two-pot calculator allows you:
- To obtain the possible tax that would be levied based on the annual remuneration and savings withdrawal amount captured only.
- Provide you with sufficient information to assist in the decision regarding a withdrawal from their retirement funds i.e. saving component and provide your detailed tax compliance information.
After successfully logging into eFiling, click the “Two-pot calculator” tab on the home screen, as indicated below.

The Two-Pot Retirement System screen will be displayed. On eFiling, the following fields will be pre-populated with your information:
- Name
- Surname
- ID Type
- ID Number
- Tax Reference Number
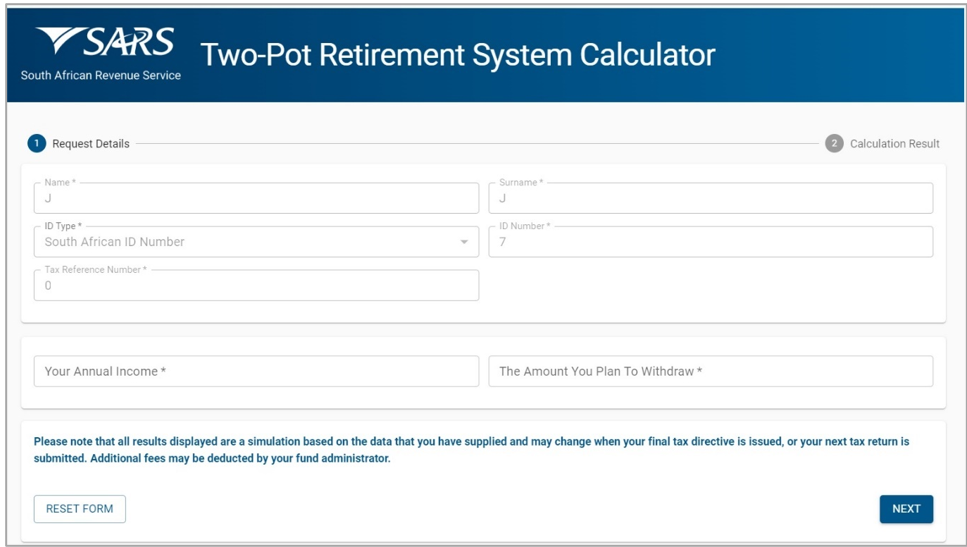
- Complete “Your Annual Income” and “The Amount You Plan To Withdraw” fields.
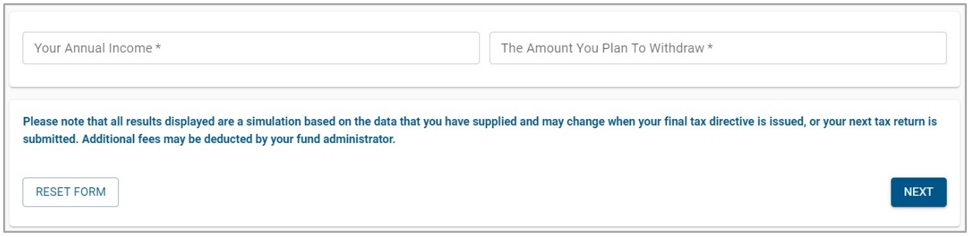
The following message is displayed: “Please note that all results displayed are a simulation based on data that you have supplied and may change when your final tax directive is issued, or your next tax return is submitted. Additional fees may be deducted by your fund administrator”. Ensure that you read the message carefully.
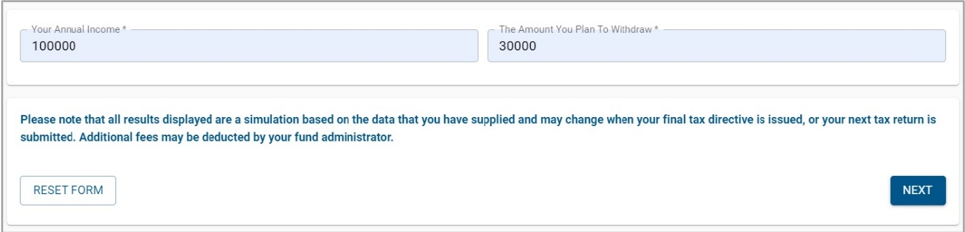
- Click the “Next” button to proceed with the calculation.
- Below is an example of a calculation result screen.
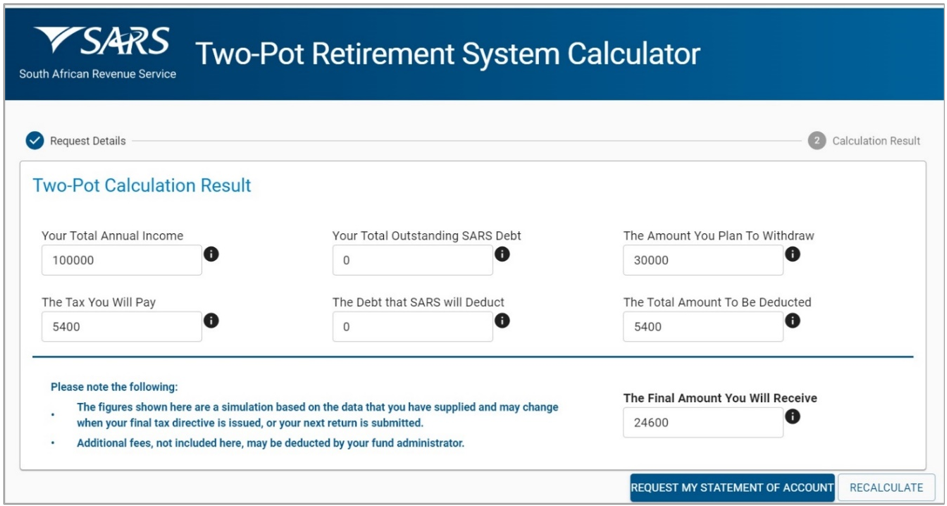
On the calculation result screen, the following fields will be displayed:
- Your Total Annual Income – This is what you captured as your annual income.
- The Tax You Will Pay – This amount is calculated based on the Total Annual Income that you supplied.
- Your Total Outstanding SARS Debt – The is the total of all debt amounts that are due to SARS by you.
- The Debt that SARS will Deduct – This is the portion of the total debt that you currently owe to SARS that will be deducted from the amount that you withdraw from your fund.
- The Amount You Plan To Withdraw – This is what you captured as the amount that you plan to withdraw from your fund.
- The Amount To Be Deducted – The sum of the Tax You Will Need to Pay and the Debt That SARS Will Deduct Amounts.
- This is the Final Amount You Will Receive – The difference between the Total Withdrawal Amount and the Total to be Deducted amount.
On the Calculation Result screen, the following notes will be displayed:
- The figures shown here are a simulation based on the data that you have supplied and may change when your final tax directive is issued, or your next return is submitted.
- Additional fees, not included here, may be deducted by your fund administrator.
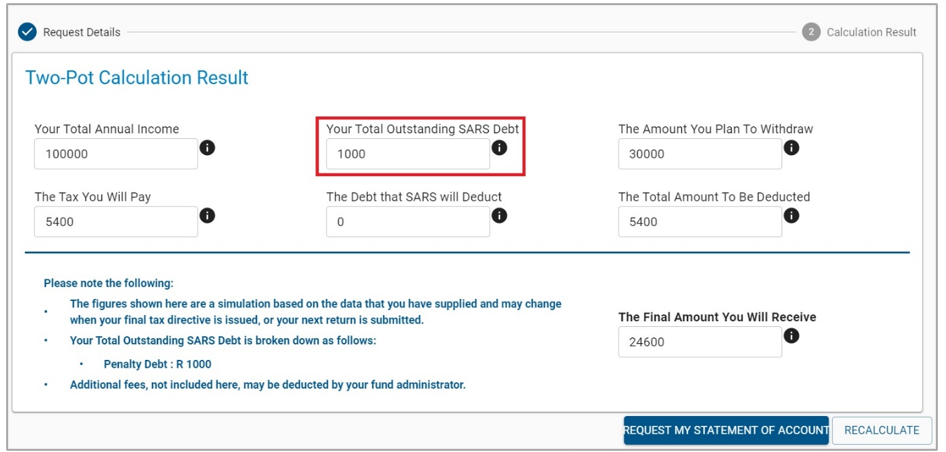
- If you have debt owing to SARS, the following notes will be added onto the abovementioned notes, namely:
- Your Total Outstanding SARS Debt is broken down as follows:
- Assessed Debt
- Penalty Debt
- Provisional Debt
- You have returns outstanding for the following years.
- Your Total Outstanding SARS Debt is broken down as follows:
- Below is an example of a screen where there is debt outstanding.
At the bottom of the results screen, the following two buttons will be displayed:
- Request My Statement of Account – This option allows the user to access the SOQS Request Documents page; and
- Recalculate – Returns the user to the initial 2-Pot Retirement System details screen.
For more information on the Two-Pot Retirement System, visit the SARS website on www.sars.gov.za.
Tax Directive Functionality
- Once you have activated the Directives tax type as explained above, you will be able to access the Tax Directive functionality on eFiling:
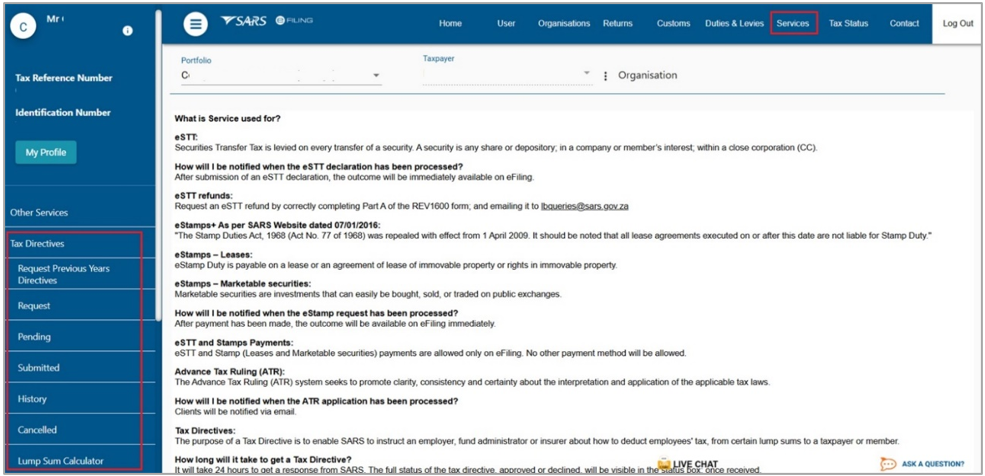
- Select ‘Services’ from the menu on the top
- Notes:
- Functionality that are available under Services on eFiling will default to the default profile under Taxpayer. This means all directive applications that is submitted will be under the default profile and you cannot select a taxpayer and then submit it under the taxpayers work sheet.
- If the default profile is changed, the tax directive will remain under the default profile that it was submitted under and not moved to the new profile.
- Select ‘Tax Directives’ again from menu on the left
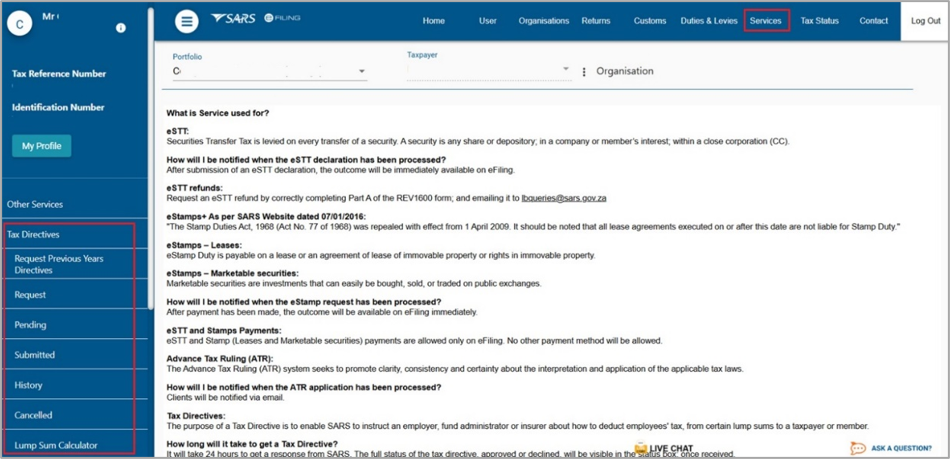
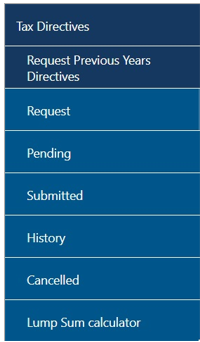
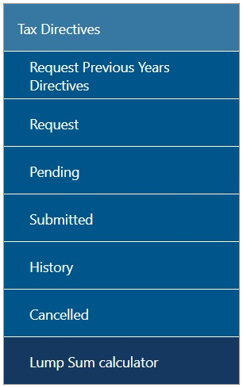
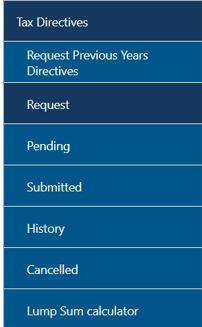
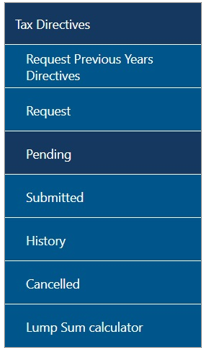
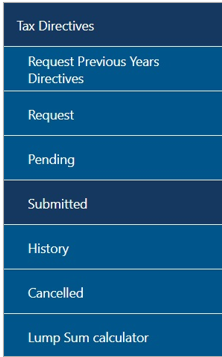
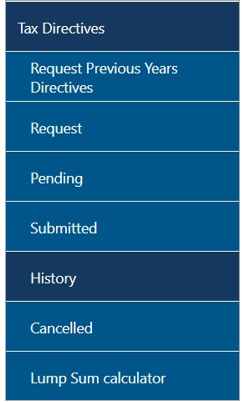
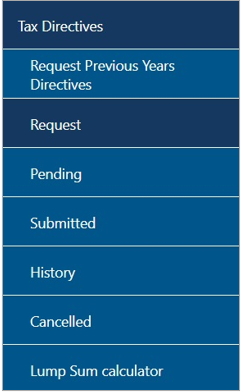
The following menus are available within the Tax Directives function on the Organisation profile:
- Request Previous Years Directives – request previously issued tax directives for a maximum of up to three years.
- This functionality will only be active on the Individuals and Tax Practitioner profiles.
- Request – All the application forms for tax directives will be displayed, including the application for cancellation of a tax directive.
- Pending – All pended tax directive application forms that are completed and saved but not submitted to SARS will be displayed here.
- Submitted – All submitted applications for Tax Directives will be displayed
- History – A history or view of all tax directive applications will be displayed.
- Cancelled – All cancelled applications for Tax Directives submitted to SARS will be displayed here.
- Lump Sum Calculator – this option allows you to obtain a simulated tax calculation on the lump sum amount.
- This functionality will only be active on the Individuals and Tax Practitioner profiles.
- The calculation is based on the fields captured and is an estimation of the tax payable according to the information on SARS system when the calculation is submitted.
If you are an individual and want to apply for a tax directive, you will access the tax directive functionality:
- Select ‘Services’ from the menu on the top
- Select ‘Tax Directives’ again from menu on the left
The following menus are available within the Tax Directives function on the eFiling portfolios:
- Request Previous Years Directives – request previously issued tax directives for a maximum of up to three years.
- Request – all the application forms for tax directives will be displayed, including the application for cancellation of a tax directive.
- Pending – All pended tax directive application forms that are completed but not submitted to SARS will be displayed here.
- Submitted – All submitted applications for Tax Directives will be displayed
- History – A history or view of all tax directive applications will be displayed.
- Cancelled – All cancelled applications for Tax Directives submitted to SARS will be displayed here.
- Lump Sum Calculator – this option allows you to obtain a simulated tax calculation on the lump sum amount.
- The calculation is based on the fields captured and is an estimation of the tax payable according to the information on SARS system when the calculation is submitted.
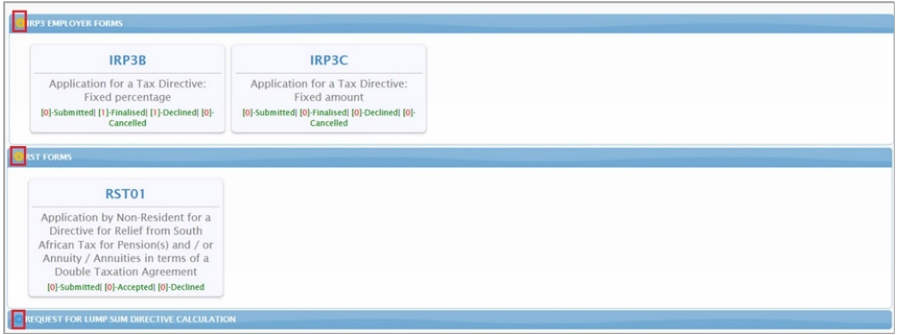
On the Individual portfolio, the taxpayer will only be able to apply for the IRP3(b) and IRP3(c) tax directives for themselves.
On the Tax Practitioner portfolios, only the IRP3(b), IRP3(c), IRP3(q) and IRP3(f) application forms will be available to request on behalf of their clients.
- Request Previous Years Directives – request previously issued tax directives for a maximum of up to three years on behalf of a client.
All tax directive applications will be available under the Organisation portfolio.
Request previous years Directives
To request previous years Tax Directives on eFiling:
- Select ‘Services’ on the menu bar
- Select ‘Tax Directives’ on the menu on the left
- Select ‘Request Previous Years Directives’.
The following screen will be displayed with the ‘Tax Reference Number’, ‘ID Number’, ‘Passport’ fields being pre-populated.
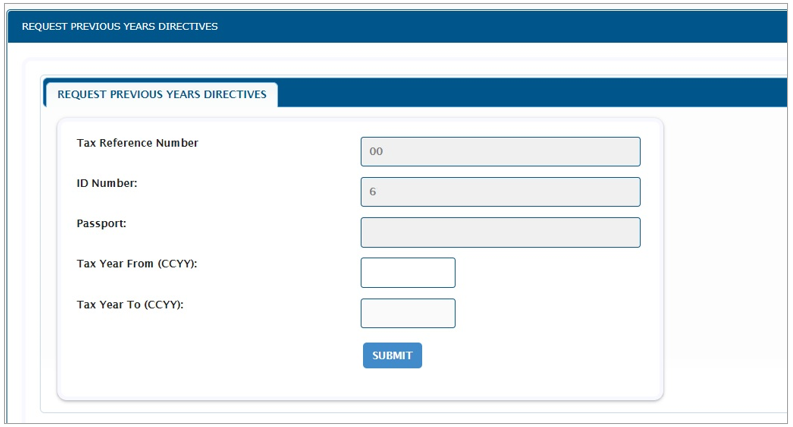
- Select the relevant tax year for the ‘Tax Year From’ dropdown and the ‘Tax Year To’ field will be pre-populated. Click the ‘Submit’ button to proceed with the search.
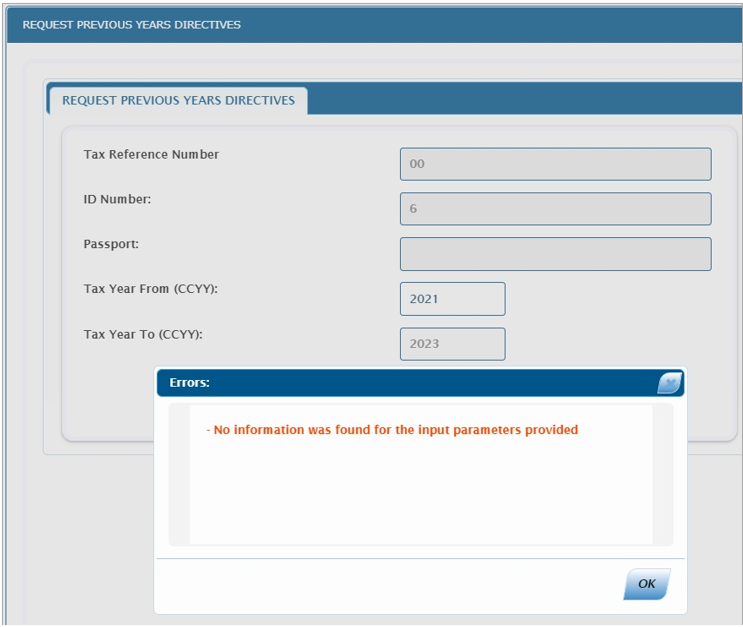
- If there are no results to display, an error message will be displayed to indicate that there is no tax directives available for the search criteria entered.
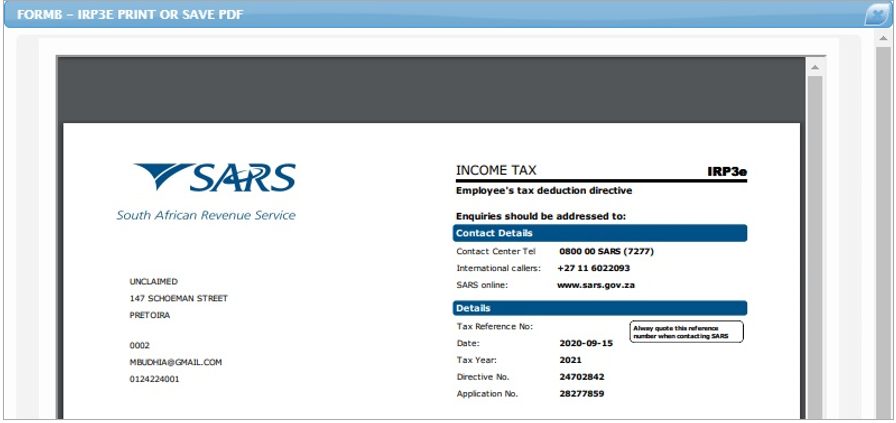
- If there are previous tax directives to display, the results screen will be displayed as indicated in the below example.
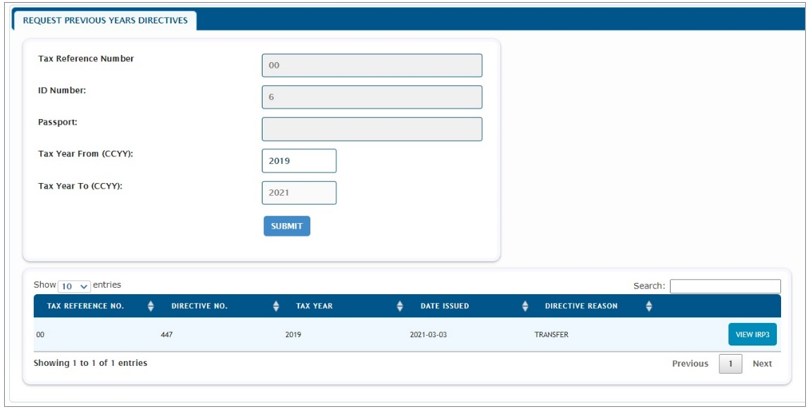
- Select the ‘View IRP3’ button and the IRP3 will be displayed or the IRP3 will be downloaded.
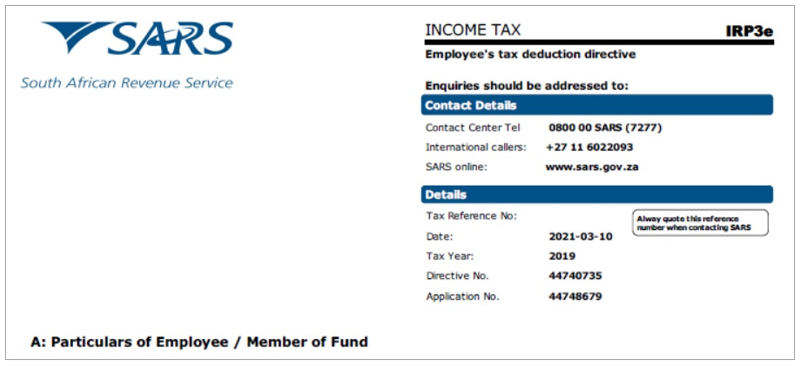
NOTE: This functionality can be used to determine if all the IRP5/IT3(a) certificates was obtained before the annual return is completed. The ‘Tax Year’ on the IRP3e must correspond with the ‘Year of assessment’ on the IRP5/IT3(a) certificates. The ‘Directive number’ on the IRP3e must also be reflected in the directive container on the IRP5/IT3(a) certificates.
Lump Sum Calculation Functionality
This functionality provides an estimation of the tax deduction on a lump sum, based on the information entered into the Lump Sum Calculation form and the information on SARS system on the day the calculation is required.
To access the Lump Sum Calculation on eFiling, use one of the following routes:
- Select the “Lump Sum Calculator” option on the landing page of eFiling; or
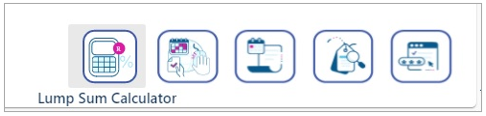
- Select the “Lump Sum Calculator” option from the Services and Tax Directive menu options; or
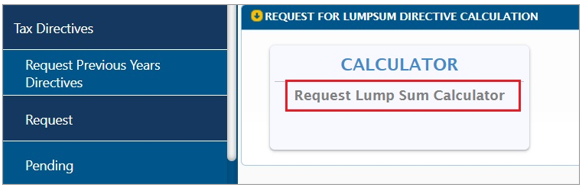
- Select “Request” menu option and “Request for Lumpsum Directive Calculation” arrow and “Request Lump Sum Calculator”.
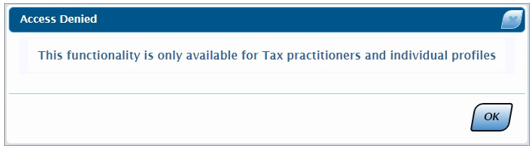
Note: The Lump Sum Calculation function will not be available on the Organisation profile on eFiling and the following error will be displayed if the option is selected.
The “Request for Lump Sum Calculation (Form Calc)” screen displays for completion and calculation of the estimation tax payable on the lump sum amount that the Employer or Fund Administrator has indicated is payable or can be taken as a lump sum amount.
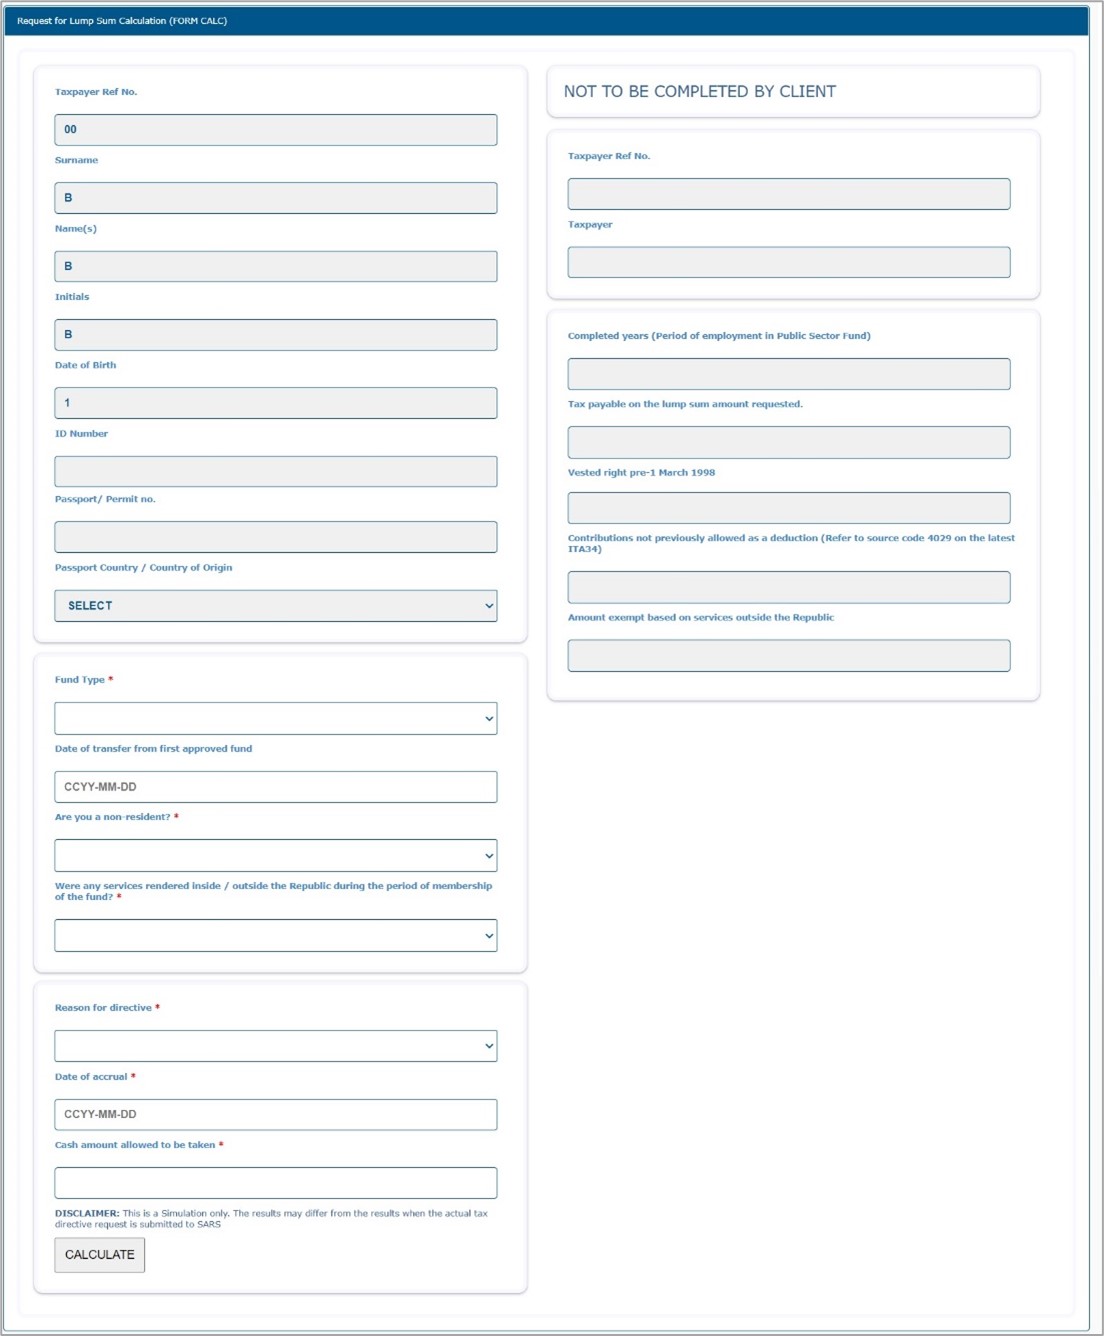
The following fields will be pre-populated in the Taxpayer Information section of the form, based on what SARS have on record:
- Tax Reference No;
- Surname;
- Name(s);
- Initials;
- Date of Birth;
- The date of birth must correspond with the first six digits of the ID number if the ID number is provided.
- ID Number;
- The identity number must correspond with the latest issued identity document or identity card by the South African Department of Home Affairs.
- Passport / Permit No; and
- The passport or permit number as per SARS records.
- Passport Country / Country of Origin.
- If a Passport number is populated, select the applicable passport country or country of origin.
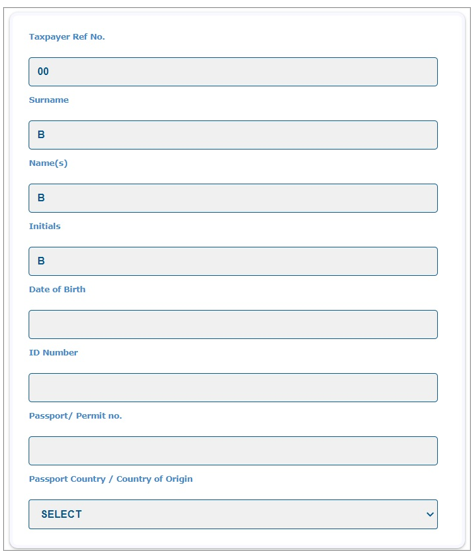
The following fields will be displayed by default in the Fund information container:
- Fund Type – indicate to which fund you are a member of and will pay a lump sum. Select one of the following options:
- Provident Fund
- Pension Fund
- Retirement Annuity Fund
- Provident Preservation Fund
- Pension Preservation Fund
- If one of the above fund types were selected refer to Provident Fund / Pension Fund / Retirement Annuity Fund / Provident Preservation Fund / Pension Preservation Fund to assist with the completion of the fields displaying on the screen.
- Employer
- Refer to Employer to assist with the completion of the fields displaying on the screen
- Insurer
- Refer to Insurer to assist with the completion of the fields displaying on the screen
- Date of transfer from first approved fund
- Are you a non-resident?
- Were any services rendered inside / outside the Republic during the period of membership of the fund?
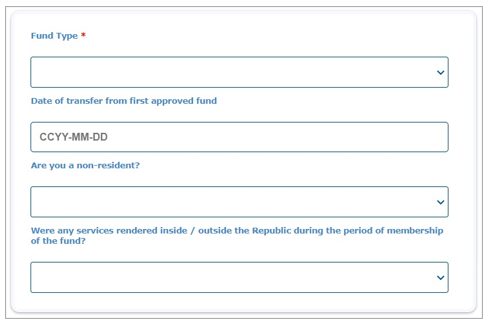
- Note: Based on the Fund Type selection and answers to the questions, additional questions will be displayed. Each fund type fields will be explained below in the sub sections.
- Note: Screens displayed below are for illustration purposes and content entered into the relevant fields should not be used for actual simulations.
Provident Fund / Pension Fund / Retirement Annuity Fund / Provident Preservation Fund / Pension Preservation Fund
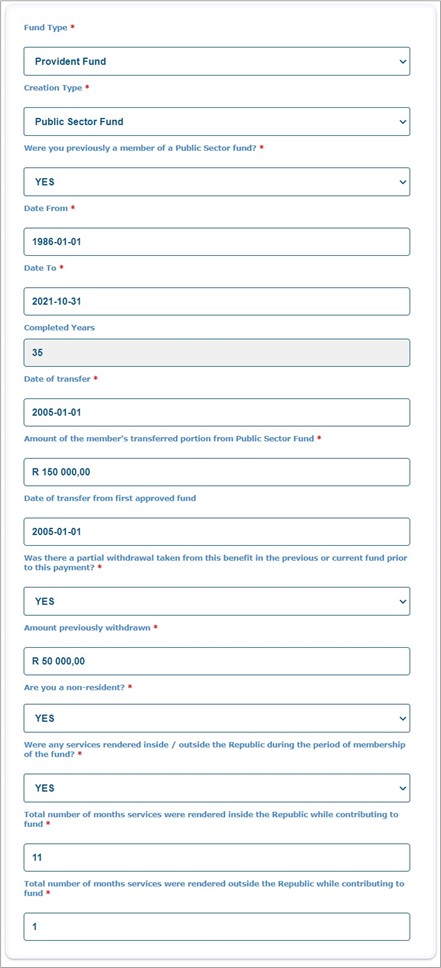
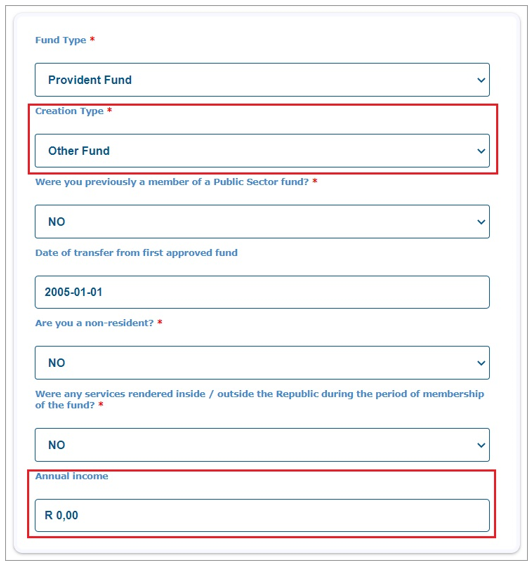
- If the fund type is selected as “Provident Fund / Pension Fund / Retirement Annuity Fund / Provident Preservation Fund / Pension Preservation Fund” complete the following fields:
- Creation Type – Select one of either:
- Public Sector Fund,
- Established by law and some municipal funds, (paragraphs (a), (b) and (d) of the definition of “pension fund” or paragraph (a),(b) and (c) of the definition of “provident fund” in section 1(1) of the Act);
- Most civil servants are members of a public sector fund, for example GEPF, Transnet.
- Eskom is not a public sector fund. Your fund administrator will be able to indicate if the fund is registered with FSCA. Public sector funds is normally not registered with the FSCA.
- Established by law and some municipal funds, (paragraphs (a), (b) and (d) of the definition of “pension fund” or paragraph (a),(b) and (c) of the definition of “provident fund” in section 1(1) of the Act);
- Approved Fund; or
- Also known as private sector funds. The rules of the Fund approved by the Commissioner of SARS and the FSCA are in compliance with the requirements of paragraph (d) of the definition of “provident fund”, paragraph (c) of the definition of “pension fund”, the definition of “provident preservation fund”, the definition of “pension preservation fund”; or the definition of “retirement annuity fund” in section 1(1) of the Act.
- Other Fund.
- The Fund Administrator / Long-term Insurer is not yet approved or registered as a Long-term Insurer at the FSCA.
- Public Sector Fund,
- Note: For Retirement Annuity Fund, the Public Sector Fund option will not be available for selection in the Creation Type field.
Public Sector Fund/Approved Fund/Other Fund
- If Public Sector / Approved / Other Fund is selected, complete the following questions, namely:
- Were you previously a member of a Public Sector Fund? – Select Yes or No.
- These fields must only be completed if an approved fund is paying the lump sum but the benefit was previously transferred from a public sector fund to the current approved fund on or after 1 March 2006;
- Do not complete these fields if ‘Creation Type’ Public Sector fund was selected.
- If you select Yes, complete the following fields:
- Date From and Date To fields.
- This is the period of service in the Public Sector Fund.
- The ‘Date To’ cannot be after the date of transfer to the Approved Fund.
- The Completed Years field will be populated automatically.
- Date of Transfer
- This is the date of the actual transfer from the Public Sector Fund to the Approved Fund.
- Amount of the member’s transferred portion from Public Sector Fund
- This is the amount excluding interest. This amount must be equal to the amount on the directive from the Public Sector Fund.
- Date of transfer from first approved fund.
- This is date transferred to a second Approved Fund after the exit from the Public Sector Fund. If benefit was transferred before 1 March 2018 this container should not be completed.
- Was the partial withdrawal taken from this benefit in the previous or current fund prior to the payment? – Select Yes or No
- If Yes, enter the Amount previously withdrawn.
- A portion of the benefit was withdrawn prior to retirement.
- If No, the Amount previously withdrawn field will not be displayed.
- If Yes, enter the Amount previously withdrawn.
- Date From and Date To fields.
- Are you a non-resident? – Select Yes or No
- Mandatory. Must select ‘Yes’ or ‘No’.
- Should only be ‘Yes’ if you are no longer an SA resident.
- Were any services rendered inside / outside the Republic during the period of membership of the fund? – Select Yes or No
- Mandatory. Must select ‘Yes’ or ‘No’.
- Should only be ‘Yes’ if the answer is ‘Yes’ to ‘Are you a non-resident?’
- The answer should be ‘No’ if you are an SA resident and a member of an SA fund / Insurer / Employer. If ‘Yes’ is selected the tax calculation will differ from the end directive.
- If Yes:
- Complete the Total number of months services were rendered inside the Republic while contributing to the Fund.
- Complete the Total number of months services were rendered outside the Republic while contributing to the Fund.
- If No, proceed to complete the Directive information container.
- Were you previously a member of a Public Sector Fund? – Select Yes or No.
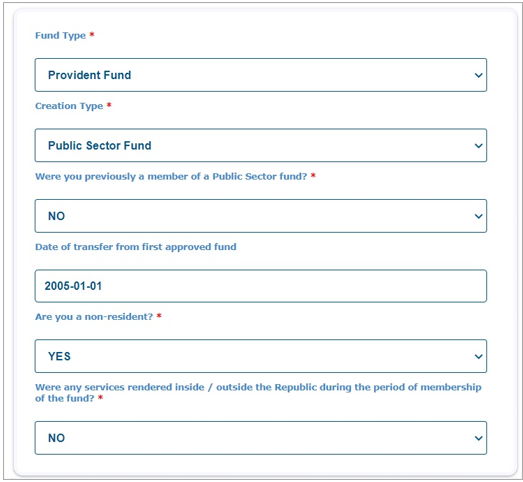
- If you select No to the question “Were you previously a member of Public Sector Fund?”, complete the following fields:
- Date of transfer from first approved fund
- Optional field
- Are you a non-resident? – Select Yes or No.
- Mandatory. Must select ‘Yes’ or ‘No’.
- Should only be ‘Yes’ if you are no longer an SA resident.
- Were any services rendered inside / outside the Republic during the period of membership of the fund? – Select Yes or No
- Mandatory. Must select ‘Yes’ or ‘No’.
- Should only be ‘Yes’ if the answer is ‘Yes’ to ‘Are you a non-resident?’
- The answer should be ‘No’ if you are an SA resident and a member of an SA fund / Insurer / Employer. If ‘Yes’ is selected the tax calculation will differ from the tax directive submitted by the Fund Administrator.
- If Yes:
- Complete the Total number of months services were rendered inside the Republic while contributing to the Fund.
- Complete the Total number of months services were rendered outside the Republic while contributing to the Fund.
- If No, proceed to complete the Directive information container.
- Date of transfer from first approved fund
- If you select No to the question “Were you previously a member of Public Sector Fund?”, complete the following fields:
- If Other Fund is selected as the Creation Type, the Annual Income field will be displayed for completion.
- Annual Income – The annual income must reflect all income received by or which accrued to the taxpayer during the year of assessment, e.g. salary, remuneration, earnings, emolument, wages, bonuses, fees, gratuities, commission, pension, overtime payments, royalties, stipend, allowances and benefits, interest, annuities, share of profits, rental income, compensation, honorarium, etc.
- If Other Fund is selected as the Creation Type, the Annual Income field will be displayed for completion.
- Note: If Pension Fund is selected as the Fund Type, and Other Fund as the Creation Type, the Annual Income field will be mandatory to complete. The deductions and tax rates applicable to approved funds and public sector funds is not applicable to ‘Other Funds’.
Directive Information and Calculated Results
Complete the following fields:
- Reason for directive – Select one of the following options:
- Death before Retirement;
- Retirement;
- Retirement due to ill health;
- Provident fund Deemed Retirement;
- Withdrawal;
- Not applicable to ‘Retirement Annuity fund’. Cannot withdrawal from a Retirement Annuity Fund before the age of 55.
- Resignation;
- Not applicable to Retirement Annuity Fund
- Future Surplus;
- For more information refer to Interpretation Note 113 on the SARS website
- Security of Mortgage bond order / Housing Loan;
- Not applicable to Public Sector Funds.
- Discontinued Contributions;
- Only applicable to Retirement Annuity funds
- Divorce – Non-Member Spouse;
- Former Member after Retirement;
- Withdrawal due to Visa Expiry;
- Only applicable if a non-resident
- Cessation of South African Residency; or
- Only applicable if a non-resident
- Retrenchment Benefit from Fund.
- Note: For detailed information on the reason for directive, refer to The Guide to complete the Tax Directive application forms on the SARS website.
Note: Once a reason is selected and the Calculation have been requested, you are not allowed to change the reason and will have to recapture / redo the calculation from the start.
- Date of accrual
- The date of retirement or the date the Fund administrator / Employer will pay the lump sum amount on request or is due.
- Date on which the member becomes a member of the fund
- This is the date the member became a member (joined date) of the Fund that is now applying for a tax directive.
- Cash allowed to be taken – the amount you are entitled to take in cash in accordance with the Fund.
Ensure that the Disclaimer is read and understood before selecting the Calculate button for the estimation.
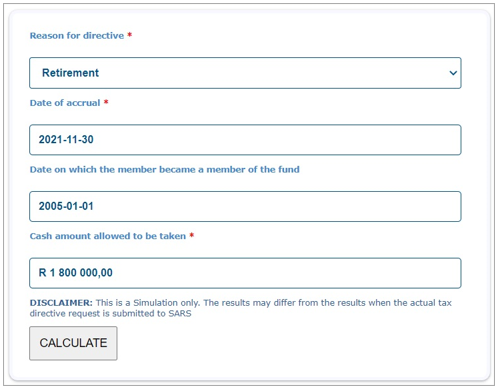
- Click the Calculate button to obtain a simulation of the lump sum.

- Click the Print Results button to view and print the simulation.
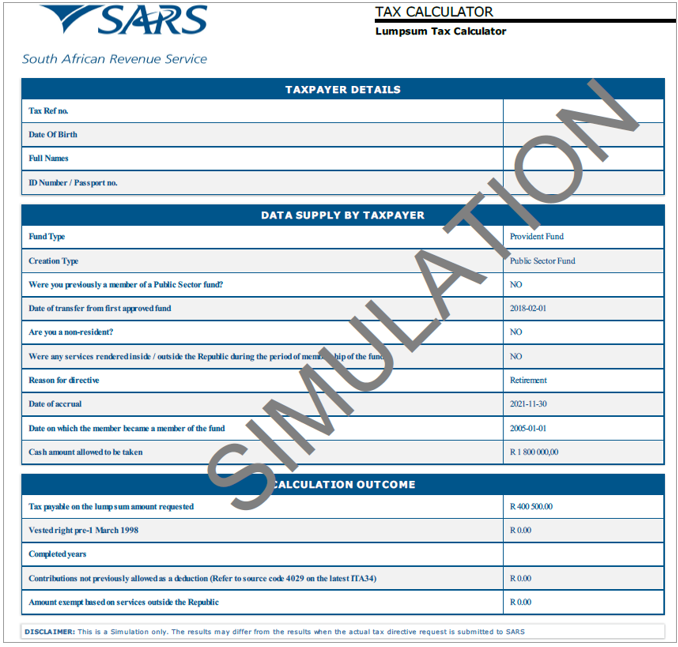
- The PDF format of the Lump Sum Tax Calculator will be displayed.
- If the fund type is selected as “Employer” complete the following field:
- Annual Income
- The annual income must reflect all income received by or which accrued to the taxpayer during the year of assessment, e.g. salary, remuneration, earnings, emolument, wages, bonuses, fees, gratuities, commission, pension, overtime payments, royalties, stipend, allowances and benefits, interest, annuities, share of profits, rental income, compensation, honorarium, etc.
- Annual Income

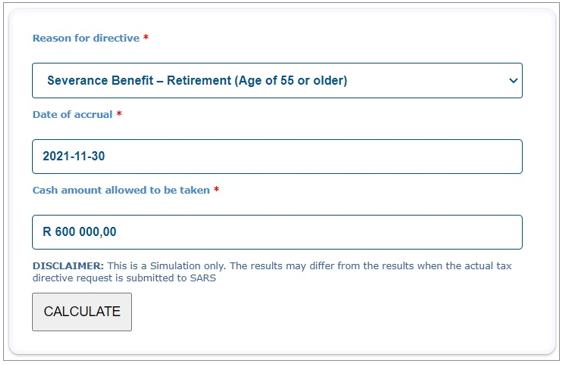
- In the Directive information container, the following reasons will be displayed. Select the relevant option:
- Severance Benefit – Death
- Severance Benefit – Retirement (Age of 55 or older)
- Severance Benefit – Involuntary Retrenchment
- Severance Benefit – Voluntary Retrenchment
- Complete the Date of Accrual
- The date of accrual is the date of retirement or the date the Employer will pay the lump sum amount on request or is due.
- Enter the Cash amount allowed to be taken.
- Ensure that the Disclaimer is read and understood before selecting the Calculate button for the estimation.
- Click the Calculate button to obtain the simulated tax on the lumpsum.
- The tax estimation results will be displayed on the right side of the screen.
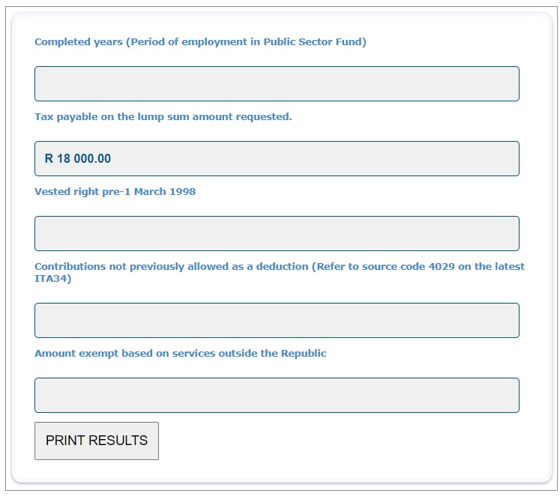
- Click the Print Results button to view and print the simulation. The calculated result will open in PDF format to view and save. It will not be available on the SARS systems.
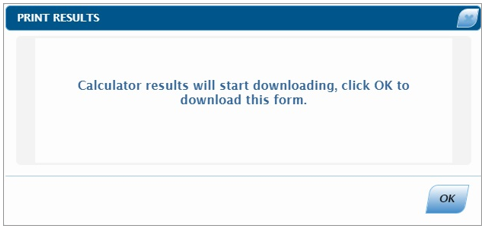
- The PDF format of the Lump Sum Tax Calculator will be displayed, as previously indicated in section Directive Information and Calculated Results above.
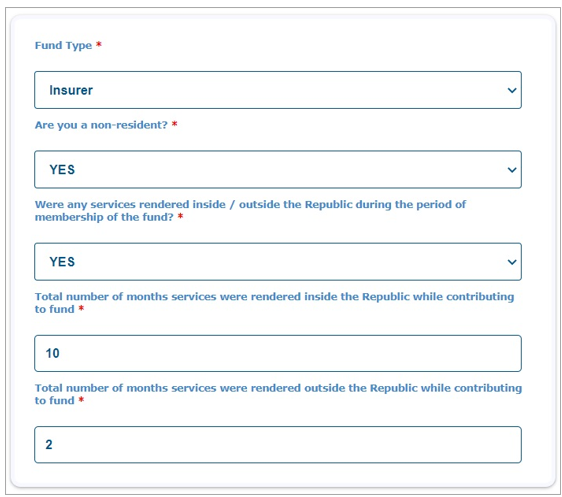
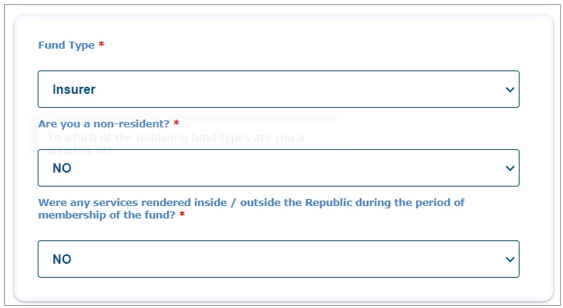
- If the fund type is selected as “Insurer” complete the following fields:
- Date of transfer from first approved fund
- This is an optional field.
- Are you a non-resident? – Select Yes or No.
- Mandatory. Must select ‘Yes’ or ‘No’.
- Should only be ‘Yes’ if you are no longer an SA resident.
- Were any service rendered inside / outside the Republic during the period of membership of the fund? – Select Yes or No
- Mandatory. Must select ‘Yes’ or ‘No’.
- Should only be ‘Yes’ if the answer is ‘Yes’ to ‘Are you a non-resident?’
- The answer should be ‘No’ if you are an SA resident and a member of an SA fund / Insurer / Employer. If ‘Yes’ is selected the tax calculation will differ from the tax directive submitted by the Insurer.
- If Yes:
- Complete the Total number of months services were rendered inside the Republic while contributing to the Fund.
- Complete the Total number of months services were rendered outside the Republic while contributing to the Fund.
- If No, proceed to complete the Directive information container.
- Date of transfer from first approved fund
- In the Directive information container, the following reasons will be displayed. Select the relevant option:
- Death Member/Former Member after retirement;
- Par. (c) Living Annuity Commutation;
- Death – Next Generation Annuitant; or
- Next Generation Annuitant.
- Complete the Date of Accrual
- The date of accrual is the date of retirement or the date the Fund administrator / Employer will pay the lump sum amount on request or is due.
- Enter the Cash amount allowed to be taken.
- Ensure that the Disclaimer is read and understood before selecting the Calculate button for the estimation.
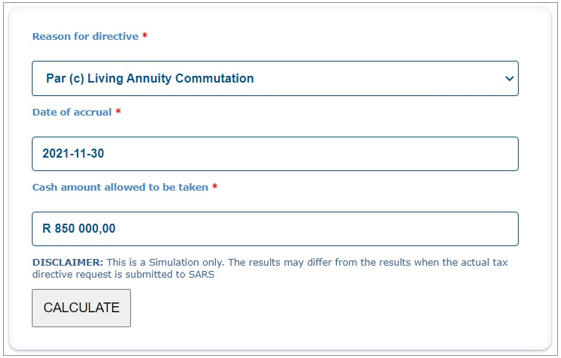
- Click the Calculate button to obtain the simulated tax on the lumpsum.
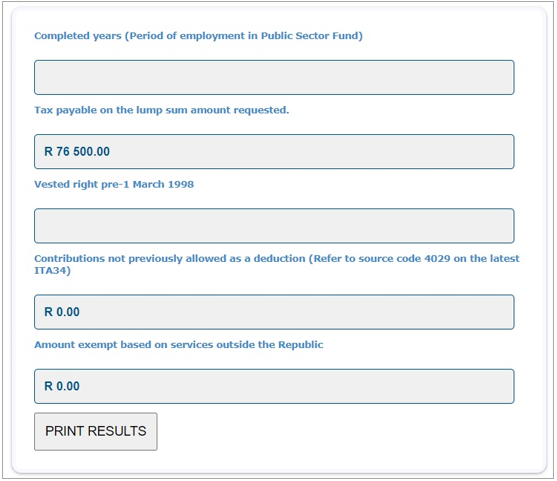
- Click the Print Results button to view and print the simulation.

- The PDF format of the Lump Sum Tax Calculator will be displayed, as previously indicated in section Directive Information and Calculated Results above.
Complete the Tax Directive Application Forms on eFiling
- To complete a Tax Directive Application form on eFiling:
- Select ‘Services’ on the menu bar
- Select ‘Tax Directives’ on the menu on the left
- Select ‘Request’.
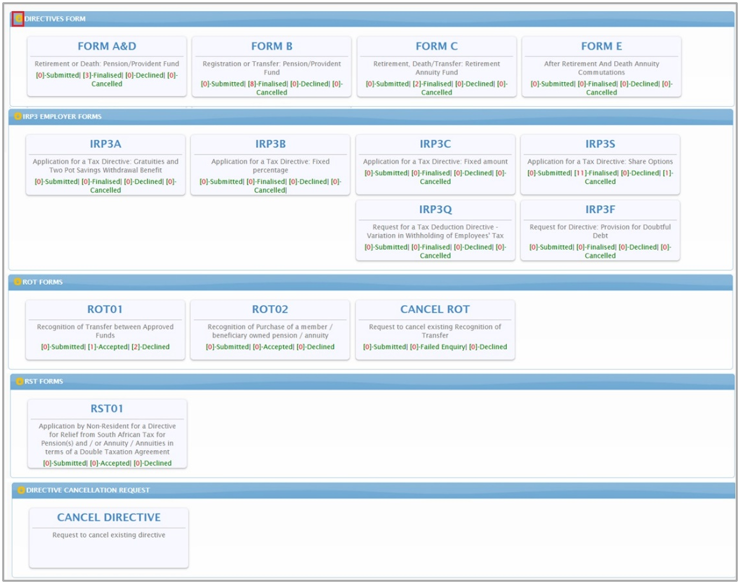
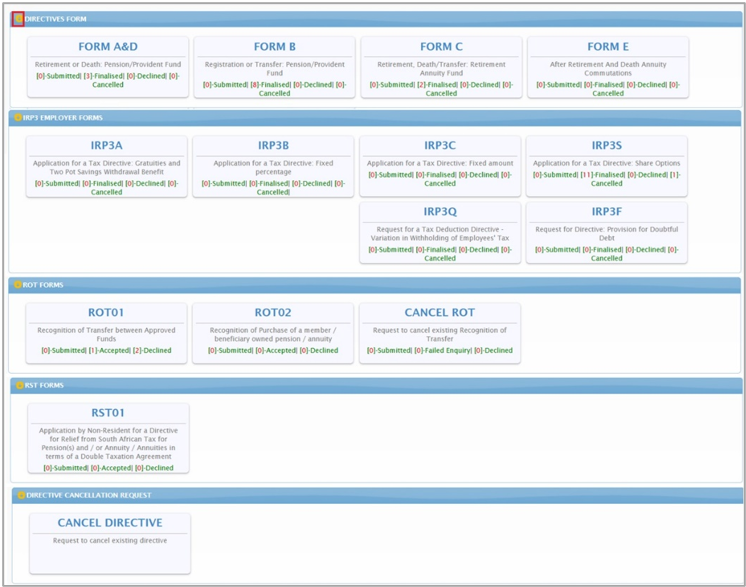
- The following screen will be displayed with all the Directive Application forms, IRP3 Employer Forms, Recognition of Transfer (ROT) Forms and the Directive Cancellation Request.
- The following screens will display the tax directive applications of the different eFiling Portfolios:
Organisation:
- The different types of forms will be displayed. Click the arrow next to the banner heading to expand the relevant form types to request.
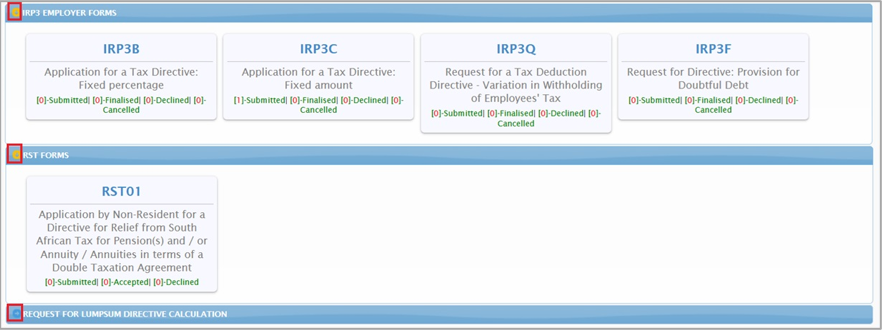
Tax Practitioner:
Individual:
- If you select an application form and the following error displays, refer to section Rights Group Functionality on eFiling above to ensure that the rights assigned to the user is correct. If the Authorisation level is selected as “View Only”, this error will be displayed and you will not be able to submit any application forms.

- If the user has no Tax Directives Rights, the following message will be displayed. Refer to section Rights Group Functionality on eFiling above to ensure that the users are assigned the tax directive rights to be able to complete and submit tax directive applications.

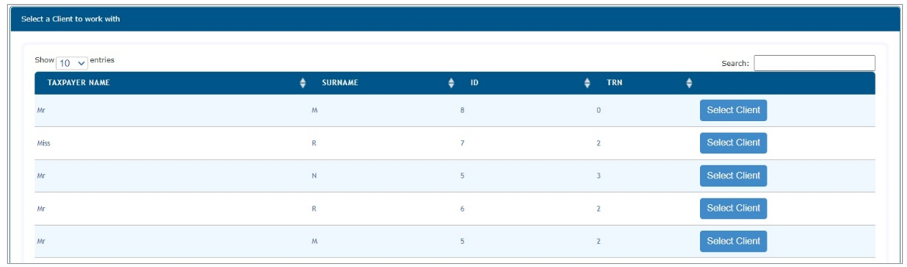
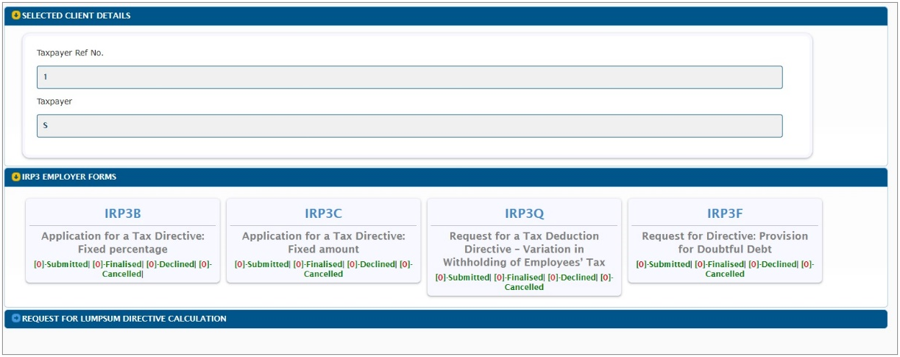
- On the Tax Practitioner eFiling Portfolio, once you have successfully logged in and accessed the Tax Directive functionality, select the relevant application form. A screen will be displayed to select the client you want to complete the application form for.
- Select the relevant taxpayer you want to complete the application for.
- The selected client details container will be displayed with the pre-populated tax reference number, taxpayer name and the available forms to request.
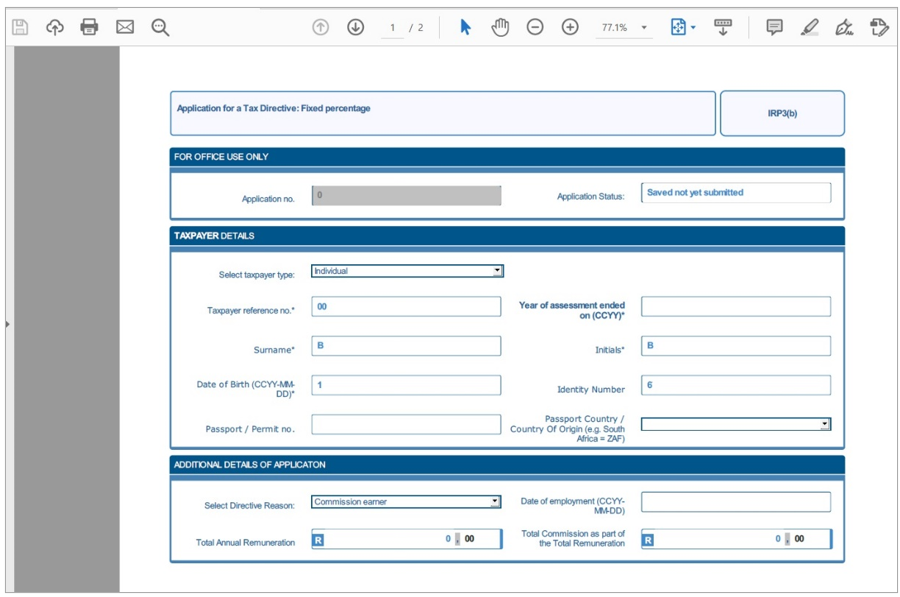
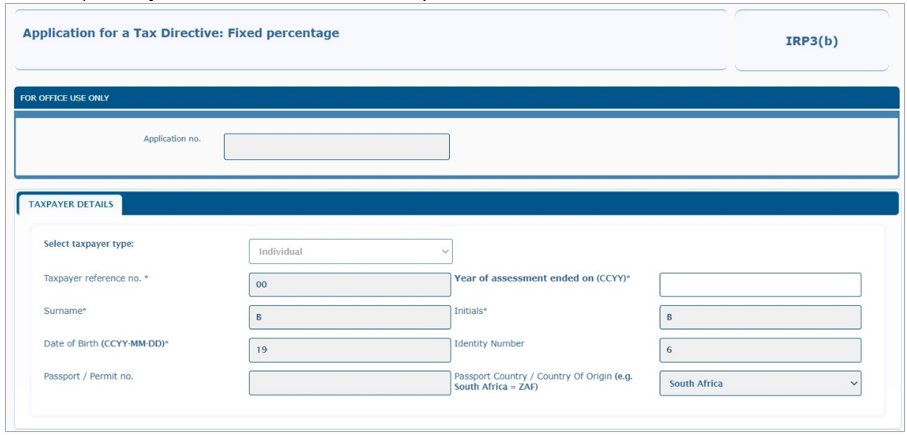
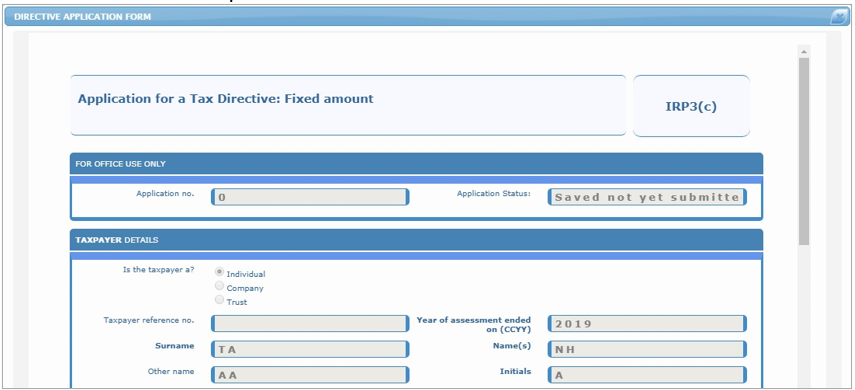
- The application form will be displayed for completion with the pre-populated information of the selected taxpayer.
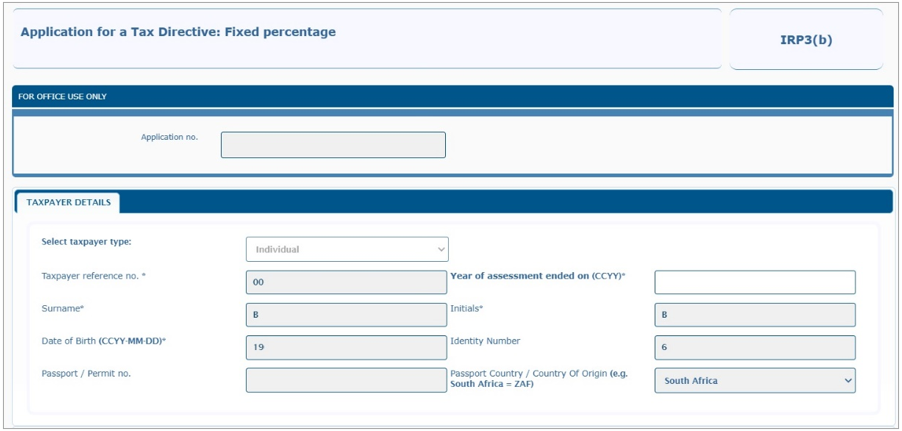
- Demographic information of the taxpayer will be pre-populated and locked for editing.
- For the completion of the Tax Directive application forms, including the Recognition of Transfer, refer to the following external guides on the SARS website www.sars.gov.za:
- Note: On eFiling, the form will display in HTML 5 format.
Save the Tax Directive Form
- After you have completed all the required information on the Tax Directive application form, select the ‘SAVE’ button at the bottom of the screen.
- Note: You must Save the form before the system will allow you to submit the form to SARS.
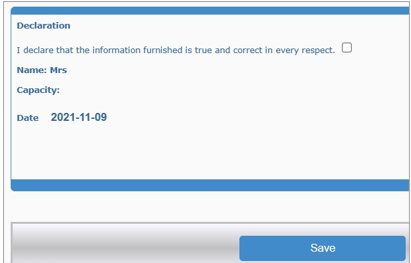
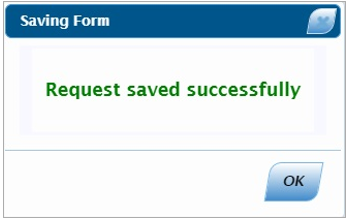
- You will receive a message to indicate that the request has been successfully saved on eFiling.
- The ‘Submit to SARS’ button will now be displayed at the bottom of the screen.
![]()
- You can now submit the form to SARS or opt to submit the form at a later stage.
Pending Tax Directive Forms
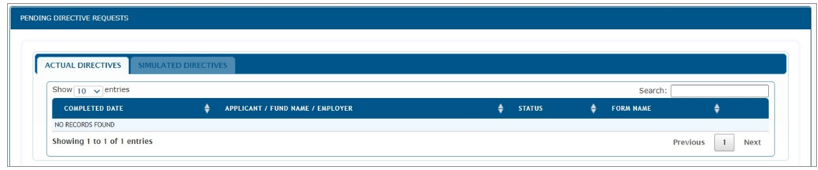
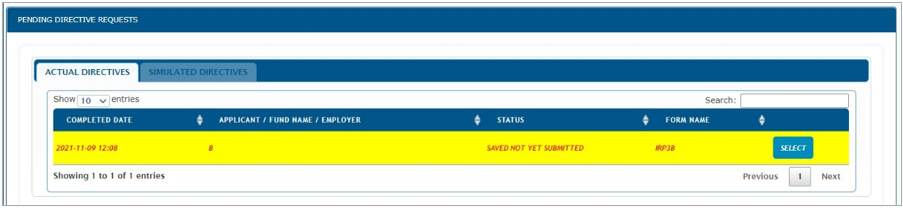
- To view saved Tax Directive applications, which have not been submitted to SARS, select the ‘Pending’ menu tab.
- A list of all the saved tax directive applications will be available to view.
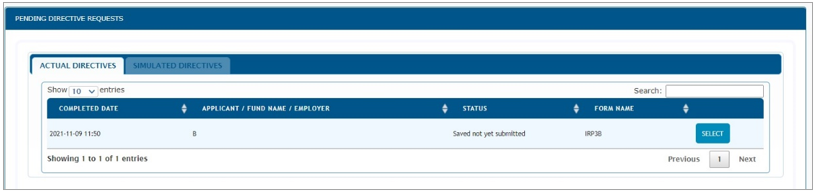
- Click ‘Select’ on the specific field of the form.
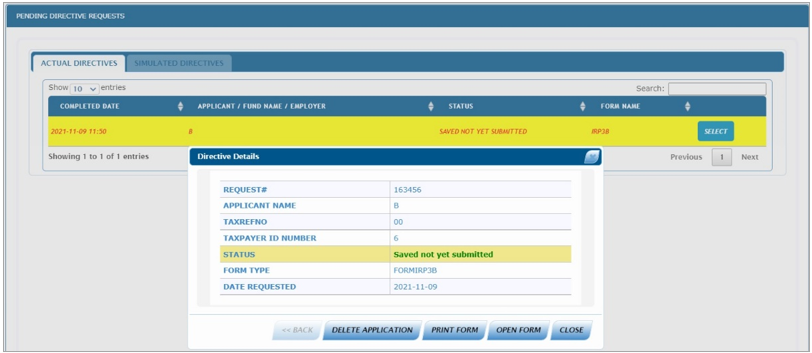
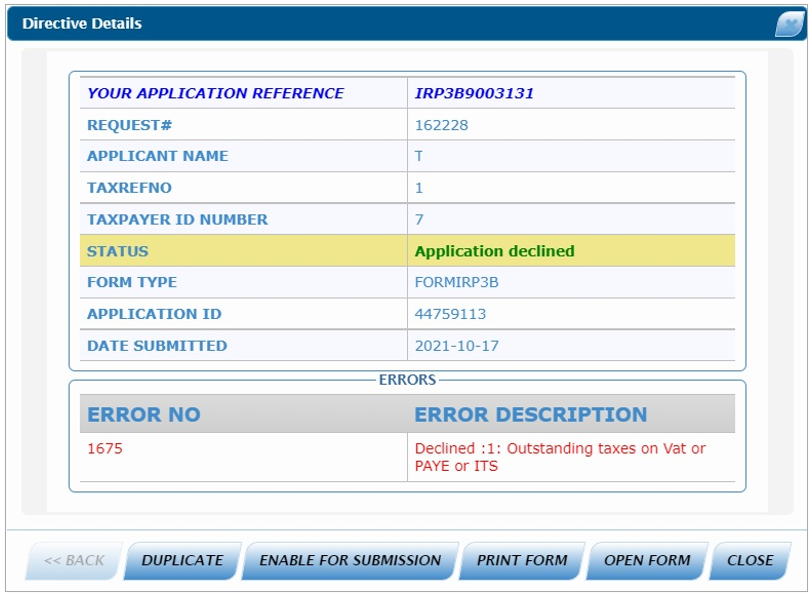
- The following buttons will be displayed on the Directive Details screen:
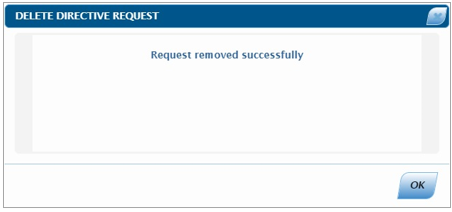
- Delete Application – if you click on this button, a confirmation message will be displayed to confirm the deletion of the form.

- If you select ‘Cancel’, the directive details screen will be displayed. If you select ‘OK’ to delete the application, a message will be displayed to indicate that the request was successfully removed, and the application will be permanently deleted and removed from the Pending Directives Request screens as indicated below.
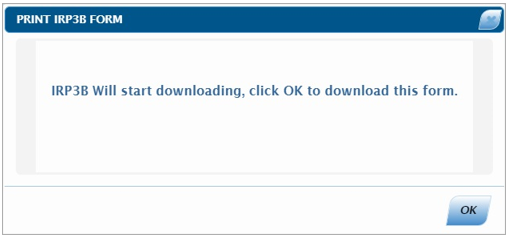
- Print Form – The print screen will open to print the application form.
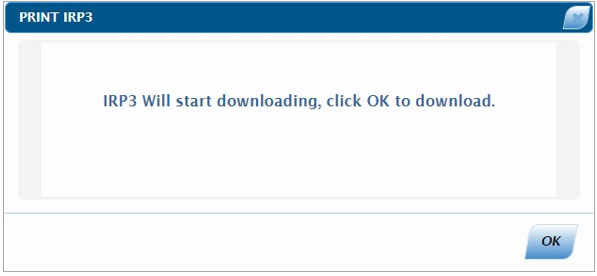
- The form will either open for printing or will be available for download.
- If download is available, the following screen will be displayed. Click “OK” to proceed to download.
- Print Form – The print screen will open to print the application form.
- Open Form – The form will open in the HTML format
- Close – this button will close the Directive Details screen and you will view the Pending Directive Requests screen.
Simulate Tax Directives
- The Simulated option will be available on all the application forms, except the IRP3(b), IRP3(c), IRP3(f) and IRP3(q) forms.
- After you have completed an application, you will be able to obtain a simulated tax directive.
- On the application form, the following question will be displayed ‘Which directive do you require?’. Indicate ‘Simulation’ or ‘Actual’.

- A disclaimer will be displayed to indicate that the calculation result is only a simulation and it may differ from the actual tax directive request that will be submitted to SARS.
Submitting the Tax Directive Form(s)
- Once you have completed all the required information on the tax directive form, you can submit the application to SARS.
- You can either submit the form after you have saved the form and the submit button is available or you can access the saved form from the Pending menu as explained in the previous section.
- Open the relevant tax directive form and scroll to the bottom of the form. The ‘Submit to SARS’ button will be displayed next to the ‘Save’ button.
- NOTE: If the ‘Submit to SARS’ button is not available, click the ‘Save’ button to save the form and then the ‘Submit to SARS’ button will be displayed.

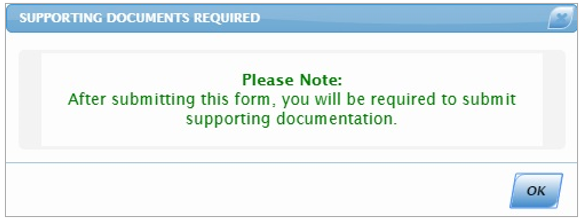
- As soon as the ‘Submit to SARS’ button is selected, the system will run validation checks based on what was completed on the application to determine if supporting documents are required or not. A message will be displayed in the case where supporting documents are required, as indicated below.
Submission without supporting documents required
- Click the ‘Submit to SARS’ button to proceed.
- A confirmation message will be displayed to confirm the submission of the application. Click ‘OK’ to proceed.

- Once the form is successfully submitted to SARS, the following message will be displayed.
- You can view the submitted form by selecting the ‘Submitted’ menu tab.
Submission with supporting documents required
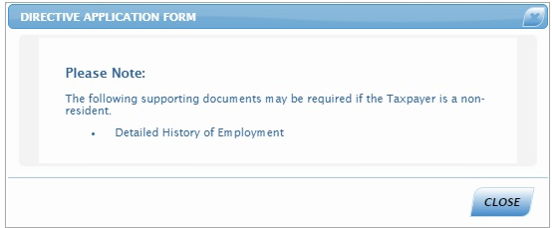
- When supporting documents are required with the application form, the following message will be displayed to inform you to submit the supporting documents, after you have selected the ‘Submit to SARS’ button.
- If you closed the message, you could select ‘Pending’ and open the application to submit the form; the ‘Upload’ option will be displayed again.
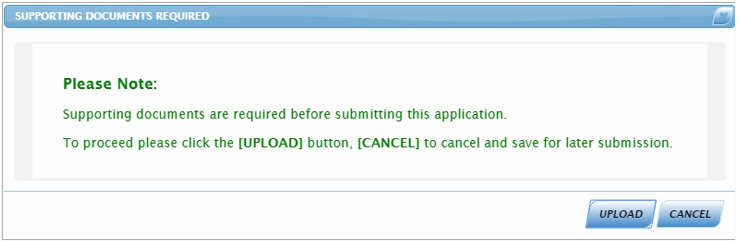
- If you select ‘Cancel’ on the message, the form will not be submitted to SARS and the form will be displayed again.
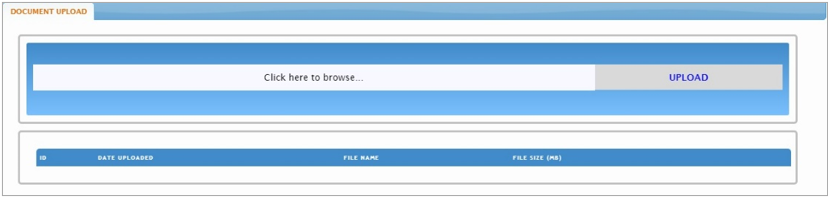
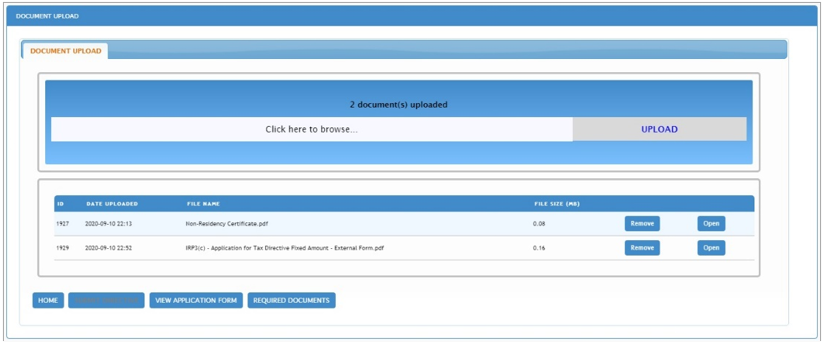
- If you click ‘Upload’, the Document Upload page will be displayed in order to upload the required supporting documents for the application to be submitted to SARS.
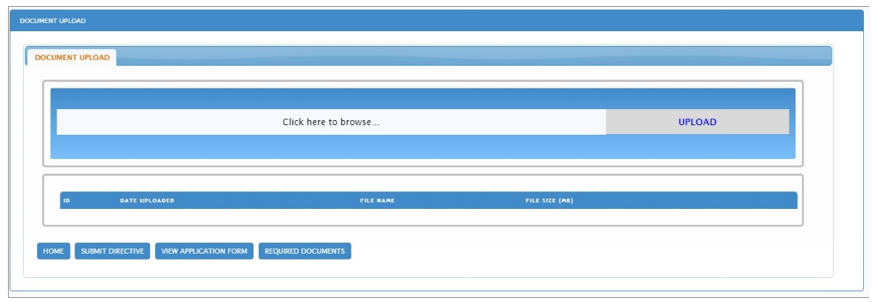
- The following buttons are displayed on the screen:
- Home – If you click this button, the Request screen will be displayed with all the application forms.
- Submit Directive – If the ‘Submit Directive’ button is selected, a confirmation message will be displayed to confirm the submission to SARS.

- View Application Form – when you click the ‘View Application Form’ button, the application form will open.
- Required Documents – If you click this button, the required documents will be displayed that must be uploaded with the application form in order to submit.
- Ensure that the following standards are adhered to when supporting documents are uploaded:
- The file type may be .pdf, .doc, .docx, .xls, .xlsx, .jpg and .gif to enable SARS to view the documents.
- The maximum allowable size per document may not be more than 5MB and a maximum of 20 documents may be uploaded.
- Note: When uploading files, ensure that the files are not password protected, as this will hamper the viewing of the supporting document files.
- To upload supporting documents, select the ‘Click here to Browse’ section.
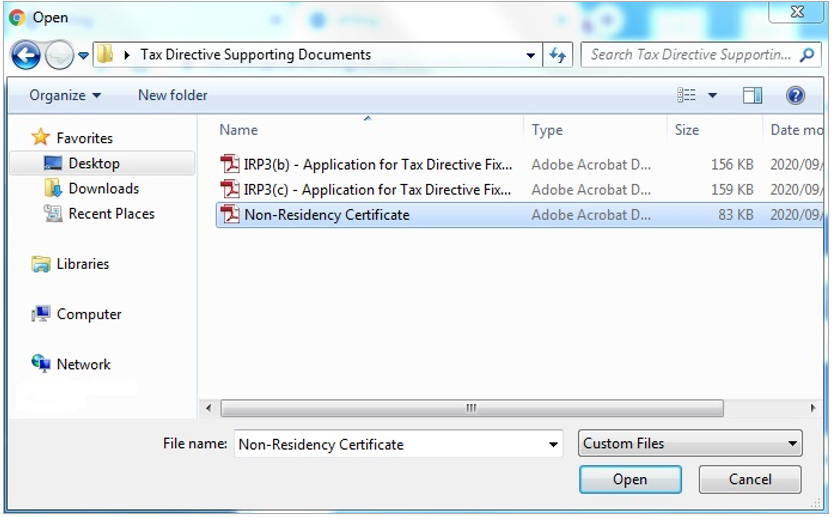
- Select the file(s) to be uploaded and click the ‘Open’ button to upload.
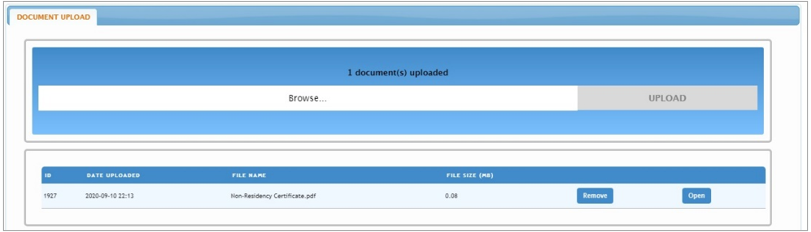
- The list of documents that are uploaded will be displayed as indicated below.

- Click the remove button to delete a file and the below confirmation message will be displayed. Click ‘OK’ to proceed or ‘Cancel’.

- A message will be displayed once the document is successfully removed.
- The Document Upload screen will be displayed and the deleted document will be removed.
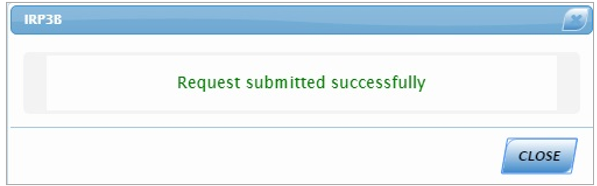
- Once you have uploaded all the required documents, select the ‘Submit Directive’ button to proceed.
- A confirmation message will be displayed to confirm the directive was successfully submitted. Click ‘Close’ to proceed.

- The submitted application will be displayed under the ‘Submitted’ tab on the left menu bar.
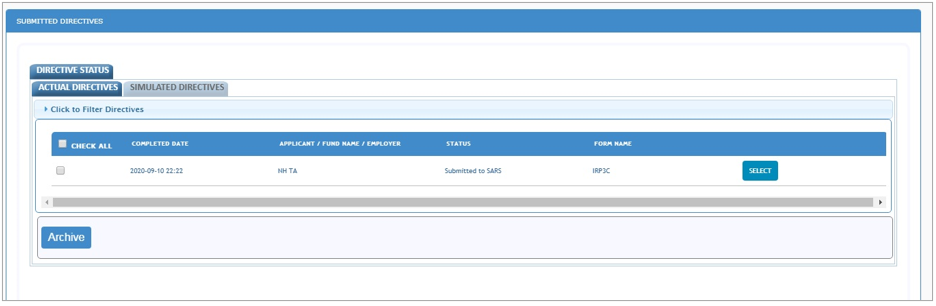
Submitted Tax Directives
- Once you have submitted a tax directive, you can access it by selecting the ‘Submitted’ menu tab. Under the tax practitioner portfolio, ensure that the correct taxpayer is selected.
- A list of all the submitted applications will be displayed.
- Click the ‘Select’ button and the following screen will be displayed with different tabs.
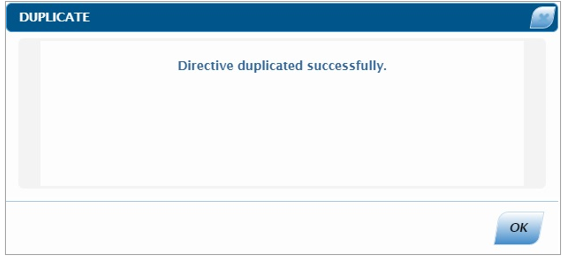
- Duplicate – A duplicate application will be submitted to SARS.
- A confirmation message will be displayed to confirm the creation of a new directive application as indicated in the below screen.
- Duplicate – A duplicate application will be submitted to SARS.
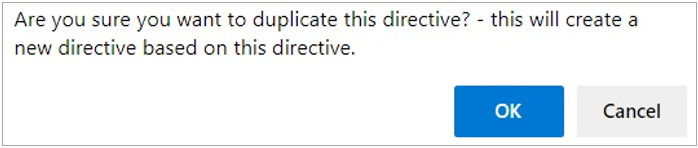
- If you click ‘OK’, a message will be displayed as below and the original completed application form will be displayed.
- Enable for Submission – this option will open the application with all the previous detail that was submitted to be able to edit and submit to SARS. After you select this option and save the form, the form will be removed from the Submitted list, unless you submit it again.
- Print Form – the application form will be displayed to print.
- Open Form – the application form will be displayed
- Close – this button will close the Directive Details screen.
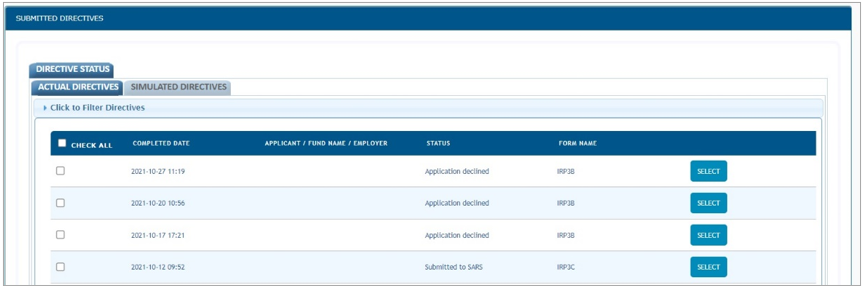
History
- To view all the tax directive applications, click ‘History’ menu tab. Under the tax practitioner portfolio, ensure that the correct taxpayer is selected.
- The search screen will be displayed. If there are no applications submitted, no directive applications will be displayed.
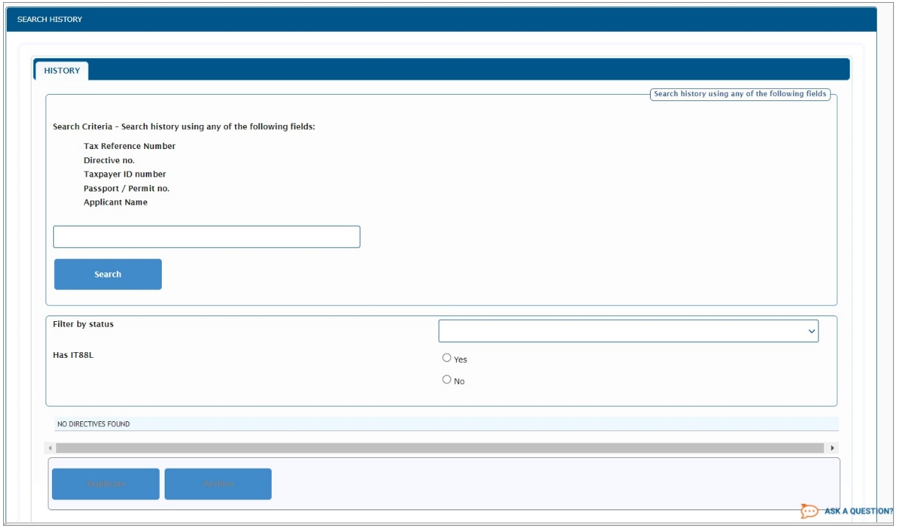
- To search, enter one of Tax Reference Number, Directive No, Taxpayer ID number, Passport / Permit No or Applicant Name and click the ‘Search’ button to proceed.
- You also have the option to filter according to the status of the tax directive applications.

- Once you have entered the search criteria, a list of all the tax directive applications will be displayed.
- To print a finalised tax directive, proceed to the next section of the webpage.
Print Tax Directive
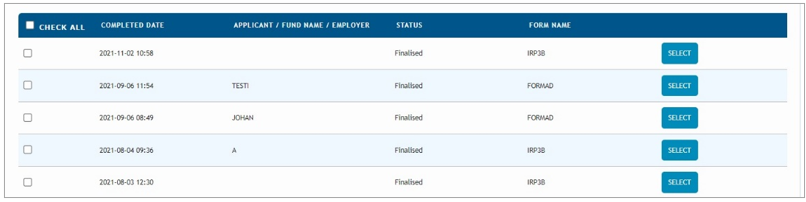
- To print a finalised tax directive, click the ‘History’ tab to view all the finalised tax directive applications.
- Click “Select” of the relevant tax directive you want to print, the field will be highlighted and the ‘Directive Details’ screen will be displayed.
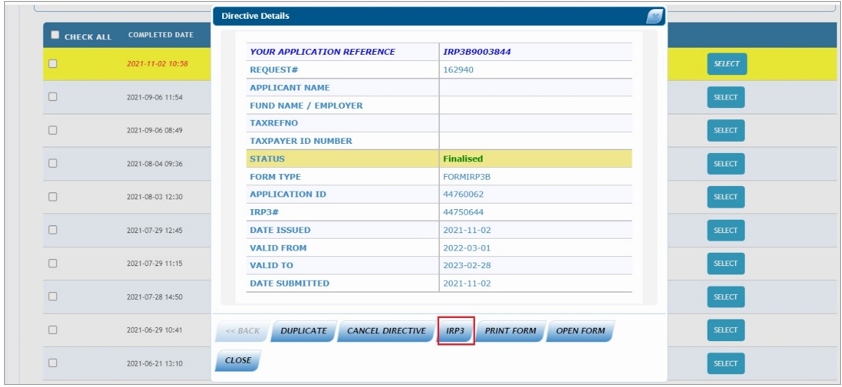
- Click the Form Type, in the above example it is ‘IRP3’ and the Directive Details screen will be displayed.
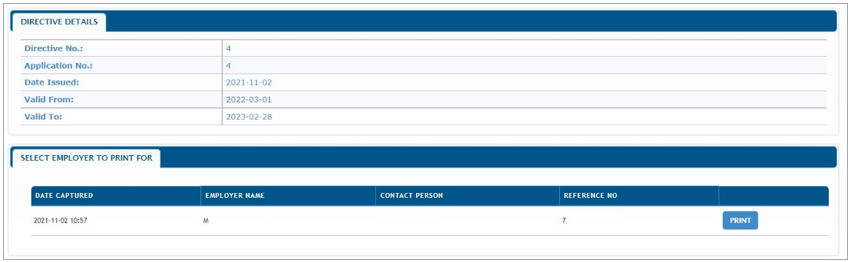
- Click “Print” and the Print screen will be displayed. Click “OK” to proceed to download the directive.
- The PDF will be displayed and can be downloaded, saved and print.
Cancel Tax Directive Application
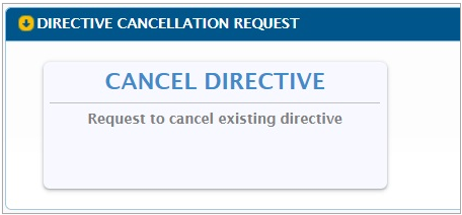
- To cancel a tax directive that was submitted to SARS, select the ‘Request’ menu tab.
- The Directive Cancellation Request option will be displayed at the bottom of the screen. Click ‘Cancel Directive’.
- The ‘Request Directive Cancellation’ screen will be displayed. Enter the Tax Directive No. or Applicant Name and click the ‘Search’ button.
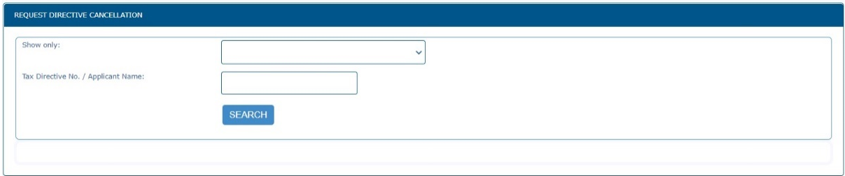
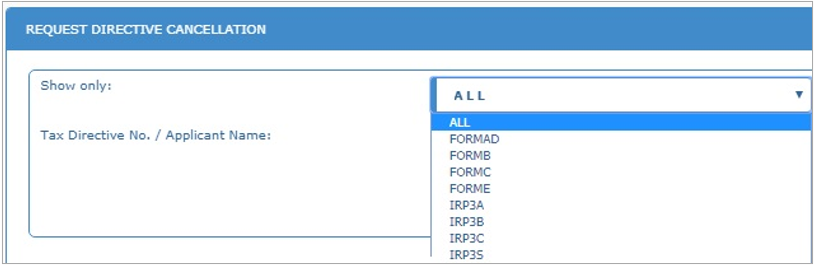
- Click the dropdown option next to the ‘Show only’ field and a list of the tax directive applications will be displayed to filter the search.
- A list of finalised tax directives will be displayed according to the search criteria entered.
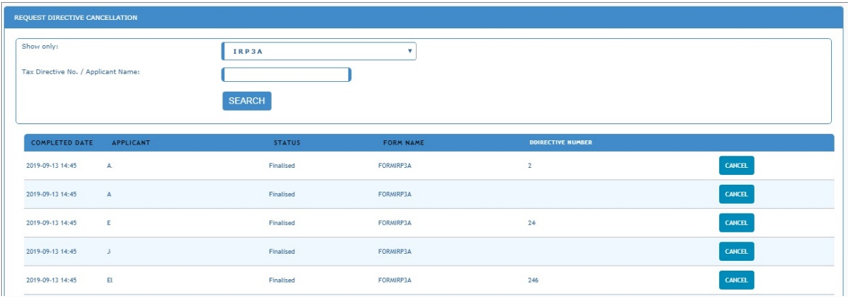
- Click the ‘Cancel’ button to proceed and the ‘Request Directive Cancellation’ screen will be displayed.
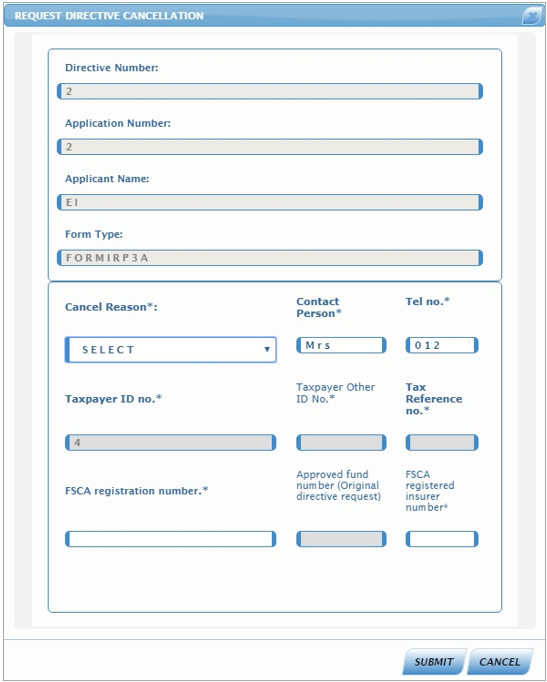
- Ensure that you select the reason for cancellation from the ‘Cancel Reason’ dropdown list.
- If you select the reason as ‘Other’, ensure that you complete the reason in the ‘Other Reason’ field provided.
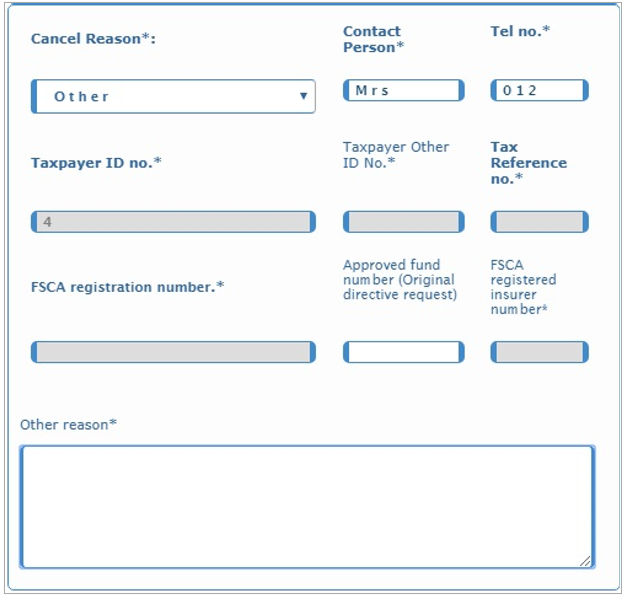
- After you have completed all the relevant information, click the ‘Submit’ button to proceed or ‘Cancel’ to close the screen.
- Click the ‘OK’ button on the confirmation message or cancel to close the message.

- Where supporting documents are required for the cancellation request, a message will be displayed. Refer to the supporting documents section above for more details.

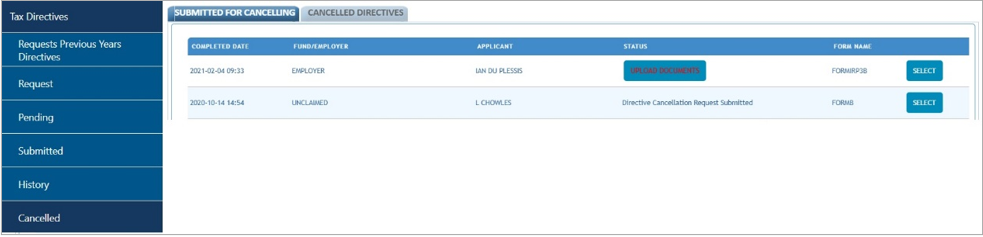
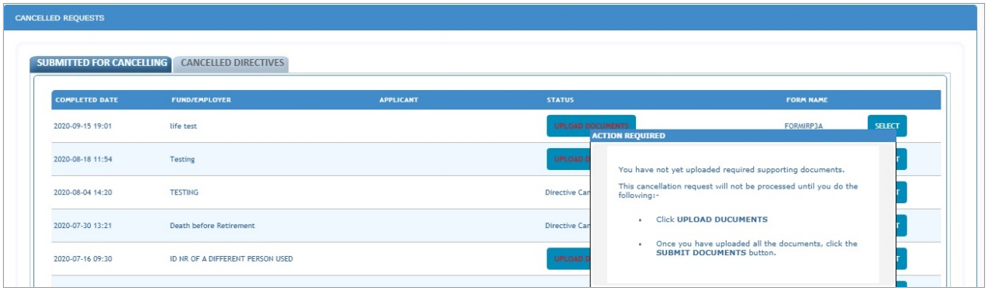
- If you click the ‘Cancelled’ menu tab on the left under Tax Directives, the request will be listed and the ‘Upload Documents’ tab will be available to submit supporting documents to SARS.
- Click on the status ‘Upload Documents’, a pop up screen will appear. To upload documents click on ‘Upload Documents’.
- The document upload screen will display once the documents are uploaded then click on ‘Submit Documents‘ at the bottom of the screen.
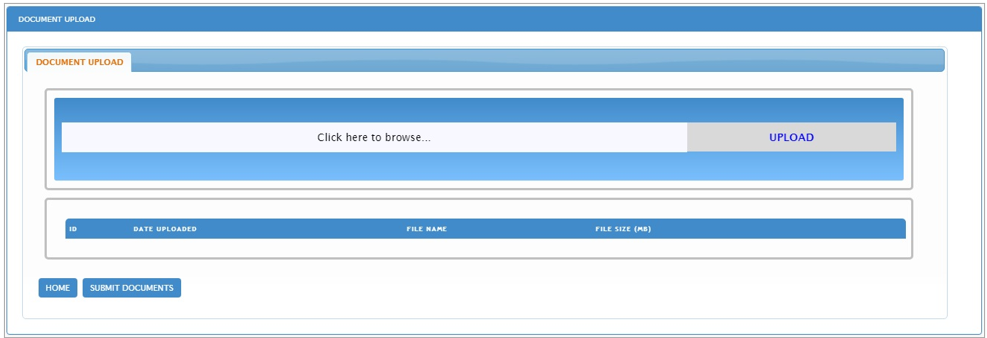
- To upload the documents click on ‘Click here to browse’. Find the documents that need to be uploaded then click on upload.
- Once the supporting documents are uploaded then ‘File uploaded successfully’ will display in the pop up.
- Click on the ‘OK‘ button, once the document is uploaded then it will display with extra buttons, ‘Remove’ and ‘Open’ once done then click on ‘Submit Documents’. If the client did not click on ‘Submit Documents’ but Home then the status will display ‘Submit Documents’.

- To submit the documents click on the ‘Submit Documents’, a pop up screen will appear.

- Click on OK a pop up message will display, ‘Request Submitted Successfully’, click close.

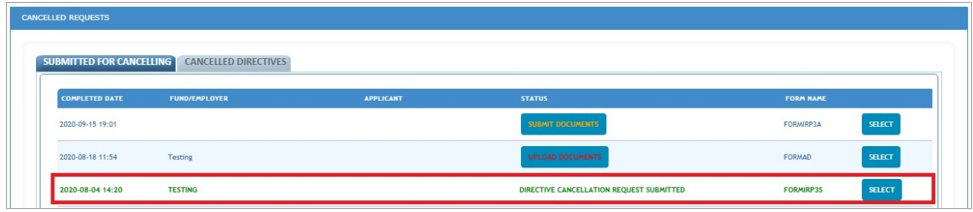
- After the documents were successfully submitted, the status is displayed as ‘DIRECTIVE CANCELLATION REQUEST SUBMITTED’.
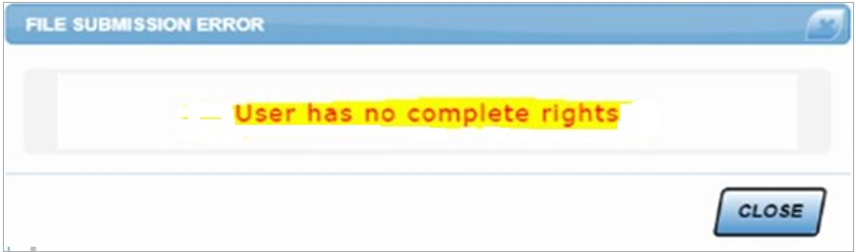
- If a user want to cancel a tax directive and the user does not have the assigned rights, the following message will be displayed. Refer to section 8 of this guide to ensure that the user have the correct assigned rights.
Definitions, acronyms and abbreviations
The definitions, acronyms and abbreviations can be accessed here – Glossary webpage.
Legal disclaimer: In the event of conflict or inconsistency between this webpage and the PDF version of the guide, the latter shall prevail.